The April 2025 (25.2) release presents new features, workflow improvements, and important fixes in After Effects.
In earlier versions of After Effects, previews and rendering relied heavily on RAM, limiting smoother playback, especially for complex and large compositions. High Performance Preview Playback introduces enhanced disk cache management for more efficient usage, speeding up workflows by reducing the need to re-render everything from scratch each time you preview or edit. This improvement enables:
- More extended previews: Playback of entire compositions without being constrained by available RAM.
- Improved performance: Particularly beneficial for systems with lower specifications.
- Efficient caching: RAM is utilized more effectively, with the system automatically balancing between disk cache and memory to optimize performance.


This feature is activated by default, and no additional setup is required. However, to turn it off, go to Preferences > Media & Disk Cache > Disk Cache > Uncheck Enable Preview from Disk Cache.
Learn more about the High Performance Preview Playback feature in After Effects.
When working with HDR (High Dynamic Range) content, it’s important to preview it in HDR so you can make sure your final project looks as intended on different screens, including high-end HDR monitors.
The latest After Effects version enables you to preview HDR compositions in full dynamic range in Adobe Color Managed projects on an HDR-capable display or through Mercury Transmit. This update lets you import HDR media, add it to a composition, and preview your work in HDR on your monitor or external hardware, ensuring an accurate view of the final output when exported.


Learn more about how to create an HDR project and preview your HDR content through Transmit.
The Properties panel supports 3D model options, making it easy to adjust how a 3D model interacts with lights and shadows and select embedded animations. Compositing options like Cast Shadows, Accept Shadows, Accept Lights, and Shadow Color are available for all supported 3D model types. Animation options are accessible for GLB, GLTF, and FBX layers, enabling the use of embedded animations.
An example of how you can access animation controls for 3D Models in the Properties panel.
Learn more about how to use the Properties panel for your 3D compositions.
You can now assign videos, still images, animated compositions, and other layers as sources for Environment Lights, in addition to HDR and EXR still-image files. This added flexibility when working with the Advanced 3D render engine provides greater creative control, enabling more dynamic and realistic lighting effects in your 3D projects. Animated Environment Lights allow 3D models to respond to variations in light brightness, color, and position from the video, resulting in natural and contextually accurate lighting and reflections.
An example of how animated Environment Lights can influence your 3D layers in your composition.
Learn how to light your 3D compositions using a composition, video, or image layer as an environment light source.
You can now perform three common 3D workflows- controlling light like a camera, applying 2D effects to 3D models, and viewing a 360º representation of Environment Lights within your composition, all with a new set of commands.
- Layer > Create > Create 3D Layer Instance allows you to apply 2D effects to 3D objects.
- Layer > Light > Control Light with Camera creates a moveable camera linked to a light.
- Layer > Light > Create Environment Light Background Layer visualizes the Environment light source.
An example of using Control Light with Camera to adjust lighting and view changes from the camera's perspective in your composition.
Learn how to use new commands designed to simplify common 3D workflows with single-click actions.
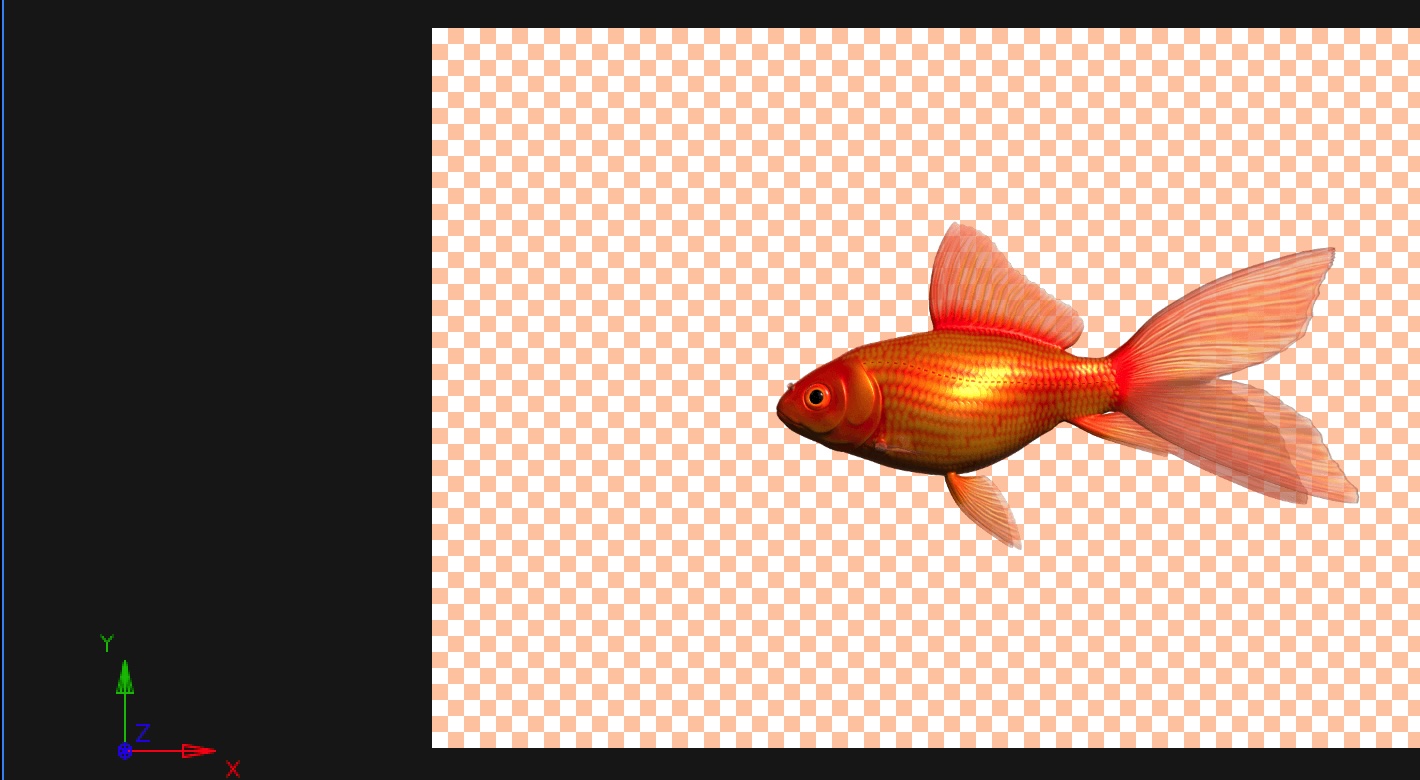
Modifying the size and colors of the transparency grid behind your design elements can improve visibility by creating a stronger contrast with surrounding elements. This makes it easier to identify transparent regions in your composition.
- Grid size: Choose the grid size and define the measurements of each square that forms the transparency grid.
- Grid colors: Choose the colors for the checkerboard pattern of the transparency grid that fit your requirements.
This update introduces a new section in the Grids & Guides preferences panel, allowing you to adjust the transparency grid's size and color.


Learn to use the Grids & Guides preference to customize transparency grids in the Composition panel.
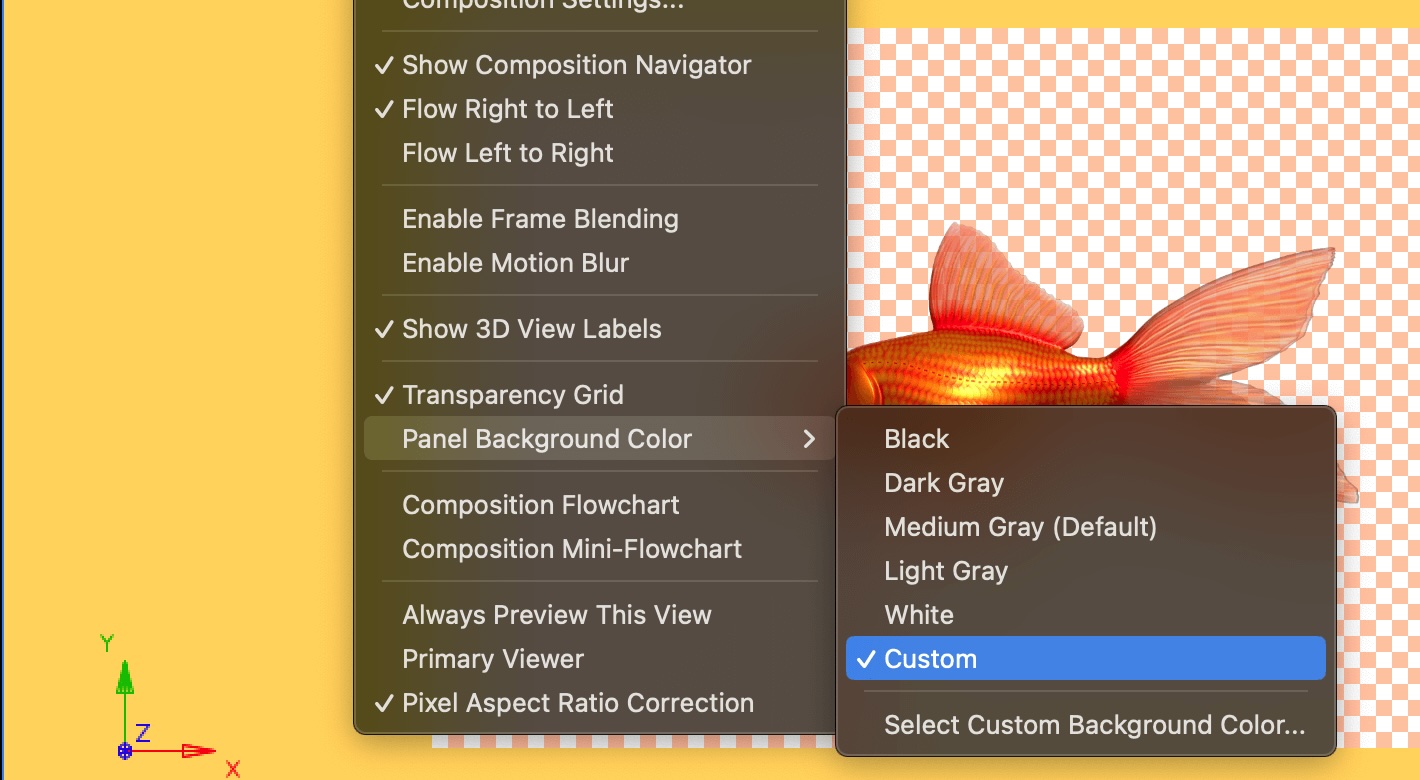
You can customize the background color of the empty area in the Composition, Layer, and Footage panels. You can select from five different shades of gray presets, or you can choose a custom color to match your needs, providing a more personalized and visually efficient workspace.
Select View > Panel Background Color and then choose from the presets or set a custom color to change the background color of the empty area in the Composition, Layer, and Footage panels.

Customize the background color of the Composition, Layer, and Footage panels to personalize your workspace, and improve efficiency.
Learn how to personalize the empty space around your composition by choosing a background color from presets or custom options.
A new preference in After Effects lets you maintain your current workspace layout when opening projects saved with a different workspace. By enabling the Maintain current workspace when opening projects option (Preferences > General > Maintain current workspace when opening projects), your layout will stay consistent, eliminating the need to rearrange your workspace every time you open a new project. This ensures your workspace remains unchanged, no matter which project you’re working on.


Learn how to maintain your workspace layout when opening projects saved with different workspace settings.
With Null Controllers for Positional Properties, you can quickly create Nulls from any positional point, enabling you to animate that point independently as its own layer. This gives you precise control over specific points, like Position or Anchor Points, within a Shape, object, or layer, without affecting other elements.
Creating Nulls from Path points gives you greater control over complex Path animations and makes it easy to attach other layers to your Paths. The three available commands for generating Nulls from Shape or Mask Path properties are:
- Null Controllers for Path Points
- Nulls Following Path Points
- Null Tracing Along Path


Learn how to create Null controllers for positional properties and paths to simplify your workflow in After Effects.
Additional updates
- Color Interop via Dynamic Link: After Effects color management has been improved to enable smoother interoperability and color consistency using Dynamic Link for round-tripping color managed sequence clips between After Effects and Premiere Pro.
- FBX file import support: You can now import FBX files directly into your 3D compositions in After Effects. FBX is a widely used format for 3D models, and this feature lets you bring in not only models, but also embedded animations, cameras, and lights.
Fixed issues
Check out the latest fixes, performance improvements, and more.
