Get to know the interface and workspace of Adobe Substance 3D Sampler.
In this article we'll break down the Sampler interface into each of it's components. Each part of the interface focuses on a specific part of the process. By separating the parts this way, Sampler becomes easy to navigate.
The default workspace is made up of the following elements:

A. Application Menus B. Viewport C. Project panel D. Assets panel E. Layers panel F. Properties panel G. Sidebars

You might not recognize some of the terms on this page. If you find an unfamiliar term, check if the Glossary has a definition.
Application Menus


The Sampler menu bar contains standard menus:
- File — Create new projects, open old ones, or save your current project.
- Edit — Undo and redo actions, or access the Preferences window.
- Window — Reset the workspace to the default layout.
- Help — See details about your version of Sampler, report bugs, and access documentation and other Sampler resources.
- License — Access or sign out of your Adobe account.
At the center of the menu bar, you can see the name of your current project. If the project has unsaved changes, the project name will be in italics and have an asterisk appended to it.
The Viewport


The Viewport is where you can see your creations. By default the Viewport only displays the 3D view. You can toggle the 2D and 3D views with the controls at the upper right of the Viewport. The 2D view is helpful for looking at individual channels of your material or seeing a full environment image.
The bar at the top of the viewport always contains the same information:
- The name of the asset you're currently working on.
- Dropdowns to change the resolution of your asset — the lock toggles whether the width and height of your asset are linked.
- Buttons to toggle the 3D view, 2D view, and fullscreen mode.
3D View
The 3D view helps you see how your material behaves when lit in 3D, or helps you see how your environment light affects a 3D object.
The bar are the bottom of the 3D view holds some controls:
- A counter in milliseconds displays the amount of time it takes Sampler to process the layer stack.
- Adjust the camera's field of view.
- Adjust displacement settings.
- Change material tiling.
- Toggle shadows - working with shadows on can impact performance.
2D View
The 2D view shows the bitmap information that you're working with. For environment lights the 2D view will display the image you're working with. While working on materials, you can see each of the channels of the material.
The bar at the bottom of the 2D view displays information and controls as follows:
- The width and height of your current asset in pixels.
- All of the channels of your current asset. Select a channel to view it in the 2D view. If not all channels are visible, drag left or right in the channel area to scroll through available channels.
- Color information for your current asset. RGBA refers to the color mode, while 16bpc refers to the bit depth.
Project Panel


The project panel holds all the assets of your current project. A project can contain any number of materials and environment lights.
From the project panel you can:
- Open an asset by clicking the asset name.
- Create a material by clicking the + to the upper right of the materials list.
- Create an environment light by clicking the + to the upper right of the environment lights list.
- Drag an asset onto the layer stack to create an instance in your current asset. This can help with organizing assets.
Assets Panel
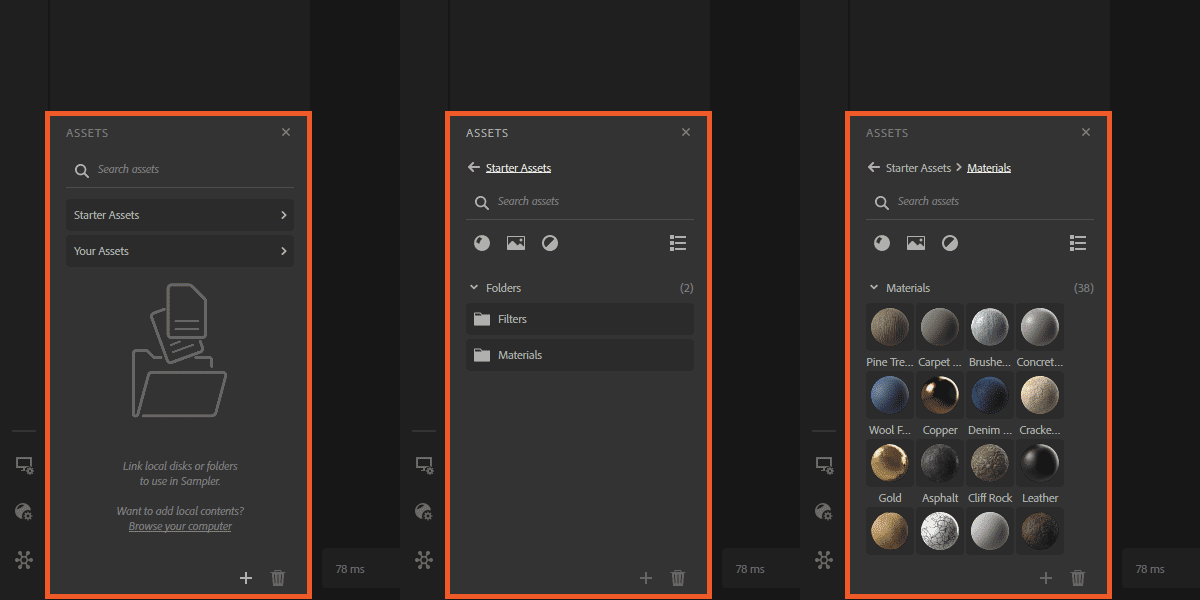

The Assets panel holds the libraries of materials, filters, and images that you can use to create your own materials and environment lights. To use an asset, drag it from the Assets panel into the viewport or directly into the Layers panel.
By default only the Starter Assets folder contains any resources. You can add your own folders with the + button at the lower right of the Assets panel.
The Assets panel displays three types of files:
- Materials are SBSAR or SSA files created with Sampler or Designer. Materials have multiple channels like roughness, metallic, and base color. Materials often also include parameters that allow you to adjust the appearance of the material.
- Images are static bitmap files that can be stored in various formats. In Sampler images are used to create and modify environment lights or build materials using the Image to material process.
- Filters are a resource that performs operations on other resources. In other words, a filter is a layer that modifies the layers beneath it in some way. For example, the colorize filter adds color to the layers underneath it. Filters can be created with Designer.
Type in the search bar to quickly find assets. Use the icons under the search bar to filter assets by type. You can also switch between grid view and list view with the toggle under the search bar.
To remove an asset or folder from the Assets panel, drag it over the trash can at the lower right of the panel.
Layers Panel
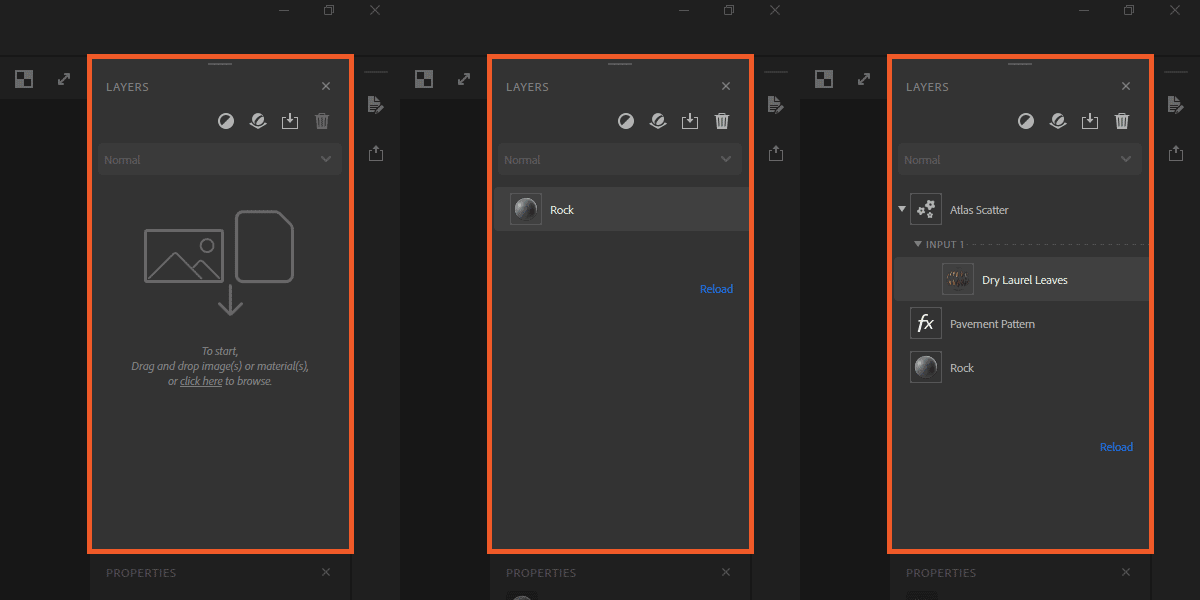

The Layers panel holds the layer stack that builds your assets.
Like other Adobe applications, layers in the layer stack are processed from the bottom upwards. In other words, each layer can only affect the layers below it.
You can add layers to the layer stack in a few ways:
- Drag assets from the Assets panel or Project panel into the Viewport.
- Drag assets from the Assets panel or Project panel onto the Layers panel to drop them into a specific location in the layer stack.
- Use the buttons in the Layers panel to Add a layer or Add a base material. You can also Import a custom filter — this will open a file explorer.
You can reorder layers by dragging them around the layer stack. Delete a layer by selecting the layer and using the Remove a layer button or with the keyboard shortcut Del.
The Layers panel and Properties panel work closely together. These panels are where you'll spend most of your time in Sampler. Click a layer in the Layers panel to see the parameters and options for that layer in the Properties panel.
Properties Panel
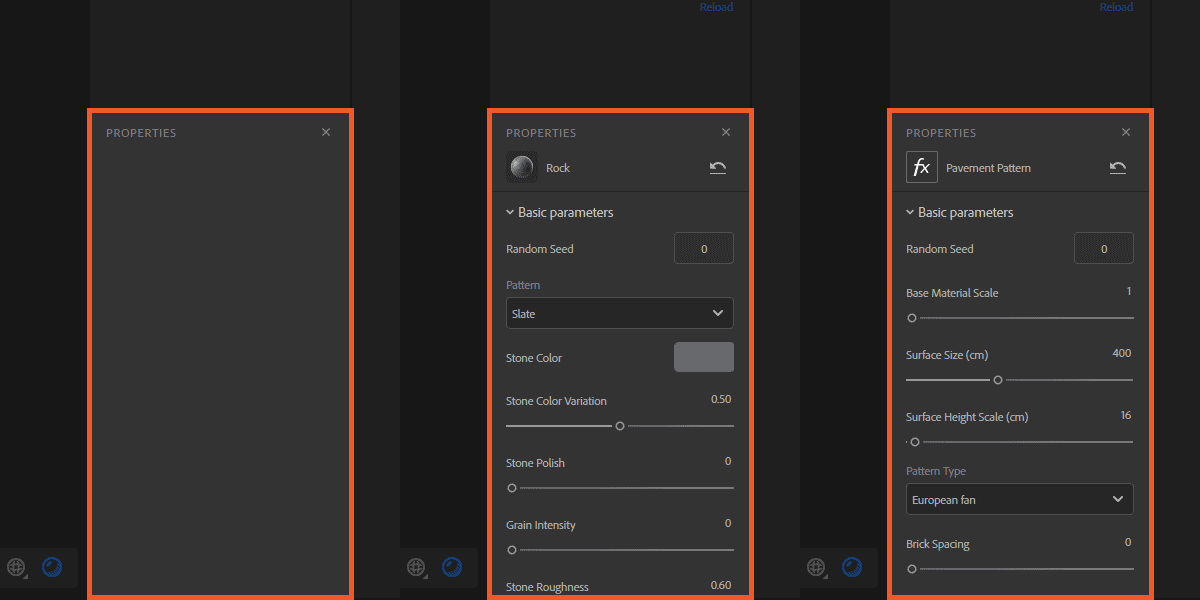

The Properties panel shows parameters and settings for layers you have selected in the Layers panel. The best way to find out how parameters behave is to play with them and see what happens.
Material layers that are not at the bottom of the layer stack have an extra set of properties for blending height. To access these properties, select the height blend icon of the layer.
Sidebars


When panels are closed, you can access them from the sidebars. The left sidebar holds quick access to some commonly used tools.
The left sidebar
At the top of the left sidebar, are several tools. The topmost option lets you import content into the Assets panel or directly into the layer stack.
The other tools in the left sidebar are quick access icons to commonly used filters. Use these tools to add a filter to the top of your layer stack.
From top to bottom the filter tools are:
- Crop — focus on a specific section of your material.
- Perspective transform — fix perspective problems with imported images.
- Transform — scale and move the layers beneath the transform.
- Clone stamp — remove artifacts or adjust up the edges of materials to make them tile.
These tools will not change the output resolution of your assets. To modify the resolution of your assets, change the width and height dropdowns at the upper right of the Viewport.
By default the left sidebar holds three closed panels:
- Viewer Settings — controls settings for the 3D viewport such as the mesh and environment lights being used. You can also adjust UV settings for the selected mesh in the Viewer Settings.
- Shader Settings — controls how the shader renders the channels of your materials. Here you can adjust the intensity and quality settings for each channel.
- Channel Settings — toggle which channels are being computed for your asset. Which channels you should use depend on your workflow and the asset you're creating.
When you close the Project panel or the Assets panel, they will also be stored in the left sidebar.
The right sidebar
By default the right sidebar holds two closed panels:
- Metadata — change the name of your asset or add other information like a description of your asset, relevant tags or categories, and the name of the author.
- Share — send you asset directly to other Adobe Substance 3D applications or export to a specific format. For more information, look at this article about exporting assets.
When you close the Layers panel or the Properties panel, they will be stored in the right sidebar.
Customize the Workspace
Sampler's workspace is fully customizable. Feel free to change the workspace to find what setup is most comfortable for you. At any point, you can use Window > Reset to default layout to get back the default workspace.
To customize the workspace layout:
- Move panels by clicking and dragging on the panel name.
- Close panels with the X at the upper-right corner of each panel.
- Open closed panels from the left and right sidebars.
You can toggle the 2D and 3D views on or off with the buttons in the upper-right corner of the Viewport.
What's next?
With a good understanding of the interface, it should be much easier to start making something new. Look at the Create a Material article where we'll walk through the steps of making a garden rock path together.
Have a question or an idea?
If you have a question or an idea to share, join other Sampler users in the Substance 3D Sampler Community. Get help, make suggestions, or show off your work and techniques.
If you have ideas for new Sampler features, share them with us!