
Choose
Edit > Preferences > Composition (Windows)
or InCopy > Preferences >
Composition (Mac OS).
Last updated on
Apr 27, 2021
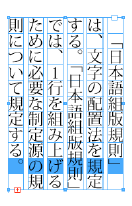
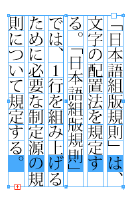
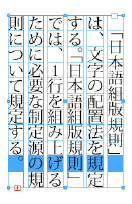
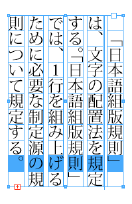
CJK composition
InCopy supports four methods developed for typesetting, including Adobe Japanese Single-line Composer, Adobe Japanese Paragraph Composer, Adobe Paragraph Composer, and Adobe Single-line Composer. Each Composer evaluates possible breaks in CJK and Roman text, and chooses those that best support the hyphenation and justification options specified for a given paragraph.
The Adobe Paragraph Composer
Considers a network of breakpoints for an entire paragraph, and thus can optimize earlier lines in the paragraph in order to eliminate especially unattractive breaks later on.
The Paragraph Composer approaches composition by identifying possible breakpoints, evaluating them, and assigning a weighted penalty to them based on such principles as evenness of letterspacing, word spacing, and hyphenation, or Roman words set to a language that supports hyphenation dictionaries.
Note
You can use the Hyphenation dialog box to determine the relationship between better spacing and fewer hyphens.
Adobe Japanese Paragraph Composer
Adobe Japanese Paragraph Composer, like the Paragraph Composer, evaluates breaks (where to wrap to the next line) in units of paragraphs. If characters are added to or deleted from a paragraph specified for this Composer, mojikumi may be modified on the line before the edit point because the Composer re‑evaluates mojikumi in the whole paragraph in order to optimize it.
The Paragraph Composer approaches composition by identifying possible breakpoints, evaluating them, and assigning a weighted penalty to them based on such principles as evenness of letterspacing, word spacing, and hyphenation.
Paragraph Composer evaluates breaks for the entire paragraph and fits mojikumi on the basis of character spacing, word spacing, and rules for even hyphenation. For CJK text, this is calculated as the difference between the actual value of mojikumi aki inserted for full justification or kinsoku processing and the optimum value set in the Mojikumi Settings dialog box. When the aki necessary for full line justification is more than the maximum aki, or when the aki necessary for kinsoku processing is less than the minimum aki, an H&J violation occurs.
The Adobe Single-line Composer
Offers a traditional approach to composing text one line at a time. This option is useful if you want to restrict composition changes from late stage edits, and you don’t care about some lines in the paragraph being very loose while others fit perfectly.
Adobe Japanese Single-line Composer
Adobe Japanese Single-line Composer applies mojikumi by evaluating line breaks one line at a time, in the same way as Single-line Composer.
Change CJK composition preferences
-
-
Under Mojikumi Compatibility Mode, do any of the following:
Select Use New Vertical Scaling to use the InDesign CS2 method of vertical scaling. Roman text is typically rotated on its side, whereas CJK text may be upright. In previous versions of InDesign, when you set glyph scaling in the Character panel, the X Scale and Y Scale attributes cause different results depending on the orientation of the characters being scaled. In CS2 or later versions of InDesign and InCopy, scaling affects all text in the line the same way, regardless of whether it’s rotated or upright. If the text isn’t upright in vertical, the X Scaling and Y Scaling will be exchanged, resulting in the Roman text being scaled in the same direction as the CJK upright text. This option is turned on for new documents and turned off for documents from InDesign CS and earlier.
Select Use CID-Based Mojikumi to determine the correct JIS X 4051 Mojikumi Class using the glyphs (jikei) of the font used instead of Unicode. Selecting this option is especially useful when you’re using OpenType fonts. This feature supports all CID fonts of AdobeJapan1‑0 through AdobeJapan1‑6. Unicode will be used with all other fonts.
-
Click OK.
Use mojikumi
Mojikumi specifies text composition for spacing of Japanese and Chinese characters, roman characters, punctuation, special characters, line start, line end and numbers. For Korean text, mojikumi may not be applicable. You can also specify paragraph indents.
For Japanese text, the existing character spacing rules in InDesign follow the Japanese Industrial Standards (JIS) specification, JISx4051‑1995. You can also select from InDesign predefined mojikumi sets. Furthermore, you can create specific mojikumi sets, and change the values for character spacing.
For Chinese text, you can use mojikumi display settings for Traditional Chinese and Simplified Chinese. If these options do not appear in the Mojikumi Set list, you can select them in the Mojikumi Options section of the Preferences dialog box.
InCopy includes 14 types of mojikumi presets for Japanese and 2 for Chinese. You can also modify the presets to be displayed in Preferences, and you can determine whether CID-Based Mojikumi is used.
In InCopy, you can change the mojikumi settings of a paragraph, but you can’t create a custom mojikumi set or change custom mojikumi settings as in InDesign. For details, see InDesign Help.
For more information on using mojikumi in InDesign, see www.adobe.com/go/learn_id_mojikumi_en.
Apply a mojikumi set to a paragraph
-
Select the target paragraph or frame. To change the default setting, confirm that no paragraph or frame is selected.
-
Choose a set from the Mojikumi pop‑up menu in the Paragraph panel or Control panel.
To disable mojikumi settings, choose None from the Mojikumi pop‑up menu.
Note
To determine which mojikumi settings appear in the Mojikumi pop‑up menu, select the settings in the Mojikumi Options section of the Preferences dialog box.
Change the display of mojikumi presets
-
Choose Edit > Preferences > Mojikumi Options (Windows) or InCopy > Preferences > Mojikumi Options (Mac OS).
-
Select the items you wish to display in the Mojikumi pop‑up menu and click OK.
Note
The Mojikumi Preset section item names are shown in gray, and items that cannot be selected are mojikumi sets, which are currently applied to paragraphs or default mojikumi sets.
Mojikumi Presets |
||||
|---|---|---|---|---|
|
|
|
|
|
|
|
|
|
|
|
|
|
|
|
|
|
|||

Change mojikumi settings
You can edit the settings for spacing that you use a lot, such as the spacing between a period and following opening parenthesis, in a mojikumi set you create.
For example, when you want to compress the character spacing for parentheses in the text, from Okoshi yakumono in Yakumono, change the Middle Line setting for Open Parentheses, or Close Parentheses in Uke yakumono. The following settings are available: 50% Fixed, 50%(0%‑50%), 50%(25%‑50%), 0% Fixed, 0%(0%‑50%). For opening parentheses, 50% Fixed leaves a half-width 50% aki before the parenthesis. In other words, it doesn’t compress the aki. 50%(0%‑50%) puts a half-width aki before the parenthesis, but depending on mojikumi settings may not make an aki at all. 50%(25%‑50%) makes a half-width aki before the parenthesis, but depending on mojikumi settings may make an aki which is half the size (25%) of a half-width character. 0% Fixed always compresses aki. 0%(0‑50%) compresses aki, but depending on mojikumi settings may allow a half-width aki. Choose 0% Fixed if you always want to compress spacing before and after parentheses.

By clicking the triangular to the left of Open Parenthesis, Close Parenthesis, commas, periods, and middle punctuation in each of Okoshi Yakumono, Uke Yakumono and Chuzuki Yakumono within Yakumono, items such as round parentheses, corner brackets, Japanese commas, commas, Japanese periods, periods, nakaguro and colons are displayed, allowing setting of aki for each character type. If you apply these settings, brackets won’t be compressed but you can adjust aki for round parentheses.
Furthermore, if you display Detailed, you can edit all classes, set the processing order for each class, and indicate differences between a specified mojikumi set and the current settings.
You can specify the desired value, minimum value, maximum value and order of priority to apply character spacing for each option. The minimum and maximum values are applied when you adjust the spacing for text that is fully justified by kinsoku. The more the Minimum and Maximum percentage values differ from the Desired percentage, the more scope you can give to InDesign to increase or decrease spacing when justifying the line.
For more information on using mojikumi in InDesign, see www.adobe.com/go/learn_id_mojikumi_en.
Create a new mojikumi set
-
Do one of the following:
Choose Type > Mojikumi Settings > Basic or Detailed.
Choose Basic or Detailed from the Mojikumi Set menu in the Paragraph panel or Control panel.
-
Click New in the Mojikumi Settings dialog box.
-
Enter the name of the mojikumi set, specify the existing set on which the new one will be based, and click OK.
-
From Units, choose whether to use percentage (%) or Bu units, or to use Character Width/Bu.
-
Specify values for Begin Line, End Line and Middle Line for items in each section of Yakumono, Contiguous Yakumono, Paragraph Mojikumi Indent and Between CJK and Roman. The Middle Line value is used to compress lines for kinsoku (specify a value less than the Begin Line value). The End Line value is used to spread lines for fully justified text (specify a value greater than the Middle Line value).
-
For item names in each section that has a triangle indicator, you can specify mojikumi settings in further detail for each character. For example, to display items, click the triangle to the left of Open Parenthesis in Okoshi Yakumono in the Yakumono section. The three items Open Bracket, Open Round Parenthesis, and Other Opening Parenthesis are displayed, allowing you to set mojikumi settings for each character class.
-
When settings are complete, click Save or OK to save the settings. Click Cancel if you don't want to save the settings.
Note
Depending on the character type, you can specify the same values for Begin Line, Middle Line, and End Line if you don't want to change the spacing.
Edit detailed settings for mojikumi
-
Do one of the following:
Select Type > Mojikumi Settings > Detailed.
In the Paragraph panel or Control panel, choose Advanced Settings From Mojikumi.
Click Detailed in the Mojikumi Settings dialog box.
Detailed mojikumi settings Detailed mojikumi settings -
Select a mojikumi set to edit from the Mojikumi pop‑up menu or click New to create a new set. You can also import a mojikumi set from another document by clicking Import.
-
From the Character Class pop‑up menu at the bottom of the Mojikumi menu, select the character class to edit its character aki settings. A list of settings that can be edited is included in the class. You can individually set Open Parenthesis, Close Parenthesis, commas, periods or middle punctuation items, but you can also specify aki in more detail for individual characters such as Japanese periods or Roman periods.
-
Choose Previous Class or Next Class from the Before & After pop‑up menu, and set whether the class aki value is to be entered before or after the entered character. To set the aki for a character following a Japanese period, for example, choose Japanese Period from the Character Class popup menu, and select previous character class from the Before & After pop‑up menu.
-
For each item, set Minimum, Desired, and Maximum values. The Minimum value is used to compress lines for kinsoku (specify a value less than the Desired value). The maximum value is used to spread lines for fully justified text (specify a value greater than the Desired value).
-
For item names that have a triangle indicator, you can further specify mojikumi settings in detail for each character. For example, click the triangle to the left of Open Parenthesis to display the items. The three items Open Bracket, Open Round Parenthesis, Other Opening Parenthesis are displayed, allowing you to set mojikumi settings for each character.
-
Specify the order of compression priority in Priority for each class, to determine the order of compression for each. When you specify 1 for any character class, characters given greater values will be processed afterwards, in increasing order of priority, and when you specify None they are processed last. You can assign the same value (1 to 9) in several aki options.
-
From the Indicate Differences menu, specify an option to indicate which mojikumi table is being compared. When a different table is selected, any values that are different from that table are highlighted in blue.
-
Click Save, or click Cancel if you don’t want to save the settings.

Change the name of a custom mojikumi set
-
In the Mojikumi Settings dialog box, choose a custom mojikumi set from the Mojikumi pop‑up menu, and click Rename.
-
Enter the new name in the Rename dialog box and click OK.
You cannot rename default mojikumi sets.
Delete a custom mojikumi set
-
In the Mojikumi Settings dialog box, choose a custom mojikumi set from the Mojikumi pop‑up menu, and click Delete Set.
All the text to which the mojikumi set was applied will return to default settings. You cannot delete predefined mojikumi sets. You cannot delete default InDesign mojikumi sets.
NoteWhen you compose Japanese text with a lot of half-width spaces or Roman parenthesis, problems that need to be resolved relating to text composition increase. It is recommended that you avoid using Roman parenthesis, and use full-width parenthesis for Japanese composition. Only use Roman parenthesis when using relatively long English sentences in Japanese text, or when a more serious problem results if you don't use Roman parenthesis.
Use kinsoku settings
Kinsoku specifies line breaks for Asian text. Characters that cannot be placed at the beginning or end of a line are known as kinsoku characters. For Japanese text, you can use hard kinsoku sets and soft kinsoku sets. Soft kinsoku sets omit long vowel symbols and small hiragana characters. You can use these existing sets, or add or delete kinsoku characters to create new sets. Chinese and Korean versions include special kinsoku sets.
Select kinsoku settings for a paragraph
-
Select a paragraph or frame.
-
In the Paragraph panel, choose an option from the Kinsoku Set list.
Create a new kinsoku set
-
Do one of the following.
Select Type > Kinsoku Settings.
In the Paragraph panel or Control panel, choose Settings from the Kinsoku pop‑up menu, and display the Kinsoku Settings dialog box.
-
Click New in the Kinsoku Settings dialog box. It is possible to import from other documents, but there is no import button as with the Mojikumi Settings.
-
Enter the name of the kinsoku set, and specify the existing set on which the new one will be based.
-
To add a character to a field, select the field, and do one of the following:
Enter a character in the Add Character box, and click Add to insert in the list box.
In the Add Character pop‑up menu, specify the code system (Shift JIS, JIS, Kuten, Big5, GB, Johab, or Unicode), enter the code into the Add Character box and click Add.
-
To delete a character in the list box, select the character and press Backspace (Windows) or Delete (Mac OS).
-
To check the currently selected character code, from the Add Character pop‑up menu select Shift JIS, JIS, Kuten, Big5, GB, Johab, or Unicode. The code system is displayed in the Add Character text box.
-
Click Save to save the settings. Click Cancel if you do not want to save the settings.
Delete a kinsoku set
-
In the Kinsoku Shori Set dialog box, choose the kinsoku setting you want to delete from the Kinsoku Settings pop‑up menu.
-
Click Delete Set.
You cannot delete predefined kinsoku settings.
Specify whether to push in or push out kinsoku text
You can determine whether text is pushed in or pushed out to prevent kinsoku characters from beginning or ending the line.
-
Select the paragraph or frame.
-
From the Paragraph panel menu or Control panel menu, choose an option from the Kinsoku Break Type menu:
Choose Push In First to prioritize fitting kinsoku characters onto the same line.
Choose Push Out First to prioritize moving kinsoku characters to the next line.
Choose Push Out Only to always move kinsoku characters to the next line.
Choose Prioritize Adjustment Amount to push in text when pushing out that text would result in greater expansion of character space than pushing it in would compress the character space.
Force highlighting of kinsoku text
You may want to check where kinsoku has been applied, as several elements may affect the text composition. When you set the option to highlight kinsoku text to on, kinsoku items are highlighted in blue-gray. Kinsoku items that have been pushed in to keep on the same line are highlighted in red, and kinsoku items that have been pushed out so as not to be on the previous line are highlighted in blue. You can edit and amend the composition of these highlighted items manually.
-
Select Edit > Preferences > Composition (Windows) or InCopy > Preferences > Composition (Mac OS).
-
Select Kinsoku, and then click OK.
Turn bunri-kinshi on or off
When bunri-kinshi is on, the characters specified in the Bunri-kinshi Characters section of the Kinsoku Settings dialog box will not be split across lines, and will not be spaced out during full justification.
-
Select the text you want to affect.
-
Choose Bunri-Kinshi from the Paragraph panel menu or Control panel menu.
Use rensuuji
Rensuuji protects numbers from breaking. Furthermore, this option processes punctuation spacing in number strings according to JIS specifications.

-
Select the text you want to affect.
-
To turn rensuuji on, choose Rensuuji from the Paragraph panel menu or Control panel menu.
Absorb ideographic space
If a space falls at the end of the line, the space may wrap to the next line, causing an jagged appearance. You can select an option to prevent a line from beginning with a space.
-
Select the text you want to affect.
-
Choose Absorb Ideographic Space At Line End in the Paragraph panel menu or Control panel menu to prevent a line from beginning with a space.
You can also make this option part of a paragraph style. This option is located in the Japanese Composition Settings section when creating or editing a style.
Turn off Roman word wrap
When the Arbitrary Hyphenation option is selected, Roman words can be broken without using Roman hyphenation rules, and no hyphen character (-) appears at the end of the line. If this option is not selected, Roman hyphenation rules are used for word breaks.
The Arbitrary Hyphenation option takes effect only if a CJK language is applied to the text. This option has no effect on text to which Roman languages are applied.
-
Select the text you want to affect.
-
Choose Arbitrary Hyphenation in the Paragraph panel menu or Control panel menu.
You can also make this option part of a paragraph style. This option is located in the Japanese Composition Settings section when creating or editing a style.
Apply kinsoku hanging
Hanging controls whether or not you hang Japanese punctuation marks such as periods or commas outside the margin, and align to the edge of the text frame. Specify hanging characters in Hanging Punctuation in the Kinsoku Settings dialog box.
-
Select the text you want to affect.
-
To turn on hanging, choose one of the following hanging methods from the Kinsoku Hang Type command in the Paragraph panel menu or Control panel menu.
None
No hanging.
Regular
When the paragraph is set to justify or justify all lines, positioning is applied to include hanging characters.
Forced
Forced When the paragraph is set to justify or align on both sides, the hanging characters are first forced to hang before positioning is applied. Forced hanging is only applied when paragraph justification is applied.
Rotate half-width characters in vertical text
-
Select the text you want to affect.
-
From the Paragraph panel menu or Control panel menu, choose Roman rotation in Vertical Text.
The direction of half-width characters such as Roman text or numbers changes in vertical text. By setting Roman Rotation in Vertical Text, you can rotate these characters vertically in the paragraph.
When you set this option to on, half-width characters are rotated individually.

Turn warichu on or off
Warichu can be set as inline note for the body text. Warichu usually consists of two lines enclosed within parentheses.

-
Select the text.
-
Do one of the following.
Choose Warichu from the Character panel menu or Control panel menu.
Choose Warichu Settings from the Character panel menu or Control panel menu, select Warichu in the Warichu Settings dialog box, and then click OK.
Change warichu options
-
Select the text you want to affect.
-
Choose Warichu Settings from the Character panel menu or Control panel menu.
-
For Number Of Lines, specify how many lines of text will appear as warichu characters.
-
For Line Spacing, specify the distance between the lines of warichu characters.
-
For Warichu Size, select the size of warichu characters as a percentage of the size of the parent text.
-
To align Warichu characters, select an alignment option. For example, in a vertical frame grid, selecting Left/Top aligns the beginning of the warichu characters at the top of the frame. In addition, if Auto is set, justification occurs automatically based on the warichu size or the parent text. The alignment proxy shows how the warichu text appears relative to the parent text.
-
In the Line Breaking Options section, specify the minimum number of characters required before and after the line breaks to start a new line, and then click OK