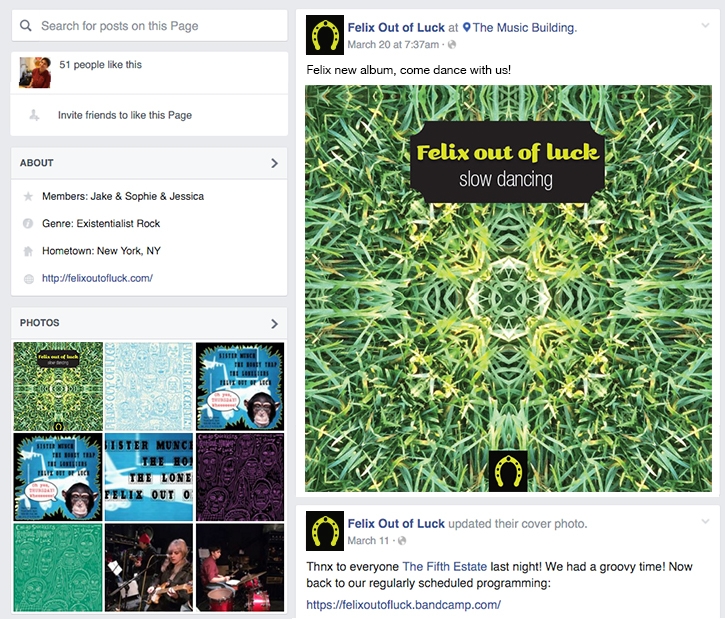
Create artistic patterns on your iPhone, iPad, or Android device. Then, use the pattern in Photoshop to create album artwork.
Typekit is now Adobe Fonts.


What you'll need
The screenshots and instructions in this tutorial show Capture on an iPhone. The user interface may vary between iPad, iPad Pro, and Android devices.
Capture a pattern
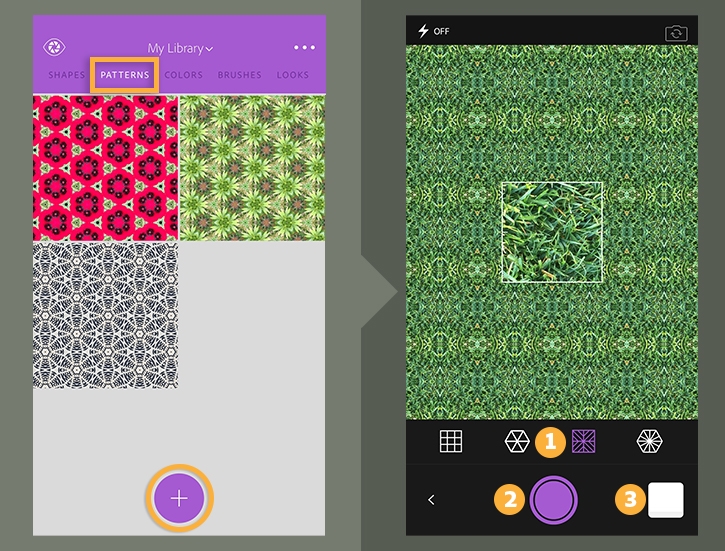
Open Adobe Capture and sign in with your Adobe ID.
Select patterns and tap the + icon. Point your camera at an object—such as a patch of grass to re-create this example.
Tap each of the 4 pattern styles (1) to determine the one you prefer. Pinch and zoom with two fingers to adjust the details of the pattern. Tap the Capture button (2) to create the selected pattern.
Tip: If you have an existing photo you'd like to use, tap Capture From (3) at the bottom of the screen to browse your images.

Edit a pattern
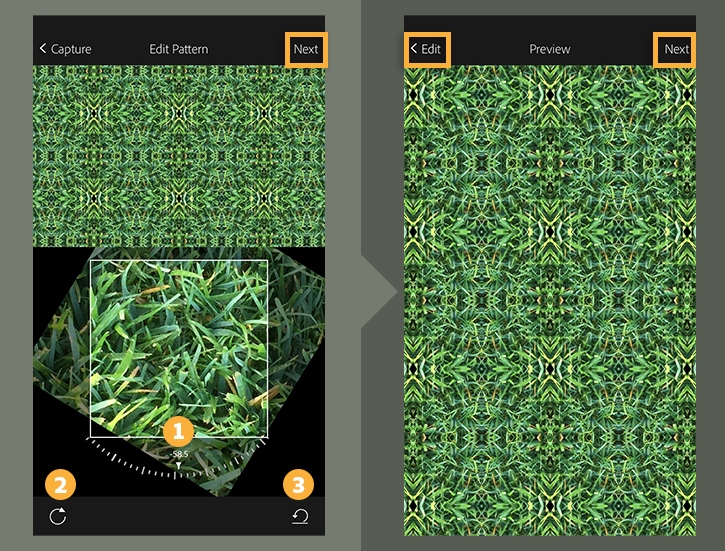
Pinch or drag the original image to continue editing the overall pattern to create the desired asset (1).
Slide the dial to rotate the image with more precision, or tap Rotate (2) to rotate the original image in 90 degree increments. Tap Undo (3) to undo the previous refinement.
Tap Next to see a full-screen preview of the patten.
Tap Edit to revise the pattern further. If you are satisfied with the asset, tap Next to continue.
Tip: Pinch to zoom in on the pattern at the top of the screen to see the pattern in more detail.

Save a pattern
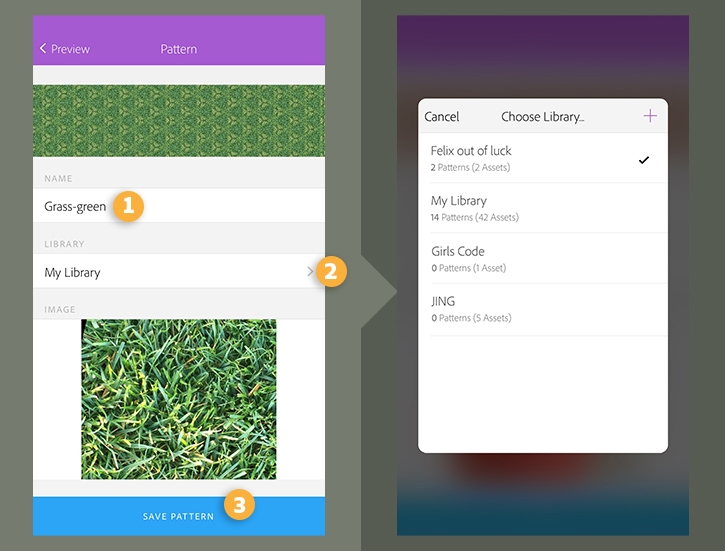
Name the pattern (1). Choose the appropriate Creative Cloud Library (2), then tap Save Pattern (3) to save it to the selected Library.

Prepare album components in Photoshop
To re-create this album cover, click Album_cover.psd and select Download > psd to download the Photoshop file to your computer.
Open Photoshop (or download a trial version), select File > Open, and select the Album_cover.psd file you just downloaded.
Replace the text with your band's name and album title. The sample album artwork includes Kari Pro Regular and Helvetica Neue Thin typefaces (both available from Typekit), and a horseshoe vector graphic from Adobe Stock.
Select Window > Layers to open the Layers Panel. Click the layer icon (1) to add a new layer, drag it below the other layers (2), and name it Pattern artwork.
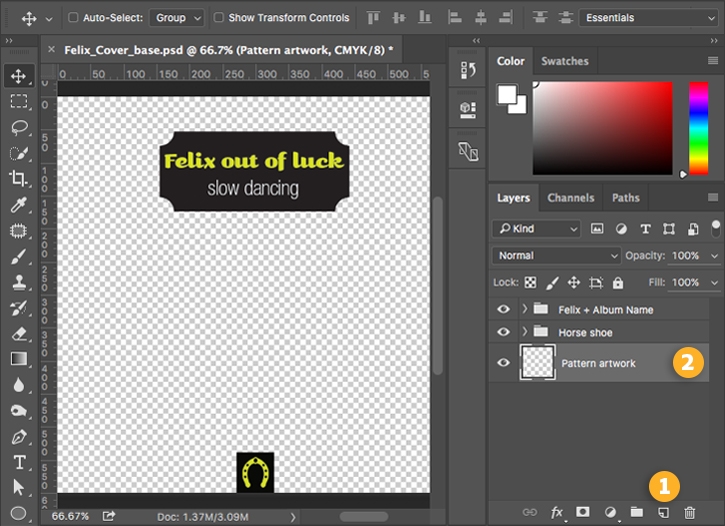

Apply the pattern to album art
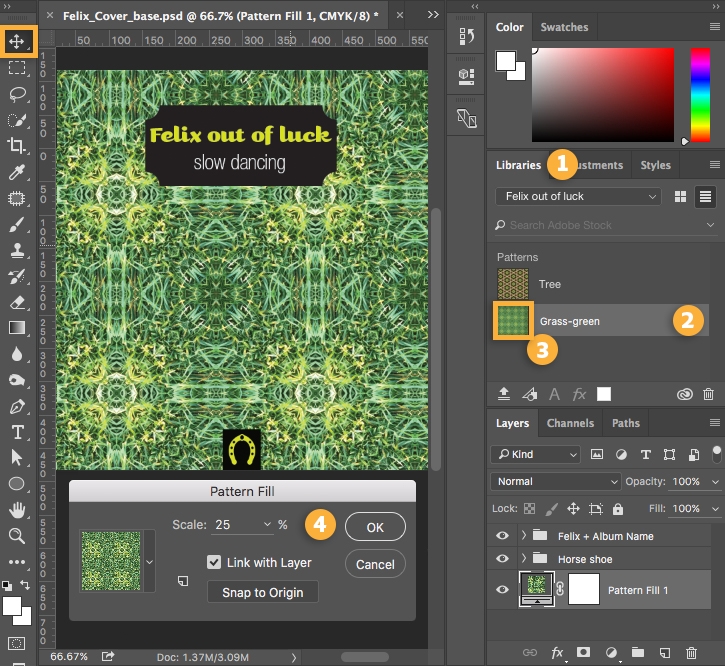
Select Windows > Libraries to open the Libraries panel (1). Select the Creative Cloud Library to which you saved the pattern (2).
Select the Move tool in the toolbar on the left, and make sure the Pattern artwork layer is selected. Then, double click on the the desired pattern in the library (3) to open it. A dialog box prompts you to scale the pattern and link it to the selected layer (4). Adjust the Scale value as desired, then click OK.
With the Move tool still selected, click and drag to adjust the pattern's position as necessary.

Publicize your album on social media
Save your album art as a JPG to post online, or as a PDF for printing.
Your album art can now be uploaded to social media sites to promote your band's next gig.
