Action
Learn how to work with the Layer Stack in Substance 3D Painter.
The Layer Stack lets you manipulate the layers of a Texture Set.


The layer stack displays layers with a specific hierarchy. The layer at the bottom will be drawn first on the mesh, then the layer on top will follow. Therefore, the layer at the top of the stack is the last item, while the layer at the bottom is the first.
The same principle applies to folders, however the content of the folder takes priority. It means that the content of a folder will be processed before the layers that are at the same level. For more information, see the Managing Layers documentation article.
Common characteristics:
- Each layer can have multiple channels.
- The paint tool will paint on all of their respective channels depending on the material settings. The channel you are currently viewing in the Layer Stack has no impact.
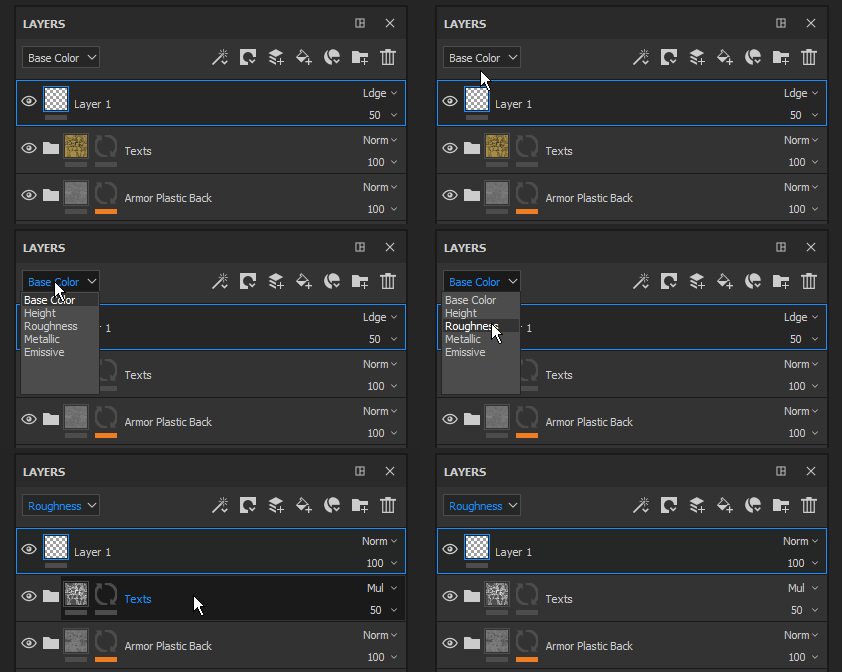
- Each Layer has a blending mode and an opacity per channel. You can switch between channels through the upper-left drop-down list.
- A layer or group of layers can be instanced across texture sets.
Types of layers:
- Layer: This type of layer can be painted on with brushes and particles.
- Fill layer: This layer cannot be paint on. Instead you can load a material to fill the channels that make up the layer. You can also manipulate the layer's transformation properties to repeat the material.
- Folder: This type of layer contains other layers and is used to organize the layer stack.
On each layer, you can add a mask. Masks allow you to apply the content only to a specific part of the channels in the current texture set.
You can either paint on the mask manually (in grayscale with a brush) or use filters and Substance Materials for more dynamic/procedural results.
View mode
Used to define the current display context.
The upper-left dropdown of the Layer Stack controls the view mode of the layer stack. Since a layer can represent multiple channels, it is not possible to display all of these channels at once. Therefore the view mode can be used to define the current display context.
When using this dropdown, it is possible to specify which channels should be used to display in the layer thumbnails and for controlling the blending mode and the opacity for this channel only.
The list in this dropdown is based on the list of channels available in the Texture Set Settings.

Actions
List of common actions that can be performed in the Layer Stack.
|
|
Description |
|---|---|
|
|
Add Effect Create an effect and add it to the currently selected layer. For more information about effects, see the Effects page. |
|
|
Create Mask Open the Mask action menu which contains the following items:
|
|
|
Create New Layer Create a layer above the currently selected one. |
|
|
Fill Layer Create a Fill layer above the currently selected one. |
|
|
Insert Smart Material Insert a Smart Material above the currently selected layer. Clicking this button will open a mini-shelf to browse the list of Smart Materials available in the current Asset panel. |
|
|
New Folder Create an empty folder above the currently selected layer. |
|
|
Delete Delete the currently selected item: layer or folder. Effects can't be deleted via this action. |
Create Layers
Adding and creating layers in the Layer Stack.
There are multiple ways of adding/creating layers in the Layer Stack:
|
Action |
Demonstration |
|---|---|
|
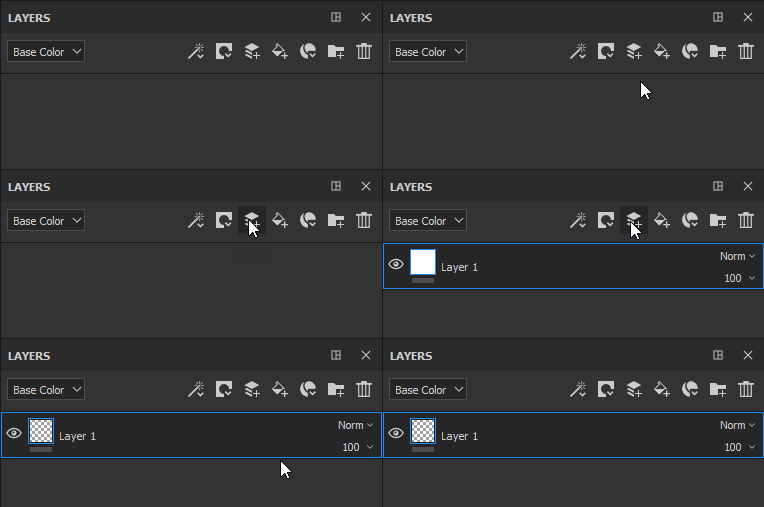
Create a paint layer by clicking on the dedicated button |

|
|
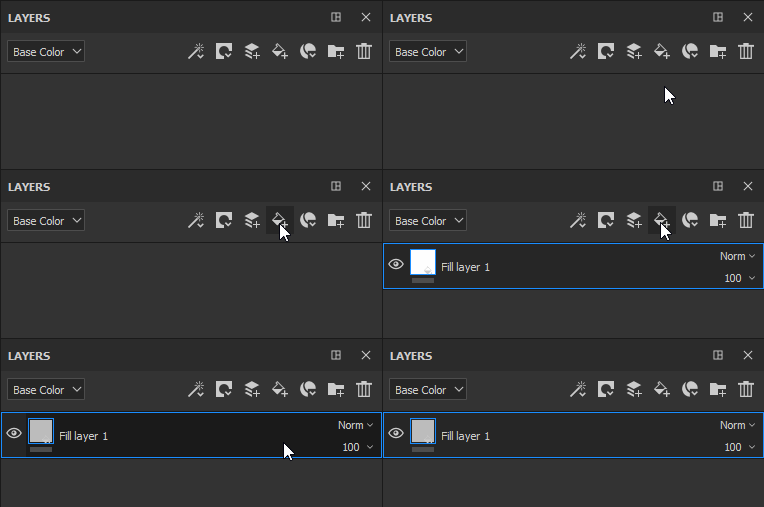
Create a fill layer by clicking on the dedicated button |

|
|
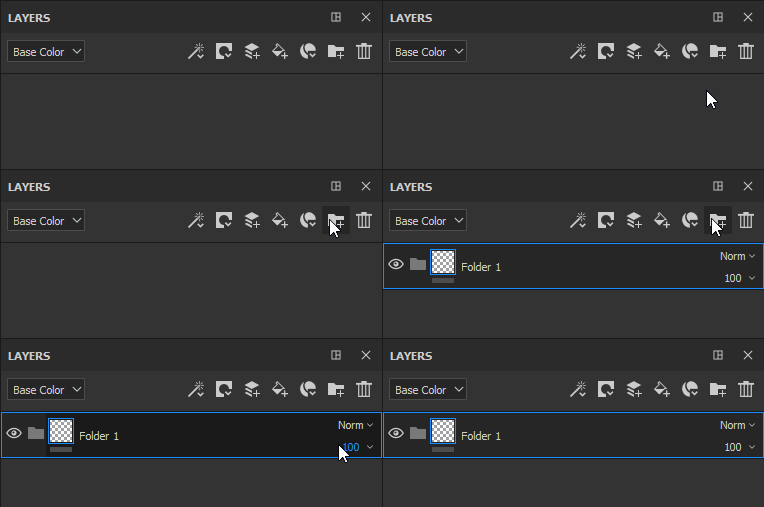
Create a folder by clicking on the dedicated button |

|
|
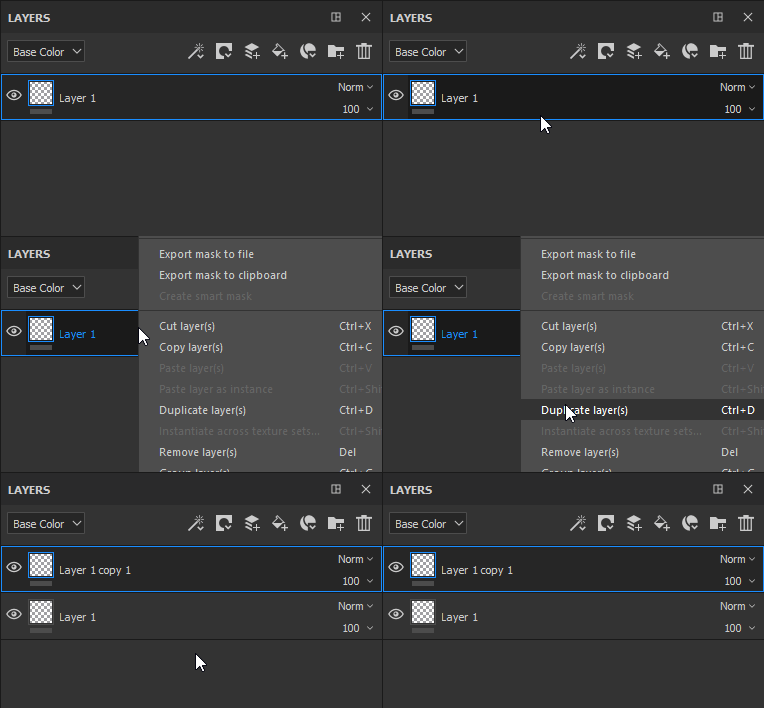
Duplicate a layer by using one of the following methods:
|

|
|
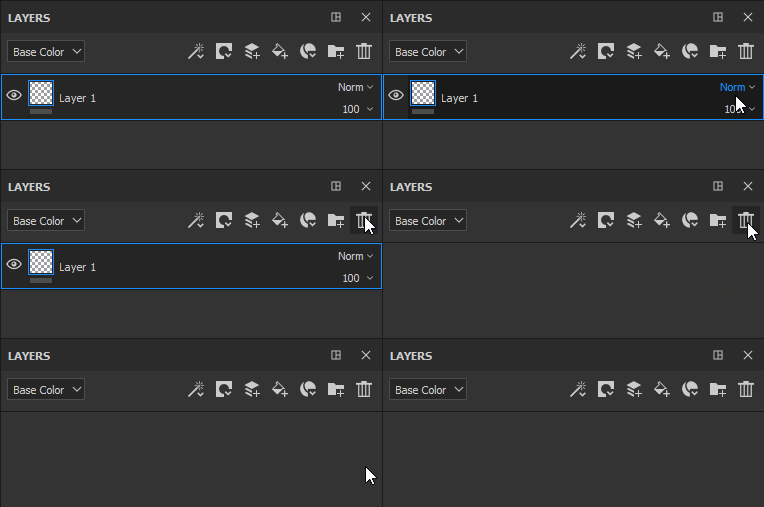
Delete a layer by clicking the dedicated button. |

|
Some of these actions have an associated keyboard shortcut.
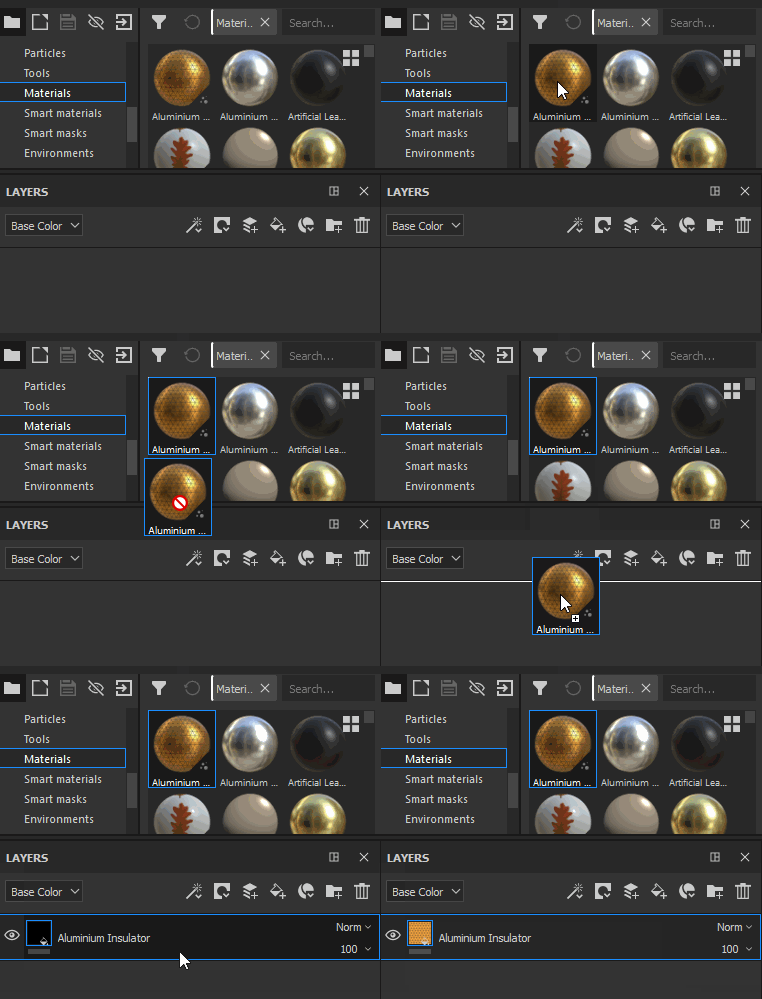
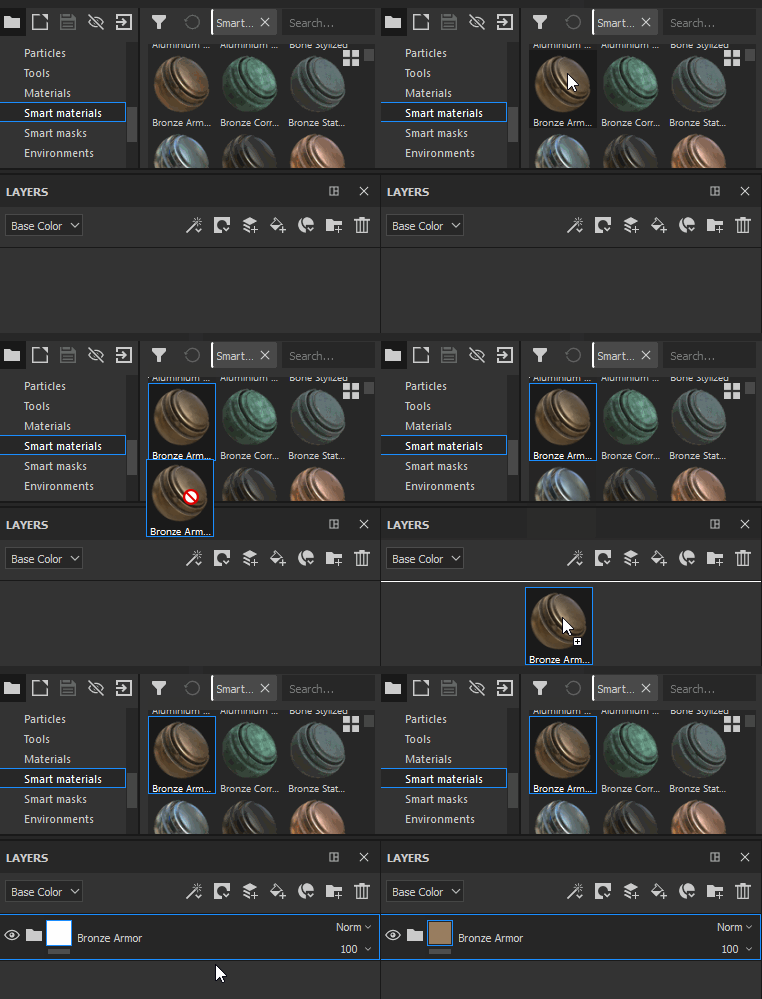
Drag and dropping resources from the asset panel can be a way of creating layers as well.
|
Action |
Demonstration |
|---|---|
|
Drag a Material from the Asset panel into the Layer Stack |

|
|
Drag a Smart Material from the Asset Panel into the Layer Stack |

|
|
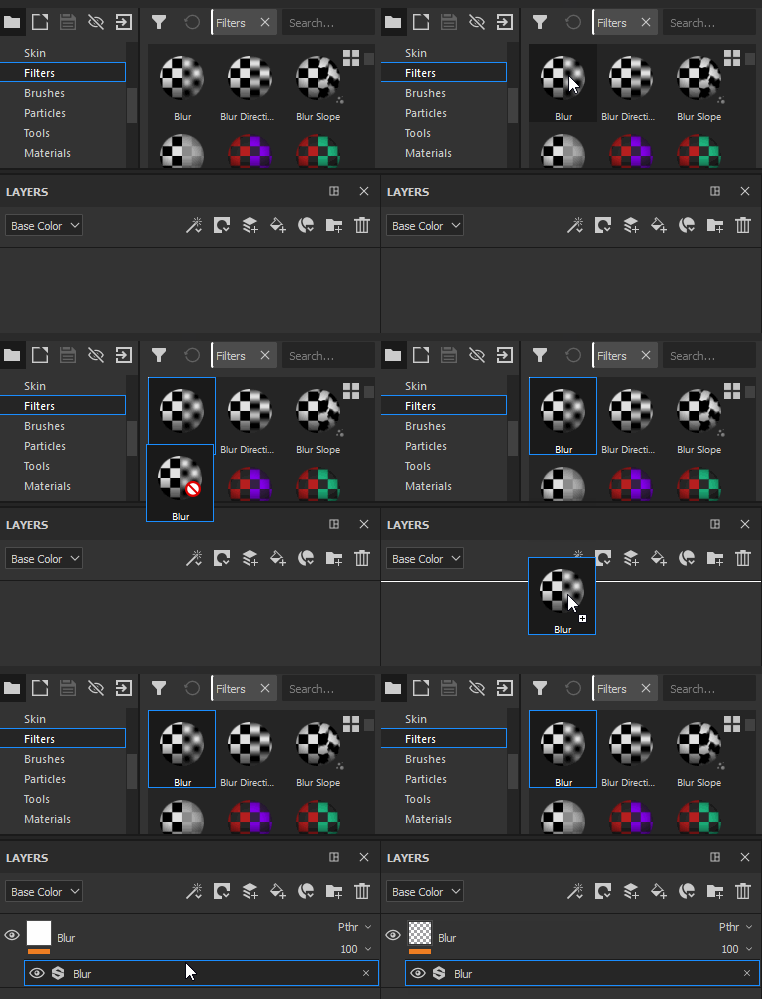
Drag Effects from the Asset panel into the Layer Stack |

|
Masks and effects
Masking
Possible operations on masks:
- You can visualize the mask itself with Alt + Left click its thumbnail. It will switch the viewport to an isolated view of the mask from this layer. This operation is also available via the viewer settings.
- You can disable a mask with Shift + Left click its thumbnail. Redo the same operation to re-enable it. This operation is also available via the right-click menu ("toggle mask").
- You can copy the content of a mask to another mask with Right click > Copy mask content over the thumbnail and then using Right-click > Paste into mask on the thumbnail of the second mask.
- You can invert the background of the mask by using Right-click > Invert mask background. This is useful if you want to avoid destroying the effects attached to a mask.
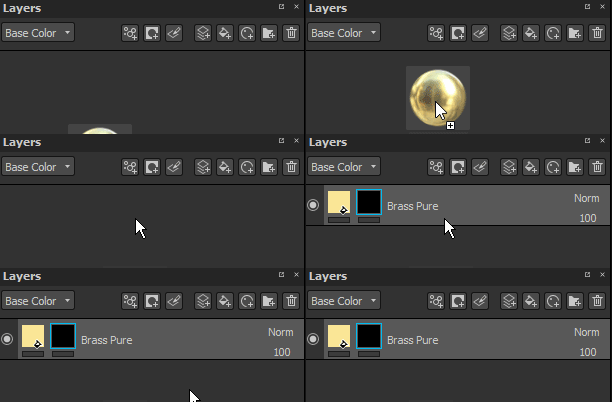
It is possible to immediately create a mask when creating a fill layer (via drag-and-drop) if the Ctrl key is pressed:

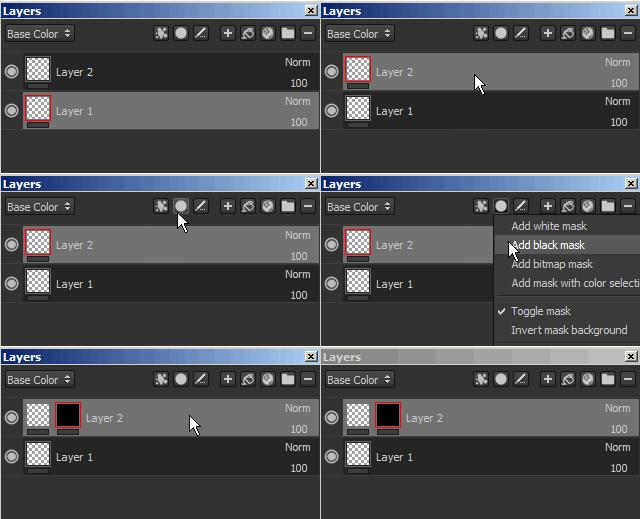
Layers can be masked to display content only on specific parts of the texture. The mask works as an intensity parameter over the content of the layer. A mask on a layer is always in grayscale, no matter what content you use to paint over it (therefore any color will be converted to a grayscale value before being painted).
You can add a mask by using the right-click menu or by using the dedicated button.

Adding a mask or removing it will destroy the previous mask and all the effects attached to it.
Effects
Effects are special operations that can be edited at any time. They can be placed either on a mask or on the content of a layer.
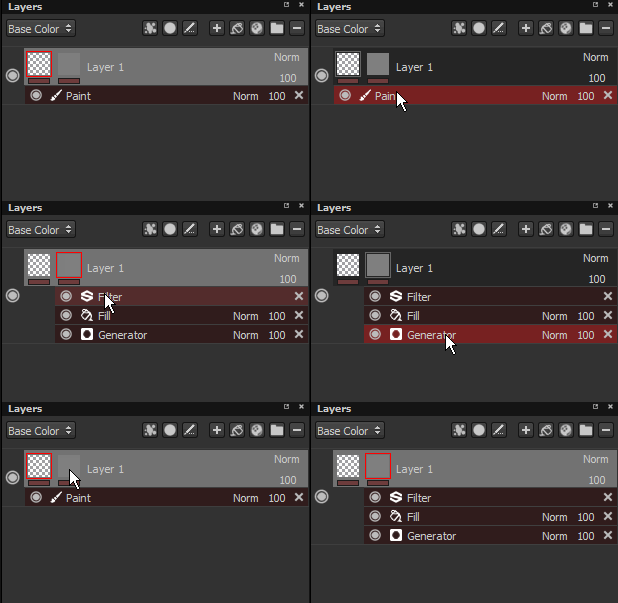

The line under each thumbnail on a layer indicates if effects exist. Gray equals no effects, red equals at least one effect. There is an effect stack per mask and per content.
For more information, see the Effects page.
Smart Masks
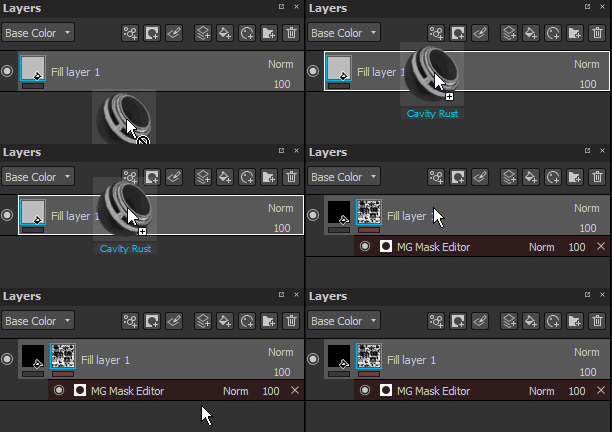

Smart masks are a way to save a mask and its effect to easily reuse them on other layers or in other projects. To create a Smart mask, right-click over a mask and choose Create smart mask.
When you drag-and-drop a Smart mask onto a layer, a black mask will be created if it doesn't exist.
Otherwise, the effects list will be merged with the existing one. It is possible to overwrite the effect list by keeping Ctrl pressed when dropping the Smart mask.
What's Next?
We've got you covered on how to use the layer stack of Substance 3D Painter. Next, you can learn about baking the maps to speed up your texturing workflow.
Have a question or an idea?
If you have a question to ask, come and participate in the Substance 3D Painter community. We would love to hear from you.
You can also share your ideas of new features with us!