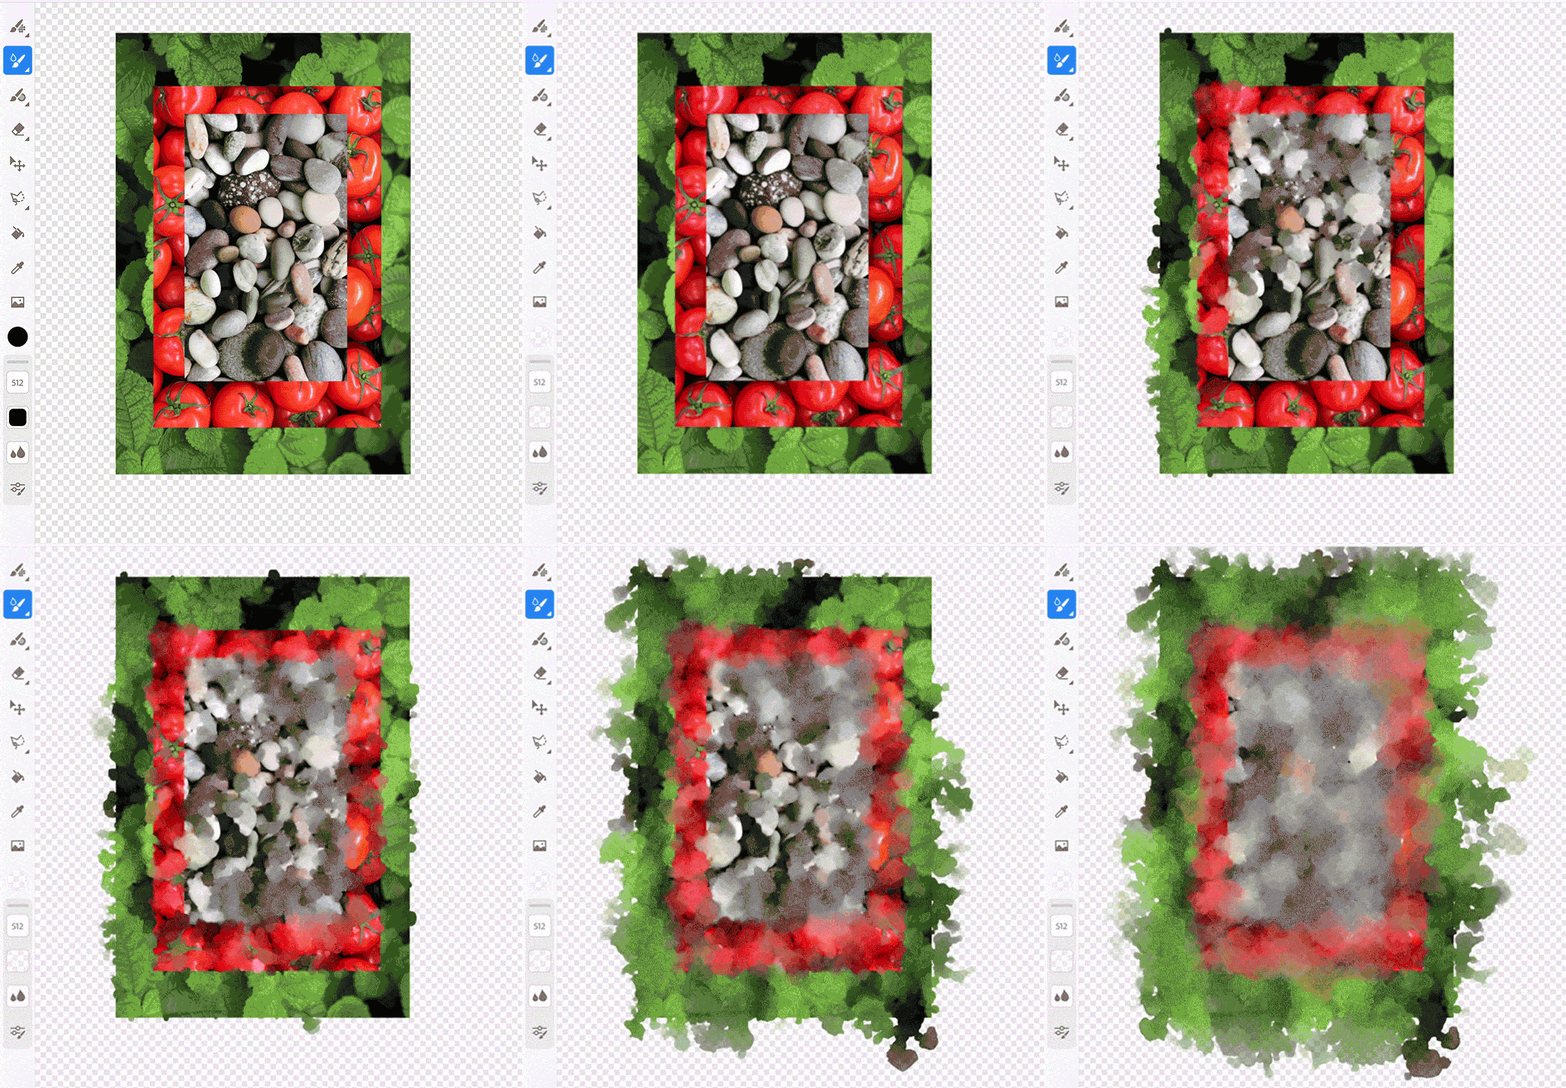
In Fresco, import the image you want to use for creating tie-dye designs.
- Adobe Fresco User Guide
- Introduction
- What's New in Adobe Fresco
- What is Adobe Fresco
- System Requirements for Adobe Fresco
- Release Notes for Adobe Fresco
- Adobe Fresco on the iPhone
- Keyboard shortcuts
- Accessibility in Fresco
- Adobe Fresco | Common questions
- Get started with the user interface
- Upgrade to a premium plan to access premium fonts
- Storage for Adobe Fresco
- Supported features on iPad and Windows devices
- Content authenticity (not available in mainland China)
- Draw, paint, animate, and share
- Layers
- Drawing aids in Adobe Fresco
- Basic shapes in Adobe Fresco
- Load basic shapes as selections
- Brushes overview in Adobe Fresco
- Pixel brushes
- Live brushes
- Vector brushes
- Mixer brushes
- Ribbon brushes
- Adjust pressure curve on stylus
- Colors
- Paint inside boundaries
- Apply motion to artwork
- Free Transform tool
- Magic Wand tool
- Pose tool
- Smudge tool
- Liquify tool
- Add and modify text
- Elements
- Publish, export, and share
- Layer masks
- Access Creative Cloud libraries in Fresco
- Ruler
- Erasers
- Add your own font
- Grids alignment
- Symmetry
- Adobe Fresco and Creative Cloud apps
- Cloud documents
- Troubleshooting
- Examples, ideas, and inspiration
Learn how to create digital tie-dye wash effects for fabric designs using Fresco's Live brushes.
With Fresco’s unique watercolor abilities and Live brushes, you can combine vibrant images to create tie-dye wash effects in Fresco and apply them on a sample design in Photoshop.


To get started on this creative design journey, all you need is:
- Fresco to create tie-dye designs and some vibrant images to experiment with.
- Photoshop to apply these designs on a sample image.
Create and export tie-dye wash effects
-
Import images Import images -
Tap
 on the task bar to access the Merge down option and use it to merge the layers of the imported image. This option automatically converts the layers to pixel layers.
Merge layers Merge layers -
From the available Live brushes, choose Watercolor Wet Spatter and set the following options:
- Color Opacity: 0.
- Flow: maximum.
- Brush size: choose a size that works the best.

Using Live brushes on an image 
Using Live brushes on an image -
Use watercolor live brush to paint over the image. Your design is now ready in Fresco!
Go ahead and share it with others!
-
To open this design in other CC apps for further use, export it to Creative Cloud.
Apply tie-dye wash effects on images in Photoshop
-
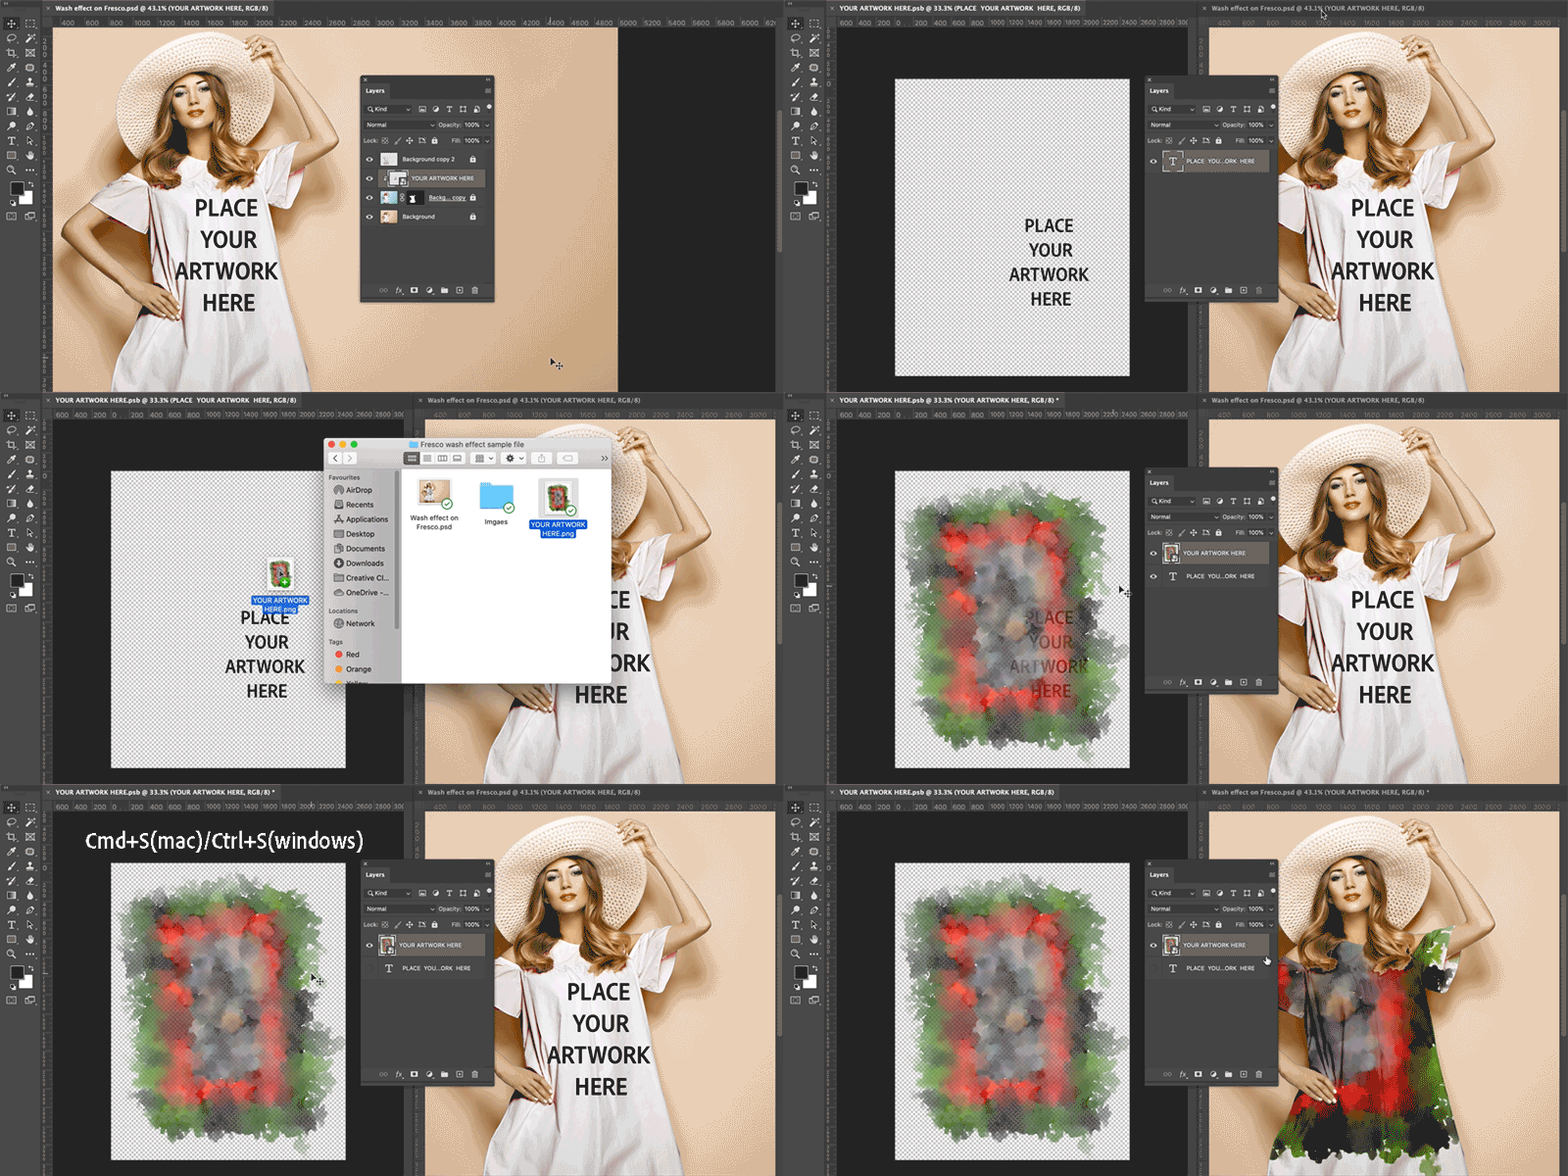
Open the sample file provided below in Photoshop to apply the tie-dye design created in Fresco.
-
In the Layers panel of Photoshop, double-click the smart object thumbnail, PLACE YOUR ARTWORK HERE. This opens the new Smart Object Layers window.
-
Now, drag-and-drop your tie-dye artwork onto the layer and save the changes. Your Photoshop sample file is automatically updated with the tie-dye design and ready for use.

Apply tie-dye wash effects on a sample image in Photoshop 
Apply tie-dye wash effects on a sample image in Photoshop
Join our community to connect, learn, and engage


For inspiration, expert tips, and solutions to common issues, visit the Adobe Fresco Community forum. Connect with our team and fellow users to exchange ideas, share your creations, stay updated with the latest features and announcements, and provide feedback.

