After Effects overlays the displacement map layer on top of the effect layer (the layer you’re distorting). If the dimensions of the displacement map are different from the dimensions of the effect layer, you can specify whether the map is centered, or stretched to fit.
- After Effects User Guide
- Beta releases
- Getting started
- Workspaces
- Projects and compositions
- Importing footage
- Preparing and importing still images
- Importing from After Effects and Adobe Premiere Pro
- Importing and interpreting video and audio
- Preparing and importing 3D image files
- Importing and interpreting footage items
- Import SVG files
- Working with footage items
- Detect edit points using Scene Edit Detection
- XMP metadata
- Text and Graphics
- Text
- Motion Graphics
- Work with Motion Graphics templates in After Effects
- Use expressions to create drop-down lists in Motion Graphics templates
- Work with Essential Properties to create Motion Graphics templates
- Replace images and videos in Motion Graphics templates and Essential Properties
- Animate faster and easier using the Properties panel
- Variable Font Axes
- Drawing, Painting, and Paths
- Overview of shape layers, paths, and vector graphics
- Paint tools: Brush, Clone Stamp, and Eraser
- Taper shape strokes
- Shape attributes, paint operations, and path operations for shape layers
- Use Offset Paths shape effect to alter shapes
- Creating shapes
- Create masks
- Remove objects from your videos with the Content-Aware Fill panel
- Roto Brush and Refine Matte
- AI-powered Object Matte
- Create Nulls for Positional Properties and Paths
- Layers, Markers, and Camera
- Animation, Keyframes, Motion Tracking, and Keying
- Animation
- Keyframe
- Motion tracking
- Keying
- Transparency and Compositing
- Adjusting color
- Effects and Animation Presets
- Effects and animation presets overview
- Effect list
- Effect Manager
- Simulation effects
- Stylize effects
- Audio effects
- Distort effects
- Perspective effects
- Channel effects
- Generate effects
- Time effects
- Transition effects
- The Rolling Shutter Repair effect
- Blur and Sharpen effects
- 3D Channel effects
- Utility effects
- Matte effects
- Noise and Grain effects
- Detail-preserving Upscale effect
- Obsolete effects
- Cycore plugins
- Expressions and Automation
- Expressions
- Expression basics
- Understanding the expression language
- Using expression controls
- Syntax differences between the JavaScript and Legacy ExtendScript expression engines
- Editing expressions
- Expression errors
- Using the Expressions editor
- Use expressions to edit and access text properties
- Expression language reference
- Expression examples
- Automation
- Expressions
- Immersive video, VR, and 3D
- Construct VR environments in After Effects
- Apply immersive video effects
- Compositing tools for VR/360 videos
- Advanced 3D Renderer
- Import and add 3D models to your composition
- Import 3D models from Creative Cloud Libraries
- Create parametric meshes
- Image-Based Lighting
- Animated Environment Lights
- Enable lights to cast shadows
- Extract and animate lights and cameras from 3D models
- Tracking 3D camera movement
- Adjust Default Camera Settings for 3D compositions
- Cast and accept shadows
- Embedded 3D model animations
- Shadow Catcher
- 3D depth data extraction
- Enable in‑engine Depth of Field in Advanced 3D
- Modify materials properties of a 3D layer
- Apply Substance 3D materials
- Work in 3D Design Space
- 3D Transform Gizmos
- Single 3D Gizmo for multiple 3D layers
- Do more with 3D animation
- Preview changes to 3D designs real time with the Mercury 3D engine
- Stereoscopic 3D in After Effects
- Add responsive design to your graphics
- Views and Previews
- Rendering and Exporting
- Basics of rendering and exporting
- H.264 Encoding in After Effects
- Export an After Effects project as an Adobe Premiere Pro project
- Converting movies
- Multi-frame rendering
- Automated rendering and network rendering
- Rendering and exporting still images and still-image sequences
- Using the GoPro CineForm codec in After Effects
- Working with other applications
- Collaboration: Frame.io, and Team Projects
- Memory, storage, performance
- Knowledge Base
Third-party effects in this category included with After Effects are CC Force Motion Blur, CC Time Blend, CC Time Blend FX, and CC Wide Time effect. See Third-party plug-ins included with After Effects.
Echo effect
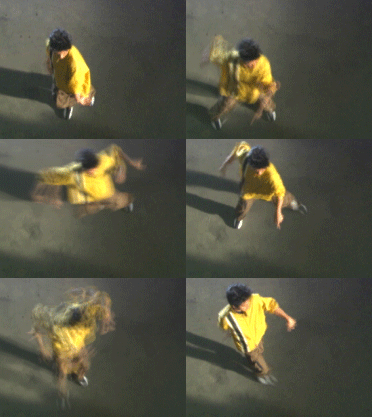
The Echo effect combines frames from different times in a layer. The Echo effect has various uses, from a simple visual echo to streaking and smearing effects.
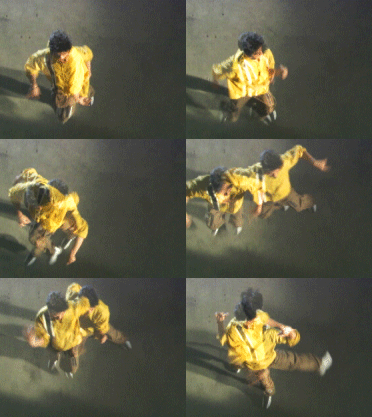

The results of this effect are visible only if the layer contains change across time, such as motion in a layer based on a video footage item. This effect does not create echoes of motion created by moving the layer itself within the composition. To create echoes of motion created by moving the layer within the composition, precompose the layer, move all attributes into the new composition, and apply the Echo effect to the precomposition layer.
This effect works with 8-bpc, 16-bpc, and 32-bpc colors.
Echo Time (seconds)
The time, in seconds, between echoes. Negative values create echoes from previous frames; positive values create echoes from upcoming frames.
Number of Echoes
The number of echoes. For example, if the value is 2, the result is a combination of three frames: the current time, the current time + Echo Time, and the current time + (2 * Echo Time).
Starting Intensity
The opacity of the first image in the echo sequence.
Decay
The ratio of the opacity of an echo to the opacity of the echo preceding it in the echo sequence. For example, if Decay is 0.5, then the opacity of the first echo is half of the Starting Intensity; the second echo is half of that or one-quarter of the Starting Intensity.
Echo Operator
The blending operation used to combine the echoes.
- Add: Combines the echoes by adding their pixel values. If the starting intensity is too high, this mode can quickly overload and produce streaks of white.
- Maximum: Combines the echoes by taking the maximum pixel values from all of the echoes.
- Minimum: Combines the echoes by taking the minimum pixel values from all of the echoes.
- Screen: Emulates combining the echoes by sandwiching them optically. This mode is similar to Add, but it doesn’t overload as quickly.
- Composite In Back: Causes the image from the current time to appear in the back, with each echo appearing successively farther forward in the composite.
- Composite In Front: Causes the image from the current time to appear in front, with each echo appearing successively farther back in the composite.
- Blend: Averages the echoes.
Pixel Motion Blur | CC
Computer-generated motion or sped-up footage often looks artificial because the motion blur is missing. The Pixel Motion Blur effect analyzes the video footage and synthesizes a motion blur based on motion vectors. Adding a motion blur makes the motion more realistic, as it includes the blur normally introduced by the camera while shooting.
Shutter Control
Choose Manual to set Shutter Angle and Shutter Samples values independently. Choose Automatic, to choose values specified for the layer or composition.
Shutter Angle
The shutter angle is measured in degrees, simulating the exposure allowed by a rotating shutter. The shutter angle uses the footage frame rate to determine the simulated exposure, which affects the amount of pixel motion blur. For example, entering 90° (25% of 360°) for 24-fps footage creates an effective exposure of 1/96 of a second (25% of 1/24 of a second). Entering 1° applies almost no pixel motion blur, and entering 720° applies a large amount of blur.
Shutter Samples
Controls the quality of the pixel motion blur. A higher value results in a smoother motion blur, but a longer rendering time.
Vector Detail
Determines how many motion vectors are used to calculate the blur. A value of 100 uses one vector for each pixel. Increasing this value may not necessarily produce better results, but will take more time to render.
Posterize Time effect
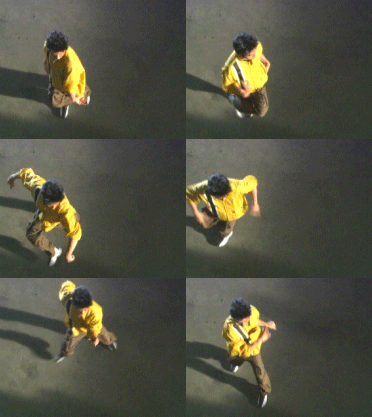

The Posterize Time effect locks a layer to a specific frame rate. It’s useful on its own as a special effect, but it also has more subtle uses. For example, 60-field-per-second video footage can be locked to 24 frames per second (and then field rendered at 60 fields per second) to give a filmlike look. Also, nested compositions can be locked to a given frame rate. This effect is sometimes called Strobe in hardware devices.
Animating the value of the Frame Rate slider can give unpredictable results. For this reason, the only interpolation method allowed for the frame rate is Hold.
This effect works with 8-bpc, 16-bpc, and 32-bpc color.
Another way to accomplish much the same result as applying the Posterize Time effect to a layer is to precompose the layer, change the frame rate for the precomposition in the Composition Settings dialog box, and set the Preserve frame rate when nested or in render queue for the precomposition on the Advanced tab. This method causes the precomposition to retain its own frame rate, and not inherit those settings from the containing composition.
Time Difference effect
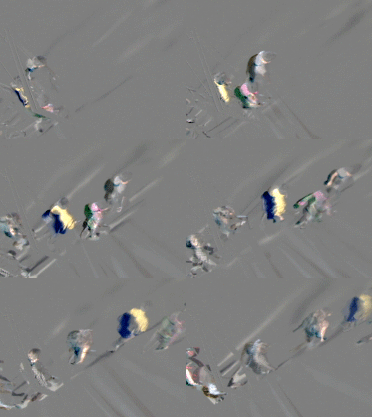

The Time Difference effect calculates the color difference between two layers and is a useful aid in color correction; use it to extract color differences when matching a clean background plate with foreground footage. It’s also good for creating mattes to be used to apply trails of smoke, fire, or echo effects. After you apply the Time Difference effect to locate color differences in the footage, you can use Color Correction effects to apply the color corrections.
This effect works with 8-bpc color.
Use Time Difference with Particle Playground to shed particles only from moving sections.
Target
Specifies the layer to be compared to the effect layer. The video switch for the comparison layer doesn’t need to be on (unless you select the source layer as the Target).
Time Offset
The relative time in the comparison layer, in seconds, where the layers are compared. If this control is set to 0.00, the comparison occurs at the current time. To compare the effect layer to a point 3 seconds into the comparison layer, for example, change the Time Offset value to 3. When you select the underlined offset value, you can enter the specific frame-offset value in the format frames/frame rate. After Effects automatically calculates the value. For example, enter 3/30 to offset three frames forward in a 30-fps composition. The calculated value is 0.1, or 10% of the total time.
Contrast
Adjusts the comparison result. This control can be especially helpful in fine-tuning color corrections.
Absolute Difference
Displays the result of the comparison as an absolute value. Any area of the comparison layer that isn’t different from the effect layer is represented by black, and any amount of difference is represented as brighter than black. If this option is deselected, compared areas with no difference are represented as gray.
Alpha Channel
Specifies how the alpha channel is calculated.
- Original: Uses the alpha channel of the effect layer.
- Target: Uses the alpha channel of the target layer.
- Blend: Blends the alpha channels of the target layer and the effect layer.
- Max: Uses the more opaque of the alpha channels.
- Full On: Sets the alpha channel to opaque.
- Lightness Of Result: Uses the lightness of the RGB difference as alpha.
- Max Of Result: Uses the highest values of the RGB difference as alpha.
- Alpha Difference: Calculates differences in the alpha channels of the effect layer and target layer in the same way in which RGB difference is calculated.
- Alpha Difference Only: Calculates only the differences in the alpha channels. RGB is set to white.
Time Displacement effect
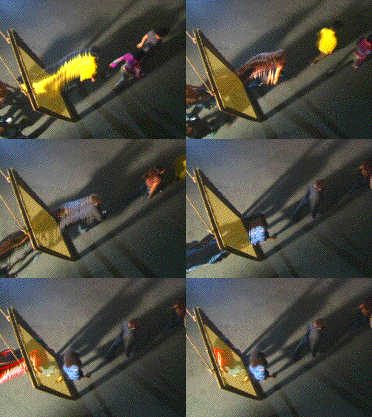


The Time Displacement effect distorts the image by shifting pixels across time, producing a wide variety of effects. For example, the traditional slit-scan technique, which captures different stages of a moving image across time, can be simulated using the Time Displacement effect.
This effect works with 8-bpc and 16-bpc color.
After applying the Time Displacement effect, any masks on the same layer will be ignored. To mask the layer, precompose it after applying the effect using the Move All Attributes into the New Composition option.
Like the Displacement Map effect, the Time Displacement effect uses a displacement map, but it bases the movement of pixels in the layer on luminance values in the map. Pixels in the layer that correspond to bright areas in the displacement map are replaced by pixels in the same position but at a specified number of seconds forward in time. Likewise, pixels in the layer that correspond to dark areas in the displacement map are replaced by pixels at a specified number of seconds backward in time. You can use any layer as a displacement map, though using a grayscale image lets you more easily see brightness levels and predict how pixels will be displaced.
The Time Displacement effect automatically replaces pixels across time without keyframes or expressions. However, you can animate other properties to vary the effect over time.
To better understand how pixels are displaced in time, think of the displacement occurring in steps.
-
-
You specify a maximum displacement amount, in seconds.
-
After Effect uses the luminance value of each pixel in the displacement map to calculate the displacement of the corresponding pixel in the effect layer, based on the maximum displacement amount.
In grayscale images, the luminance value range extends from 0 to 255, and it’s converted to a scale ranging from -1 to 1. A luminance value of 0 produces maximum backward displacement, meaning that pixels at the current time are replaced by pixels from a previous time. A luminance value of 255 produces maximum positive displacement, meaning that pixels at the current time are replaced by pixels at a future time. A luminance value of 128 produces no displacement. For other values in grayscale displacement maps, you can calculate the displacement amount, in seconds, using the following equation:
Displacement amount in seconds = maximum_displacement_time * (2 * (luminance_value – 128) / 256)
-
After Effects displaces each pixel in the image by replacing a pixel in the image at the current time with the pixel in the same position at another time. The other time is the displacement amount in seconds for the pixel, calculated in step 3.
Suppose you specified 2 seconds as the maximum time displacement. After Effects finds the luminance value of each pixel in the displacement map, and then it replaces the corresponding pixels at the current time with pixels from another time based on the maximum time of 2 seconds. A luminance value of 255 in the displacement map replaces that pixel with the pixel 2 seconds ahead in the same position. A luminance value of 42 replaces that pixel with the pixel 1.34 seconds behind in the same position.
Time Displacement Layer
Specifies the layer to use as the displacement map.
Max Displacement Time (sec)
Sets the maximum time, in seconds, from which pixels are replaced, before or after the current time. Only luminance values of 0 or 255 (maximum darkness and maximum brightness) produce the maximum time displacement. All other luminance values produce time displacements of less than the maximum time.
Time Resolution (fps)
Sets the number of frames per second in which to replace pixels. Typically, this value shouldn’t be greater than the frame rate of the affected layer. Increasing Time Resolution can greatly increase rendering time.
Stretch Map To Fit
Resizes the Time Displacement Layer to match the dimensions of the layer you’re distorting. If this option isn’t selected, the time displacement layer is centered in the composition.
Apply the Time Displacement effect
-
In the Composition panel, display both the layer you want to distort and the displacement map layer.
-
Hide the displacement map layer by selecting the video switch in the Timeline panel.
-
In the Composition panel, select the layer you want to distort.
-
Choose Effect > Time > Time Displacement.
-
Choose a displacement map from the Time Displacement Layer menu, which lists all layers in the composition. Grayscale maps are recommended.
NoteAfter Effects uses the layer you select in its original form without any masking, effects, or transformations you may have applied. If you want to use the layer with those alterations included in the displacement map, precompose that layer using the Move All Attributes into the New Composition option.
-
Adjust the Time Displacement controls.
Timewarp effect

The Timewarp effect gives you precise control over a wide range of parameters when changing the playback speed of a layer, including interpolation methods, motion blur, and source cropping to eliminate unwanted artifacts. You can use the Timewarp effect to create simple slow-motion or fast-motion results or more complex retiming. The Timewarp effect works independently of the Frame Blending switch in the Timeline panel.
- After applying the Timewarp effect, any masks on the same layer will be ignored. To mask the layer, precompose it after applying the effect using the Move All Attributes into the New Composition option.
- The Timewarp effect does not work on fields for interlaced footage. To use the Timewarp effect on a layer with an interlaced footage item as its source, double the frame rate in the composition settings. When you render to the final output, modify your render settings in the Render Queue panel to set the frame rate appropriate for the output type.
The Timewarp effect is based on Kronos, a component of the Furnace software package from The Foundry. For detailed documentation on motion vectors and motion estimation parameters, see the Furnace documentation (in PDF) on the Foundry website.
This effect works with 8-bpc and 16-bpc color. In After Effects CS6, this effect works in 32-bit color.
You can use the Timewarp effect to add motion blur within a video layer without changing the layer’s speed. Apply the Timewarp effect, set Speed to 100, enable motion blur within the effect, and use the manual shutter control features to adjust the motion blur.
Method
When changing frame rates, image information must be created (interpolated) for the frames that lie between the original frames of an image. The Method setting determines how interpolated frames are generated.
- Whole Frames: Duplicates the last frame shown.
- Frame Mix: Creates a new frame by blending existing frames.
- Pixel Motion: Creates a new frame by analyzing the pixel movement in nearby frames and creating motion vectors. Motion vectors represent the movement of a pixel or block of pixels from one frame to the next. Images between frames are interpolated using these vectors.
Adjust Time By controls
Choose Speed to specify a time adjustment as a percentage. Choose Source Frame to specify a time adjustment by identifying which source frame is to play at what time. If you choose Source Frame for Adjust Time By, then you must animate the Source Frame property to do anything other than freeze on one frame. You can animate the Speed property, too, to change the time-remapping factor over time.
By default, Speed is set to 50, for a reduction in speed to 50%. This setting creates new frames one-quarter of a frame interval and three-quarters of a frame interval from an original frame, rather than using one original frame and one newly generated frame. Original frames are deliberately excluded from the time-remapped series of frames to avoid the pulsing that would otherwise be seen on every other frame for a half-speed slowdown.
Tuning controls for Pixel Motion interpolation
- Vector Details: Determines how many motion vectors are used during interpolation. The more vectors used, the longer the rendering time. A value of 100 produces one vector per pixel. If the layer has fast-moving motion, it may look better with a lower Vector Details setting.
Smoothing
These controls affect the sharpness of the image:
- Build From One Image: Generates the final output from the closest single frame, as opposed to the closest two frames. The result is a sharper image but jerkier motion.
- Correct Luminance Changes: Equalizes the luminance between frames before calculating motion.
- Filtering: The quality of the filtering used to build the interpolated image. Extreme greatly increases rendering time. The Filtering option affects only the sharpness of the final image; use Normal until you’re ready for final rendering.
Error Threshold
Determines the precision of pixel matching from one frame to the next. A higher value results in fewer motion vectors and more blending.
If you see edge tearing in the image, try increasing the Error Threshold for more blending. If the image has heavy grain, try decreasing the Error Threshold, so the low-level motion of the grain is ignored.
Block Size
Adjusts the size of the blocks used to calculate the vectors.
Weighting
Controls the weighting of the red, green, and blue channels in calculations used to analyze the image. For example, setting Red Weight and Green Weight to zero means that only the blue channel is analyzed for motion.
Motion Blur controls
- Shutter Angle: Determines the intensity of motion blur. The shutter angle is measured in degrees, simulating the exposure caused by a rotating shutter. Simulated exposure time is determined by dividing the shutter angle by the frame rate times 360°. For example, a shutter angle of 90° causes an exposure of 1/96 of a second per frame: 90° / (360° * 24 fps).
- Shutter Samples: Controls the quality of the motion blur. A higher value results in a smoother motion blur.
Matte Layer
The layer to use as a matte for defining the foreground and background areas of the image. White areas in the matte represent the foreground, black areas represent the background, and gray attenuates between foreground and background.
Matte Channel
The channel to use as a matte.
Warp Layer
Allows you to warp the layer to which the effect is applied by applying the motion vectors from the layer that you choose.
Show
Controls the portion of the layer to be time-remapped.
Source Crops
If the image contains unwanted pixels or artifacts at the edges, use Source Crops controls to specify image boundaries. Pixels from the boundaries are repeated to fill the area beyond the boundaries to the edges of the layer.