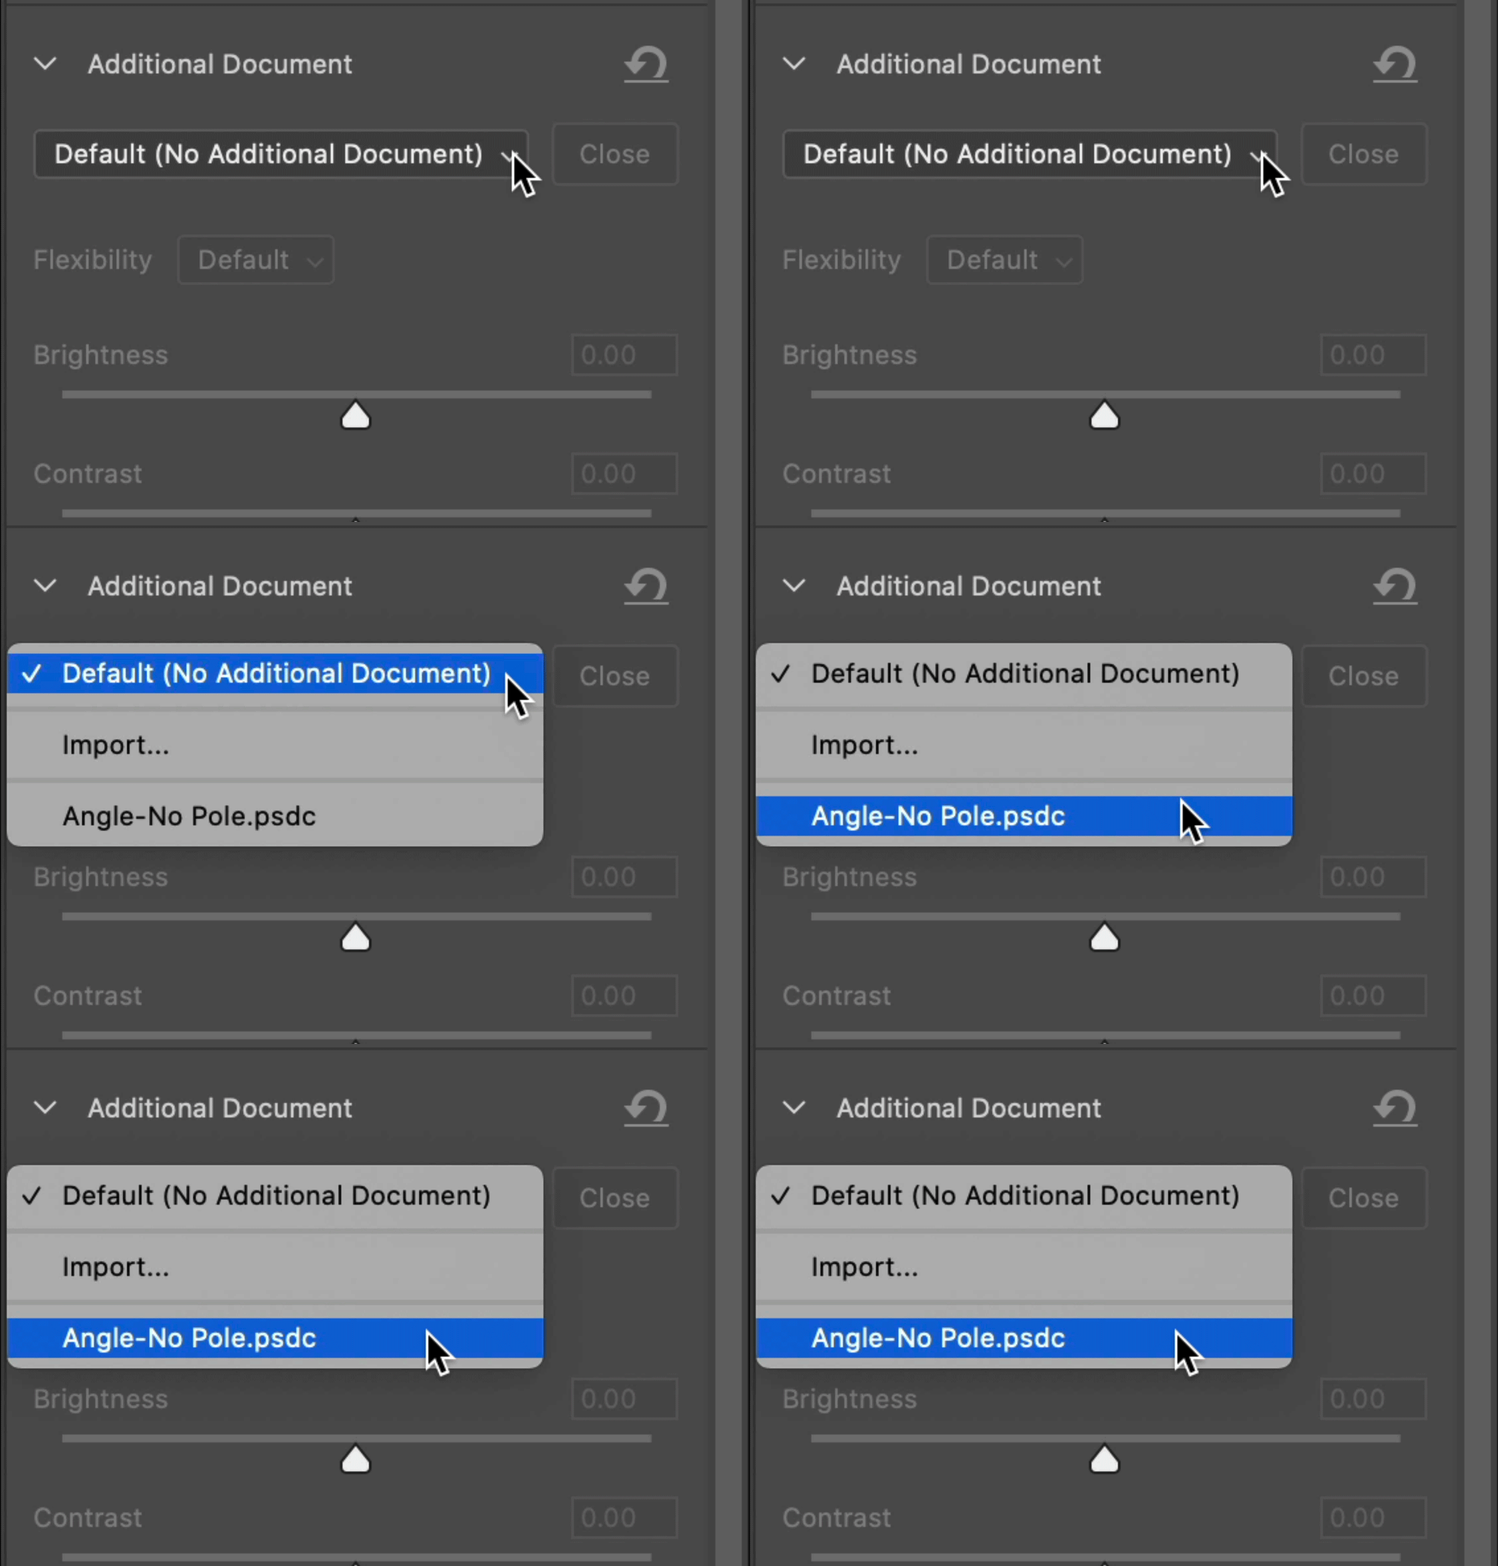
Click the Additional Document section to reveal the options
Learn to use Multi-Image Content-Aware Fill to seamlessly fill selected portions of an image with content sampled from a similar image
Try Photoshop (Beta)'s features today!
Beta features are now available for development, testing, and feedback in Photoshop (Beta) desktop app.
To install Photoshop (Beta), visit the Beta apps tab of your Creative Cloud desktop app and select Install next to Photoshop (Beta).
For more help, please visit the Adobe Photoshop beta community.


Topics in this article:
In Photoshop, Content-Aware Fill (CAF) allows you to easily fill an area of your image with new information based on the surrounding image areas. You can use this to remove unwanted objects or distracting elements from your images.


To learn more about the Content-Aware Fill workspace, see Remove objects from your photos with Content-Aware Fill.
Use a second image to fill the area
You can use another similar image as the pixel source for your area. This is helpful if you have multiple shots of the same scene and want to remove people or cars passing through your photos or an object in the way of your perfect angle.
Choose the additional document
Select an open document from the list or use Import… to bring in another file. Photoshop will automatically choose the pixels to complete the main image.
-
-
Click the Additional Document pop-up list.
-
Choose an open file from the list or choose Import…
- The Sampling Area (green overlay) and Sampling Brush tool are disabled when using Multi-Image Content-Aware Fill.
- If you had a custom sampling area that you had painted in, it will be thrown out.
- For best results, the main and additional images can be from cameras that were oriented differently but should have a significant overlap of content within the region being filled. Also, the camera should not translate too far: less translation is better, but the camera should revolve less than about 10 degrees around the object being removed.


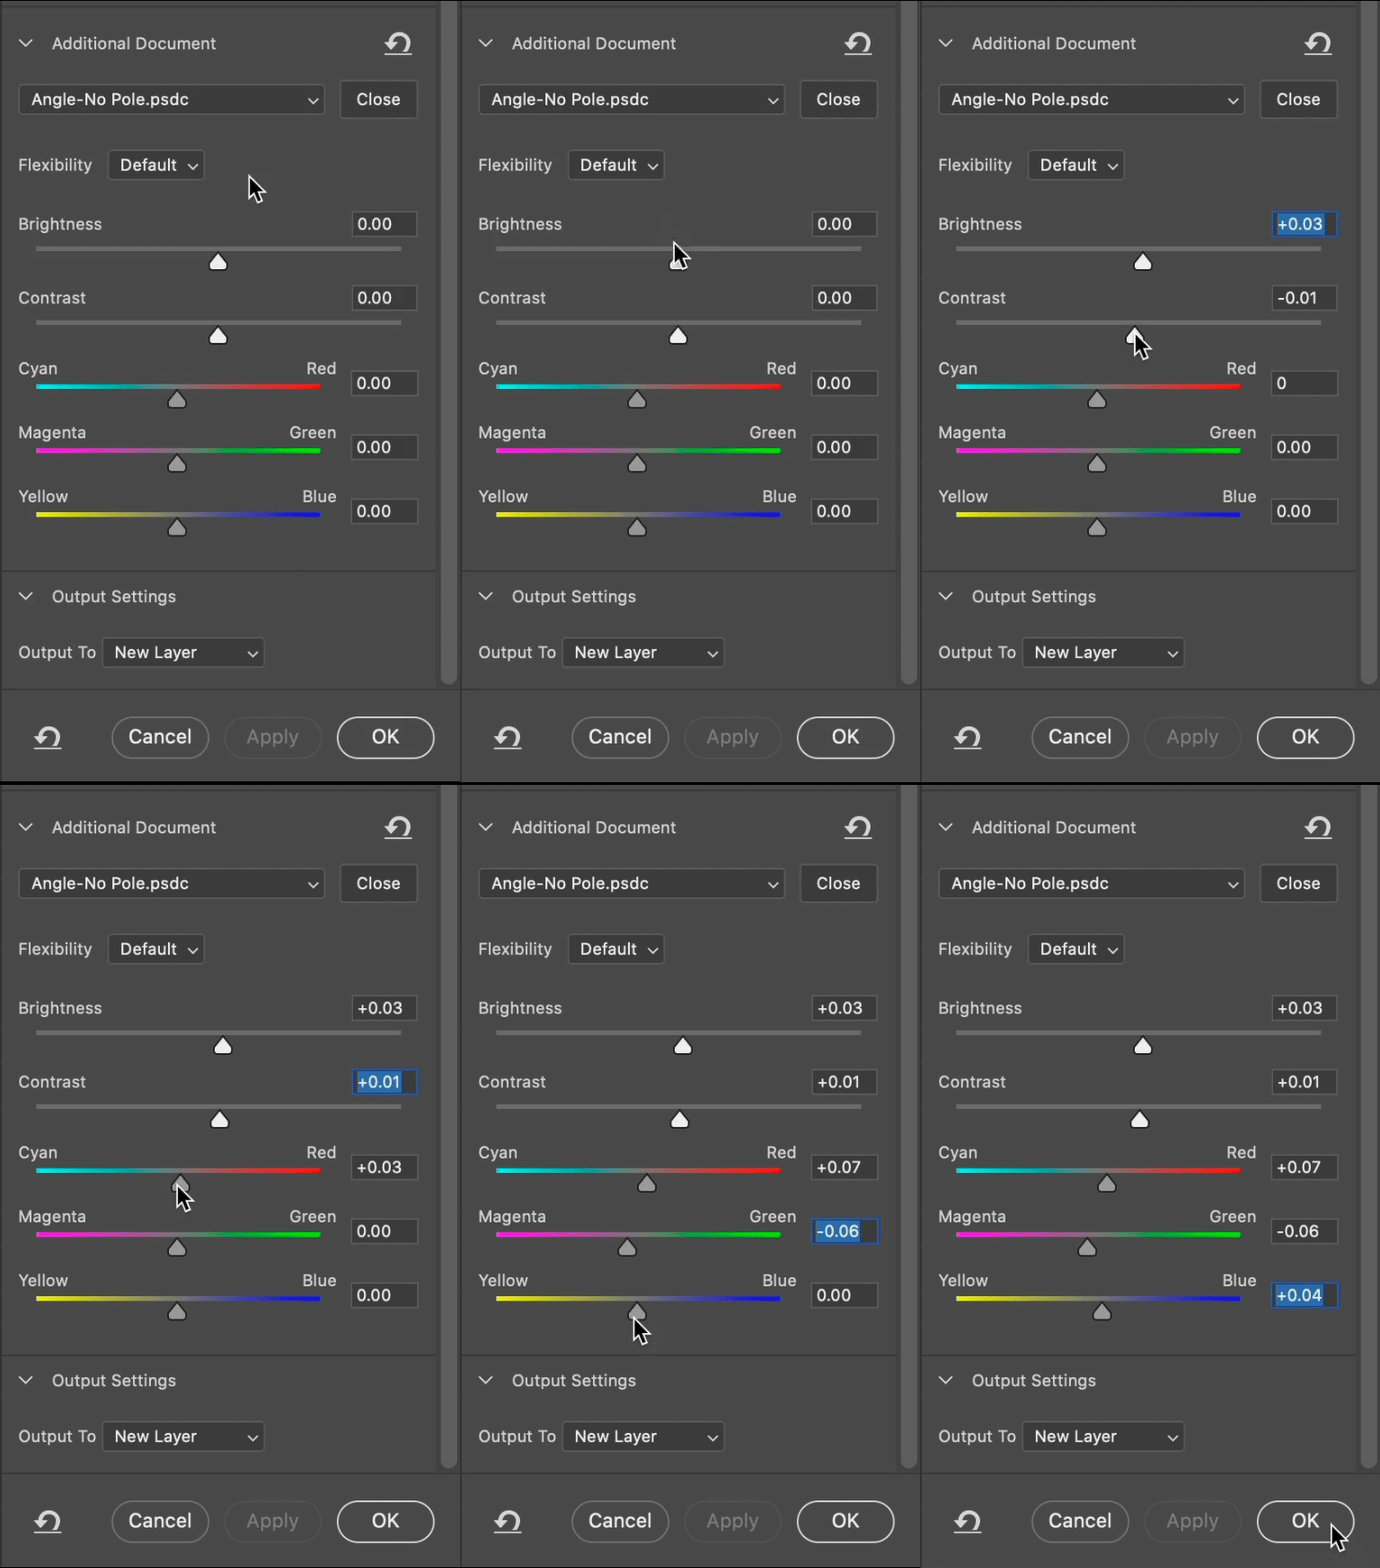
Adjust the fill pixels from the second image if they don’t match in color or brightness of the fill area.
- Flexibility: Use the Flexibility control (Off/Default/High) to allow the source pixels to be warped like putty (High) or kept static as if they were cloned (Off).
- Brightness: Adjust the lightness or darkness of the filled pixels to match the surrounding area.
- Contrast: Adjust the contrast of the filled pixels to match the surrounding area.
- Color Balance Sliders: Match the surrounding areas if needed using the color balance sliders.
Additionally, you can reset the color or brightness changes for the fill area by clicking the reset icon next to the Additional Document header.


Sometimes the fill result can be improved by identifying corresponding points between the main image and the additional image. Use the Alignment tool to identify these points.
-
Click the Alignment tool in the Content-Aware Fill workspace toolbar.
-
Drop an alignment point on the main image. The corresponding point will automatically appear on the additional image.
-
Move the point on the main or additional image until the points are in the corresponding locations for each image.
-
Repeat for up to four sets of alignment points. Each pair of points is numbered and color-coded for clarity.
Tip: It often helps to place the alignment points close to the region being removed, but distributed relatively evenly around it.
To exit the Multi-Image CAF workflow and return to the regular CAF workflow, click the Close button next to the Additional Document popup. The additional image and its results will be dismissed.
Similar to using Content-Aware Fill to expand the background or sky, Multi-Image Content-Aware Fill can be used to complete a cut-off image. See the video below to learn how to achieve this workflow.