Access Neural Filters
Navigate to Filter > Neural Filters. In the Neural Filter panel that opens, you can choose to work with any of the filters listed under All Filters.
Explore a range of creativity with Neural Filters
Topics in this article:
Neural Filters is a new workspace in Photoshop with a library of filters that dramatically reduces difficult workflows to just a few clicks using machine learning powered by Adobe Sensei. Neural Filters is a tool that empowers you to try non-destructive, generative filters and explore creative ideas in seconds. Neural Filters helps you improve your images by generating new contextual pixels that are not actually present in your original image.
Original image


Smile created using Liquify


Smile generated by Neural Filters


To see the list of all Neural filters currently available for use and learn more about them, see Neural Filters list and FAQ.
To get started, download filters from the cloud and start editing. You can find both featured and beta filters in the Neural Filters panel by clicking Filter > Neural Filters.
Inside the Neural Filters panel, you can now find all of your Neural Filters, whether featured or beta, in one place. Choose Filter > Neural Filters and select the All Filters tab. You can even cast your vote for filters you would like to see implemented in the future.
Also, you can see a list of Neural Filters that are planned for upcoming releases under Wait List in the Neural Filters panel.
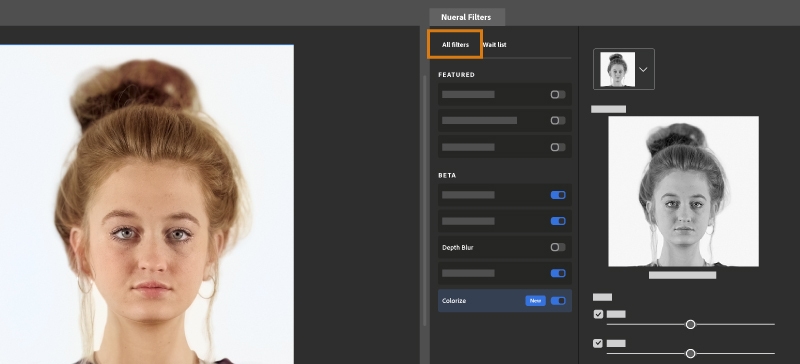

Follow these three easy steps to start working with Neural Filters in Photoshop:
Access Neural Filters
Navigate to Filter > Neural Filters. In the Neural Filter panel that opens, you can choose to work with any of the filters listed under All Filters.


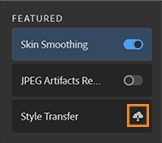
Download desired filters from the cloud
Any filter that shows a cloud icon next to it will need to be downloaded from the cloud before you can use it the first time. Simply click on the cloud icon to download each filter you plan to use.

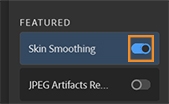
Enable and adjust the filter
Turn on the filter and use the options in the panel on the right to create the desired effect.

Portrait related filters will be grayed out if no faces are detected in the image.
There are three categories of Neural Filters in Photoshop:
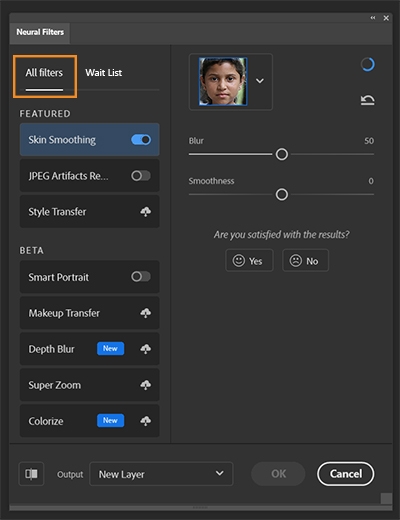

Your resulting edits are saved as output in one of the following ways:


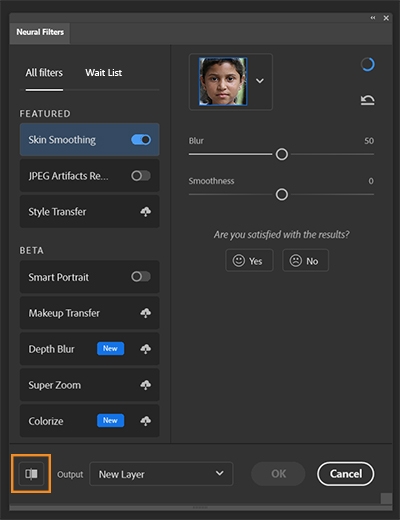
To toggle between the before and after preview for each filter, click on the preview mode icon in the lower left corner of the gallery.

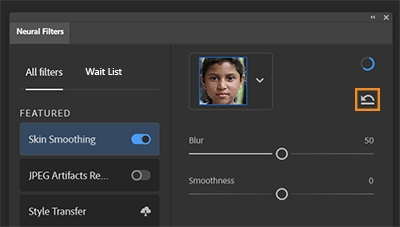
To reset the effect of any filter to its initial values, click on the icon near the upper right corner of the gallery.

Help us improve Neural Filter by sharing your feedback.
Neural Filters uses machine learning technology and the feedback you provide when encountering issues is incredibly important in helping us optimize the filters to allow you to produce the best results with your photo editing.
To learn more about sharing feedback on neural filters, check out Neural Filters feedback.


If you participate in the Photoshop Product Improvement Program, the checkbox to send us the image will automatically be checked. If you uncheck the checkbox, the image will not be sent with feedback.
Create stunning images with Photoshop
Edit, retouch, and transform photos with the industry-leading creative tools you know and love.