
To create a library template, navigate to the E-sign tab, then select Create e-sign template
Last updated on
3 Feb 2026
What's New
Get Started
- Quick start guide for administrators
- Quick start guide for users
- For Developers
- Video tutorial library
- FAQ
- Enterprise Trial
Administer
- Admin Console Overview
- User Management
- Add, edit, and review active users
- Admin Console SSO
- Create function-focused users
- Review users who haven't completed verification
- Check for users with provisioning errors
- Change Name/Email Address
- Edit a user's group membership
- Edit a user's group membership through the group interface
- Promote a user to an admin role
- User Identity Types and SSO
- Switch User Identity
- Authenticate Users with MS Azure
- Authenticate Users with Google Federation
- Product Profiles
- Login Experience
- Group management
- Account/Group Settings
- Settings Overview
- Global Settings
- Account tier and ID
- New Recipient Experience
- Self Signing Workflows
- Send in Bulk
- Web Forms
- Custom Send Workflows
- Power Automate Workflows
- Library Documents
- Collect form data with agreements
- Limited Document Visibility
- Attach a PDF copy of the signed agreement
- Include a link in the email
- Include an image in the email
- Files attached to email will be named as
- Attach audit reports to documents
- Merge multiple documents into one
- Download individual documents
- Upload a signed document
- Delegation for users in my account
- Allow external recipients to delegate
- Authority to sign
- Authority to send
- Power to add Electronic Seals
- Set a default time zone
- Set a default date format
- Users in Multiple Groups (UMG)
- Group Administrator Permissions
- Replace recipient
- Audit Report
- Transaction Footer
- In Product Messaging and Guidance
- Accessible PDFs
- PDF/A workflows
- Healthcare customer
- New request signature experience
- New custom workflow experience
- New create template experience
- Account Setup / Branding Settings
- Signature Preferences
- Well formatted signatures
- Allow recipients to sign by
- Signers can change their name
- Allow recipients to use their saved signature
- Custom Terms of Use and Consumer Disclosure
- Navigate recipients through form fields
- Restart agreement workflow
- Decline to sign
- Allow Stamps workflows
- Require signers to provide their Title or Company
- Allow signers to print and place a written signature
- Show messages when e-signing
- Require signers to use a mobile device to create their signature
- Request IP address from signers
- Exclude company name and title from participation stamps
- Apply Adaptive Signature Draw scaling
- Digital Signatures
- Electronic Seals
- Digital Identity
- Report Settings
- Enable classic Reporting
- New report experience
- Classic report settings
- Security Settings
- Single Sign-on settings
- Remember-me settings
- Login password policy
- Login password strength
- Web session duration
- PDF encryption type
- API
- User and group info access
- Allowed IP Ranges
- Account Sharing
- Account sharing permissions
- Agreement sharing controls
- Signer identity verification
- Agreement signing password
- Document password strength
- Block signers by Geolocation
- Phone Authentication
- Knowledge-Based Authentication (KBA)
- Allow page extraction
- Document link expiration
- Upload a client certificate for webhooks/callbacks
- Timestamp
- Send Settings
- Show Send page after login
- Agreement creation experiences
- Require recipient name when sending
- Lock name values for known users
- Allowed recipient roles
- Allow e-Witnesses
- In-person signing config
- Recipient groups
- CCs
- Required fields
- Attaching documents
- Field flattening
- Modify Agreements
- Remove recipients from in-flight agreements
- Agreement name
- Languages
- Private messages
- Allowed signature types
- Reminders
- Signed document password protection
- Send Agreement Notification through
- Signer identification options
- Populate form fields with identity-verified data
- Content Protection
- Enable Notarize transactions
- Document Expiration
- Preview, position signatures, and add fields
- Signing order
- Enable hybrid signature flows
- Add myself
- Send only to internal recipients
- Download agreement link
- Form field borders
- Liquid mode
- Custom workflow controls
- Upload options for the e-sign page
- Post-sign confirmation URL redirect
- Restrict access to shared agreements
- Show Send page after login
- Message Templates
- Bio-Pharma Settings
- Workflow Integration
- Notarization Settings
- Payments Integration
- Signer Messaging
- SAML Settings
- SAML Configuration
- Install Microsoft Active Directory Federation Service
- Install Okta
- Install OneLogin
- Install Oracle Identity Federation
- SAML Configuration
- Data Governance
- Time Stamp Settings
- External Archive
- Account Languages
- Email Settings
- Migrating from echosign.com to adobesign.com
- Configure Options for Recipients
- Guidance for regulatory requirements
- Accessibility
- HIPAA
- GDPR
- 21 CFR part 11 and EudraLex Annex 11
- Healthcare customers
- IVES support
- "Vaulting" agreements
- EU/UK considerations
- Download Agreements in Bulk
- Claim your domain
- Report Abuse links
- System Requirements and Limitations
User profile and configurable features
- Address Book
Send, Sign, and Manage Agreements
- Recipient Options
- Cancel an email reminder
- Options on the e-signing page
- Overview of the e-sign page
- Open to read the agreement without fields
- Decline to sign an agreement
- Delegate signing authority
- Restart the agreement
- Download a PDF of the agreement
- View the agreement history
- View the agreement messages
- Convert from an electronic to a written signature
- Convert from a written to an electronic signature
- Navigate the form fields
- Clear the data from the form fields
- E-sign page magnification and navigation
- Change the language used in the agreement tools and information
- Review the Legal Notices
- Adjust Acrobat Sign Cookie Preferences
- Send Agreements
- Send (Compose) page
- Overview of landmarks and features
- Group selector
- Adding files and templates
- Agreement name
- Global Message
- Completion Deadline
- Reminders
- Password protect the PDF
- Signature type
- Locale for the recipient
- Recipient signature order/flow
- Recipient roles
- Recipient authentication
- Private message for the recipient
- Recipient agreement access
- CC'd parties
- Identity check
- Send an agreement only to yourself
- Send an agreement to others
- Written Signatures
- Compose in-person agreement
- Recipient signing order
- Hybrid recipient workflow
- Send in Bulk
- Send (Compose) page
- Authoring fields into documents
- In-app authoring environment
- Automatic field detection
- Drag and drop fields using the authoring environment
- Assign form fields to recipients
- The Prefill role
- Apply fields with a reusable field template
- Transfer fields to a new library template
- Updated authoring environment when sending agreements
- Create forms with text tags
- Create forms using Acrobat (AcroForms)
- Fields
- Field types
- Common field types
- E-signature fields
- Initials field
- Recipient name field
- Recipient email field
- Date of signing field
- Text field
- Date field
- Number field
- Checkbox
- Checkbox group
- Radio button
- Drop-down menu
- Link overlay
- Payment field
- Attachments
- Participation stamp
- Transaction number
- Image
- Company
- Title
- Stamp
- Field content appearance
- Field validations
- Masked fields values
- Setting show/hide conditions
- Calculated fields
- Verified forms
- Field types
- Authoring FAQ
- In-app authoring environment
- Sign Agreements
- Manage Agreements
- Manage page overview
- Copy an Agreement
- Delegate agreements
- Replace Recipients
- Limit Document Visibility
- Cancel an Agreement
- Create new reminders
- Review reminders
- Cancel a reminder
- Access Power Automate flows
- More Actions...
- How search works
- View an agreement
- Create a template from an agreement
- Hide/Unhide agreements from view
- Upload a signed agreement
- Modify a sent agreement's files and fields
- Edit a recipient's authentication method
- Add or modify an expiration date
- Add a Note to the agreement
- Share an individual agreement
- Unshare an agreement
- Download an individual agreement
- Download the individual files of an agreement
- Download the Audit Report of an agreement
- Download the field content of an agreement
- Bulk actions
- Hide multiple agreements
- Digitally sign multiple agreements
- Audit Report
- Reporting and Data exports
Advanced Agreement Capabilities and Workflows
- Webforms
- Reusable Templates (Library templates)
- Manage Shared Templates
- Transfer ownership of web forms and library templates
- Power Automate Workflows
- Overview of the Power Automate integration and included entitlements
- Enable the Power Automate integration
- In-Context Actions on the Manage page
- Track Power Automate usage
- Create a new flow (Examples)
- Triggers used for flows
- Importing flows from outside Acrobat Sign
- Manage flows
- Edit flows
- Share flows
- Disable or Enable flows
- Delete flows
- Useful Templates
- Administrator only
- Agreement archival
- Webform agreement archival
- Save completed web form documents to SharePoint Library
- Save completed web form documents to OneDrive for Business
- Save completed documents to Google Drive
- Save completed web form documents to Box
- Agreement data extraction
- Agreement notifications
- Send custom email notifications with your agreement contents and signed agreement
- Get your Adobe Acrobat Sign notifications in a Teams Channel
- Get your Adobe Acrobat Sign notifications in Slack
- Get your Adobe Acrobat Sign notifications in Webex
- Agreement generation
- Generate document from Power App form and Word template, send for signature
- Generate agreement from Word template in OneDrive, and get signature
- Generate agreement for selected Excel row, send for review and signature
- Custom Send workflows
- Share users and agreements
Integrate with other products
- Acrobat Sign integrations overview
- Acrobat Sign for Salesforce
- Acrobat Sign for Microsoft
- Other Integrations
- Partner-managed integrations
- Integration keys
Acrobat Sign Developer
- REST APIs
- Webhooks
- Sandbox
Support and Troubleshooting
Use document templates to streamline workflows, reduce errors, and keep your team working with the latest version of every form.
Library templates let users create reusable, interactive documents. These templates can range from simple agreements with a single signature field, like non-disclosure agreements, to complex forms for tax filings or employee onboarding.
If you frequently use the same file to define an agreement, a template can streamline the process by speeding up document delivery, ensuring consistency in the final signed contract, and keeping your team aligned with the latest version.
Types of Templates
Library templates can be created in two ways:
- Form Field Layer templates (Acrobat Sign Solutions only) – These templates contain only the fields applied to an uploaded file. They’re ideal for organizations that generate contracts dynamically with custom content but follow a standardized format. Upload the file and apply the field layer to position all fields.
- Document templates – These templates include both the base file and predefined fields. They work best for static, boilerplate documents that don’t require dynamic content, such as tax forms, applications, and non-disclosure agreements.
The Create Template controls are available through multiple interfaces based on the service you have purchased.
Please select the version of Acrobat Sign you are using:
Create a library template
-
-
The Create e-sign Template page loads.
Drag and drop your files into the Add files section, or select the Choose files button to open the file picker panel.
If you select From Documents, a list of the available PDFs from your Documents page is displayed:
Uploading multiple files when creating a library template combines them into one template. When the template is selected, all pages from all files will be present.
Select Continue when your file is attached.
-
The field authoring environment loads.
Select the Template Properties menu and edit the name of your template in the Template Name field.
If you don’t enter a name for the template, Acrobat Sign uses the name of the first uploaded file. This name appears as the agreement name on the Compose page and as the Template Name in the selection list when you create a new agreement.
The Template Name can be edited through the template properties.Users with an Acrobat Pro - Multi-license service type also have the option to configure:
- The Template Type - Templates can be saved in two forms:
- Reusable document - This option saves the full document, content, and form fields.
- Reusable form field layer - This option saves just the form field layer to be applied to a different document (different content with the same layout).
- Both - Both types of templates will be available.
- Who can use - Templates can be reserved for only the creator to access or shared with the other users in the organization.
- The Template Type - Templates can be saved in two forms:
-
Add additional participants if you expect the form to be sent to more than two recipients during the signature cycle. (Two are automatically allocated for any new template.)
NoteThe fields are color-coded to match the colored block next to the recipient's participation number to help identify field allocation on the template.
-
The form-building environment opens, displaying any fields already present in the uploaded document.
If no fields are detected on the uploaded file, automatic field detection will attempt to identify where fields should be.
- The system attempts to assign the appropriate field type based on document content.
- If no specific field type is detected, a Text field is placed.
- All auto-placed fields are assigned to the currently selected participant.
NoteWhen using automatic field detection, you'll be prompted to review each field to verify that it's the correct field type and assigned to the correct recipient. If you anticipate using the template with more than one recipient, don't skip this step.
To manually add fields, select a field type from the right panel and drag it onto the document where needed. When manually placing a field, it's automatically assigned to the selected participant.
-
Select Create when all fields are placed and assigned.
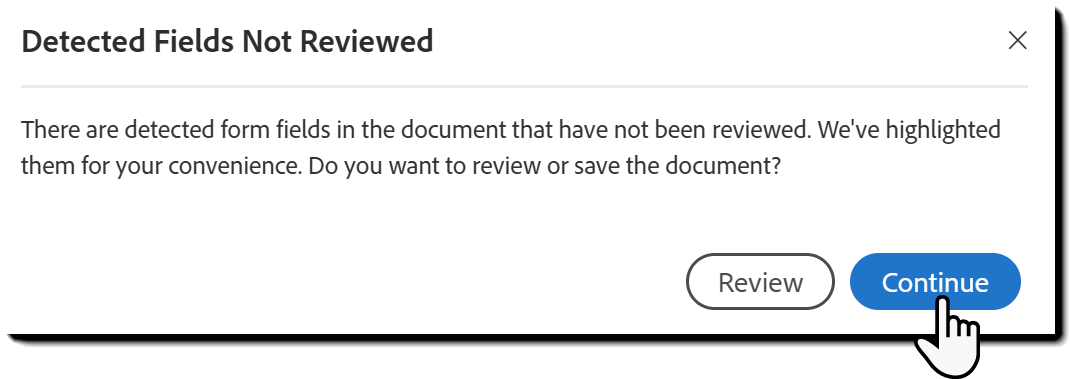
NoteIf you used automatic field detection and did not explicitly review all of your placed fields, this is when you'll be reminded:
-
The post-creation page loads to affirm that the template is created.
You have four options on the page:
- Send this template for signature - This opens a new Request e-signatures page with the template automatically attached and ready to configure with the recipient's email address.
- Create another template - Starts the creation process from the first step.
- Manage your templates - Loads the Documents page with the Templates filter selected.
- Done - Returns you to the Acrobat Home page.
-
To manually access your template, navigate to the Documents tab, and select the Templates filter:


Note
The user who creates a template is its owner.
Only the owner can edit the template or change its permission level unless it's shared with their group or the organization:
- Account-level admins can edit the template from the Shared Libraries section in the admin menu if shared with the organization.
- Group-level admins can edit the template from the Shared Libraries section in the admin menu if shared with a group in which they have admin authority.
- Account-level admins also have access to all documents shared with any groups.
Account-level admins or the group admin overseeing the original creator can transfer template ownership to another user.
Alert
The current version of the modern Create Template interface isn't yet in parity with the classic experience.
Admins should review the unsupported elements and enable the modern environment if there are no issues
Create a library template
-
To create a library template, navigate to the Home tab, then select Create a reusable template
-
The Create a Library Template configuration page loads.
Drag and drop your files into the Add files section, or select the Choose files button to open the file picker panel.
Uploading multiple files when creating a library template combines them into one template.
When you select an existing library template to start a new agreement or Send in Bulk event, all files used to create the template are attached and treated as a single file.
-
Enter the name of your template into the Template Name field.
If you don’t enter a name for the template, Acrobat Sign uses the name of the first uploaded file. This name appears as the initial agreement name on the Compose page and as the Template Name in the selection list when you create a new agreement.
When using a library template to start a new agreement or Send in Bulk event, the template name is imported as the initial agreement name (this can be edited).
-
Configure the Template Type:
- Reusable document - This option saves the full document, content, and form fields.
- Reusable form field layer - This option saves just the form field layer to be applied to a different document (different content with the same layout).
- Both - Both types of templates will be available.
NoteAt any time you can change the type of template by editing the template properties.
-
Configure Who can use the template.
This setting will grant access to the template based on the uploading user:
- Only me - This option will only make the template available to the uploading user.
- Any user in my group - Setting the template at the group level will create a logical association between the template and the group the uploading user is currently part of. All members of the group will have access to the template.
- Moving the user who uploaded the template to another group will not break this template-group association.
- The template is made available to edit for the account-level admin and the group-level admin of the user's group in the Shared Libraries menu.
- Changing the Group relationship of the template will remove it from access for the previous group, but will not impact agreements that have already been sent using the template.
- Accounts that have Users in Multiple Groups enabled will have a dropdown field to select the group the template should be related to when sent.
- Users in one or more groups - Enterprise accounts have the option to associate a template with multiple groups. If the option is not available to you, contact your administrator to request that the option be enabled.
- Any user in my organization - Every user in the account will have access to use the template.
- The template is made available to edit for the account-level admin in the Shared Libraries menu.
Note- Deleting a Template – The user who owns the template can delete it anytime.
- Editing a Template – The owning user, as well as group and account admins, can edit the template.
- Modifying a Template in an Agreement – Other users can adjust fields by selecting Preview & add fields when sending an agreement. These changes apply only to the specific agreement the sender is editing and does not alter the original template.
-
Select Preview & add fields to start the form field authoring process.
-
Add participants
The page refreshes to display the Add participants panel.
Before placing fields, the system needs to know how many participants might be involved in completing the form. This ensures that fields can be assigned correctly.
- Each field must be explicitly assigned to a participant, defined as a Prefill field for the sender, or set to Anyone.
- Add the maximum number of recipients who may need to interact with the form by selecting the plus icon under the participant list. Add participants until all required participant slots are added. For example, if the template could involve up to four recipients, add four participants.
When finished, select Preview & add fields to continue.
NoteThe Template name, Template type, and Who can use the template values can be edited in this panel also if you want to make adjustments.
-
The form-building environment opens, displaying any fields already present in the uploaded document.
To add more fields:
- Select a field type from the left panel and drag it onto the document where needed.
- When you place a field, it is automatically assigned to the currently selected participant.
- Use the Auto-place fields button at the top of the field list to let the system place fields automatically.
- The system attempts to assign the appropriate field type based on document content.
- If no specific field type is detected, a Text field is placed.
- All auto-placed fields are assigned to the currently selected participant.
- Select a field type from the left panel and drag it onto the document where needed.
-
Create the template when you're done.
You can always come back and edit it later.


