
Click Add captions in the Closed Captions section.
Last updated on
18 June 2025
- Captivate User Guide
- Get to know Captivate
- Adobe Captivate releases
- Adobe Captivate 13
- Adobe Captivate 12
- Project setup
- Import from PowerPoint
- Import from Captivate Classic
- Generative AI in Adobe Captivate
- Generative AI overview
- Generative AI FAQs
- Generative credits
- Generate text
- Generate images
- Generate avatar
- Generate transcripts
- Add and edit text
- Add and edit images
- Add and edit media
- Interactive components
- Create quizzes
- Add widgets
- Interactions and animations
- Enhance your e-learning project
- Simulation projects
- Timeline and TOC
- Review and collaborate
- Preview and publish
- Accessibility
- Design options in Adobe Captivate
- Additional resources
-
-
Enter the caption in the placeholder.
-
Drag the playhead on the timeline to the point where you want to add the next caption.
-
Click the icon to add another caption.
-
In the Position section of the Visual Properties panel, select a caption's position. You can place the caption at the top or bottom of the video.
-
Move the Opacity slider in the Visual Properties panel to increase or decrease the transparency of the caption.
-
Change the caption's background color from the Solid color picker.
-
Change the appearance of a caption.
Also, change the color of the caption, add an outline to the caption, or add a shadow.
View Work with text in Adobe Captivate to know more about changing the appearance of text.
-
Apply the caption text properties to the slide or all slides in the project.
- Apply to this slide: Select this option to apply the changes to the text properties to the captions on the selected slide.
- Apply to all the slides: If there are other slides with captions, select this option to apply the changes to the text properties on all other slides.


Import closed captions
Adobe Captivate allows importing, exporting, and replacing closed captions or subtitles of audio in your Captivate project. Captivate supports .srt and .vtt file formats for captions.
You can format the font style, size, and color or make it bold, italic, underline, and change the position of the caption. Additionally, vtt files support CSS (Cascading Style Sheets) for styling. For srt files, you can format the same, except for the subtitle position.
Note
If an SRT or VTT file contains a font type that is not compatible with Captivate, the caption text will automatically switch to Arial as the default font.
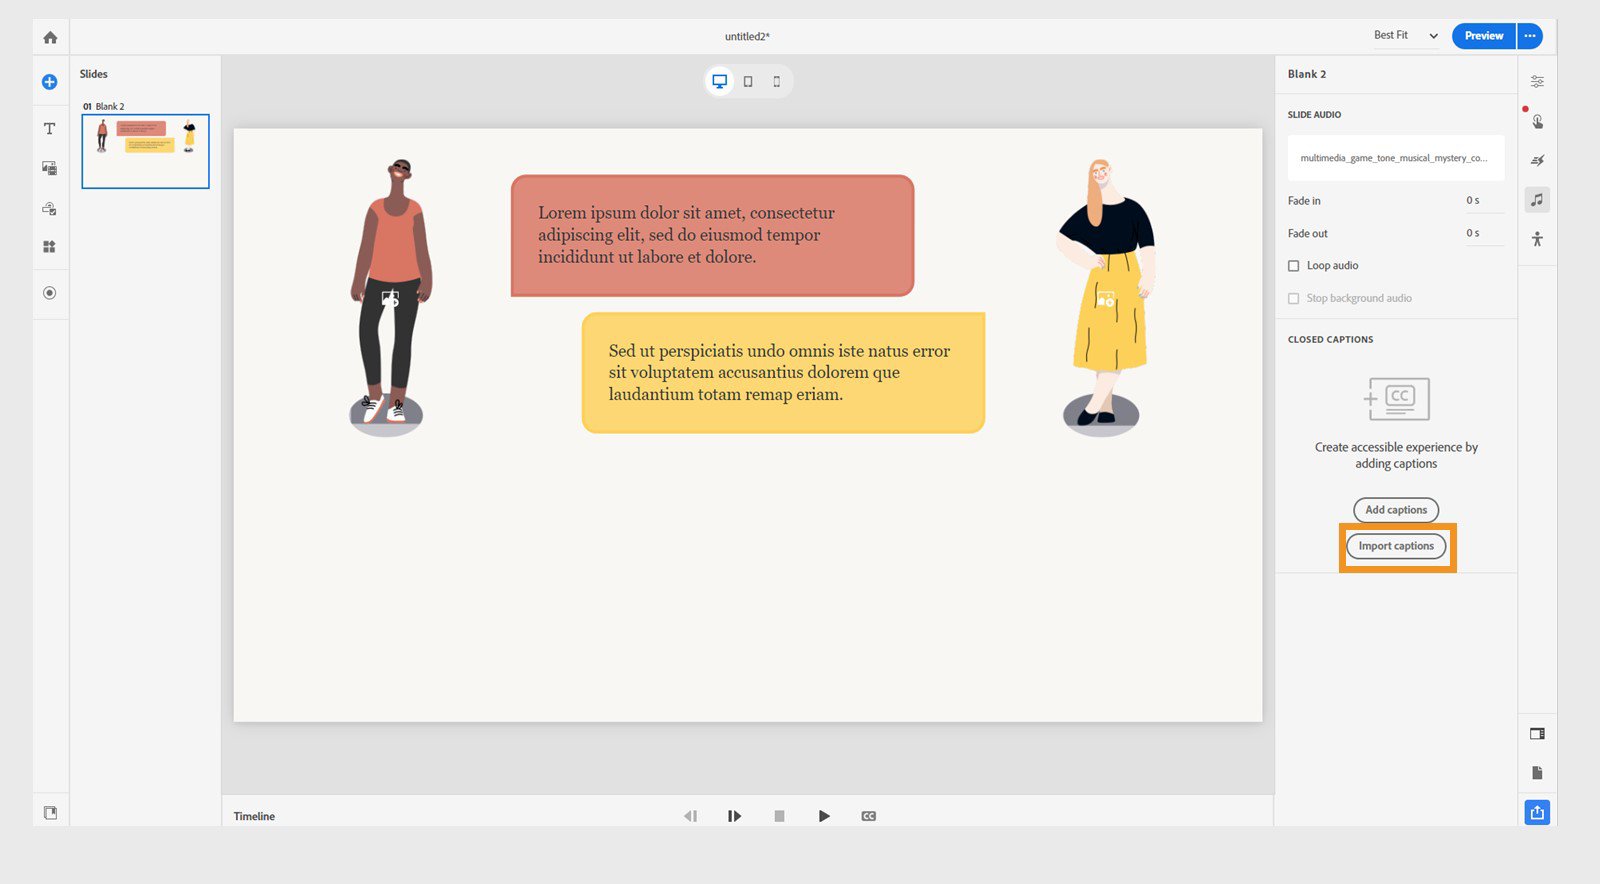
The import function for closed captions becomes accessible only when there is existing audio on the slide.
-
Select Audio in the right toolbar.
-
Select Import captions.
Import closed captions to slide audio Import closed captions to slide audio NoteEnsure that the duration of the captions does not exceed the duration of the audio for the slide.
-
Select the captions file (srt or vtt) from the system.
-
View the captions in the Closed Captions panel.
Imported captions for a slide audio Imported captions for a slide audio

Note
When both the audio and its corresponding captions share identical file names and are located in the same directory, the captions are seamlessly imported upon adding the audio.
In cases where both SRT and VTT files coexist in the same directory, priority is given to the VTT file, which will be automatically selected as the default.
-
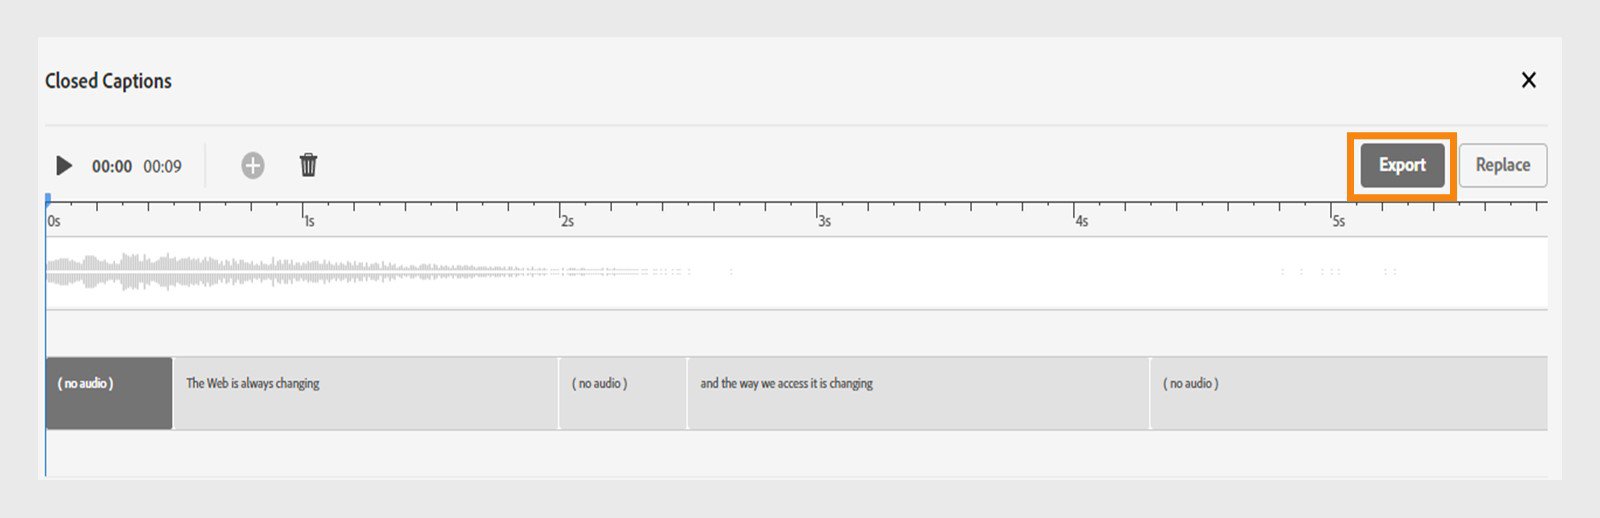
Select Export from the captions timeline.
Export captions Export captions -
Enter the filename and also the destination, where you want the file to be exported.
-
Select the file format (srt ot vtt).
-
Select Export.
Choose the file name and location for exporting captions Choose the file name and location for exporting captions

Replace existing captions
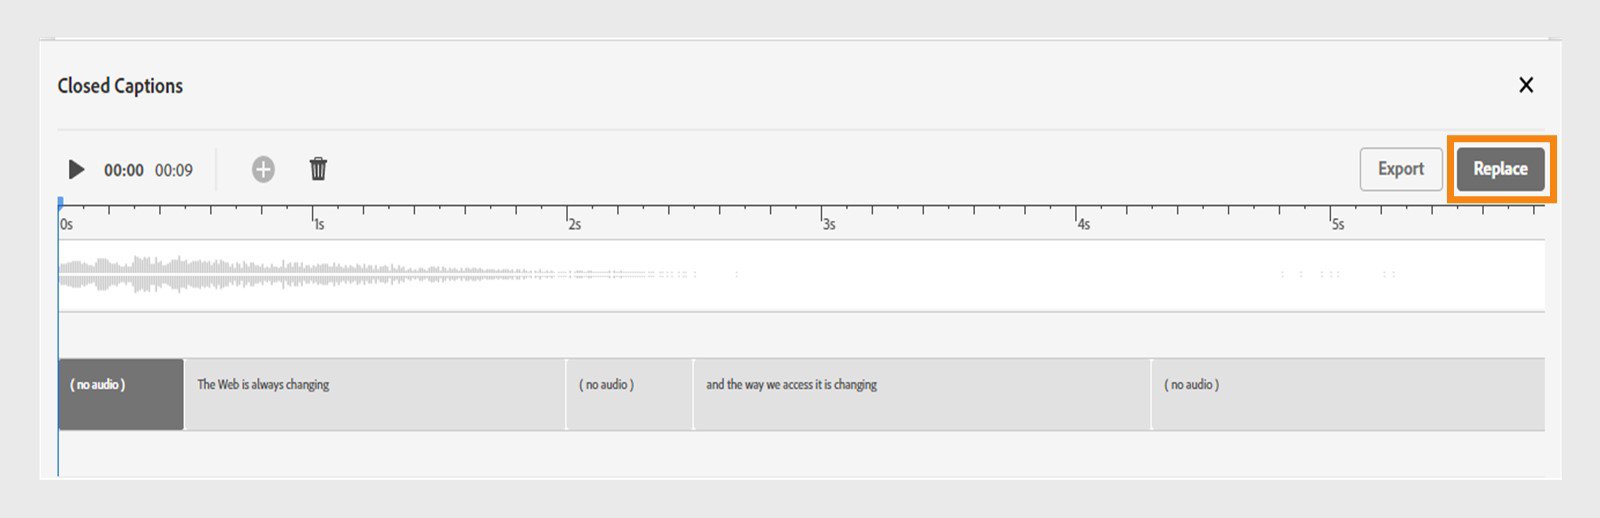
You have the option to replace current captions if you have imported an incorrect file, or wish to adjust timing and font styles in the existing file. Make the changes in the caption file and utilize the replace feature to upload a revised version or a different file entirely.
-
Select Replace from the closed captions panel.
Replace captions for a slide audio Replace captions for a slide audio -
Choose another caption (srt or vtt) file from the system.
|
Error |
Steps to mitigate |
|---|---|
|
Failed to import the captions, The duration of the subtitles must not exceed the duration of the audio. |
Ensure the length of the audio is more than the caption duration. Open the captions file and check the end timing and ensure it is less than or equal to the audio duration. |
|
Import Failed: Subtitles have conflicting time ranges. Adjust the timing to avoid overlapping with other captions. |
Captions have conflicting time ranges. Check and adjust the timing of each caption in the file. Ensure the start and end times of each caption do not overlap. You can fix the timing in the file and re-import. |
|
Import Failed: Subtitle format is incorrect. |
Check the file and ensure the format or syntax is correct and adheres to respective srt or vtt formats. |
|
Import Failed: Subtitle file cannot be empty. |
Srt or vtt file must contain caption texts and their timing information. |
|
Import Failed. The end time of a subtitle cannot be less than or equal to its start time. |
Ensure the end time is greater than the start time and re-try. Any particular caption's end time should not be less than its start time. |
Export project content and closed captions
If your computer has Microsoft Word installed, you can export project content and closed captions from an existing Adobe Captivate project to a .DOC file.
-
Select File > Export > Project content and closed captions in the main toolbar.
-
Select a location on your computer.
The captions are saved as a Microsoft Word document. Navigate to the location where the file is saved and open the file.
Import project content and closed captions
You can import text captions from a DOC file. First, you export the text captions from your Adobe Captivate project. Adobe Captivate creates a DOC file that preserves all the formatting from the text captions.
Update the column Updated Text caption Data with localized content. Then import the file into the Adobe Captivate project.
-
Select File > Import > Project content and closed captions.
-
Select the DOC file that contains captions that you want to import.
-
Click Open.
After successful import, the project will be updated with localized content from the doc file.