Click Windows > Extensions > Browse Extensions.
The Adobe Creative Cloud Add-Ons page appears.
Use Dreamweaver and Campaign together to create and design personalized email campaigns
Adobe Campaign is generally used for automated email marketing. When you use Dreamweaver with Campaign, you can combine the email design capabilities of Dreamweaver with the cross-channel marketing capabilities of Adobe Campaign in the Adobe Marketing Cloud.
Designers can continue to work designing within Dreamweaver, but personalized data from Adobe Campaign can be pulled into the Dreamweaver user-interface for more contextual designs.
And because this integration is two-way, Adobe Campaign users can also access Dreamweaver’s editing capabilities from within the Campaign interface.
In summary:
The Adobe Campaign extension in Dreamweaver allows you to personalize email content in Dreamweaver by adding personalization fields and content blocks to your content.
In a few quick steps, you can be up and running and creating personalized content:
Click Windows > Extensions > Browse Extensions.
The Adobe Creative Cloud Add-Ons page appears.
On the Adobe Creative Cloud Add-Ons page, click Dreamweaver on the left to view Dreamweaver-specific add-ons, or search for the Adobe Campaign integration add-on.
Follow the on-screen instructions to download the add-on.
If you face issues downloading and installing the extension using the above procedure, try Installing the extension using the instructions here: Install third-party extensions.
There are multiple ways you can work with Dreamweaver and Adobe Campaign.
In either scenario, you can use the Adobe Campaign panel to edit your templates within Dreamweaver. In addition, your content changes are automatically synchronized between Campaign and Dreamweaver.
Read on to know more about how to work with the Adobe Campaign panel in Dreamweaver.
After installing the Campaign extension, you can see the Adobe Campaign panel by selecting Window > Campaign.
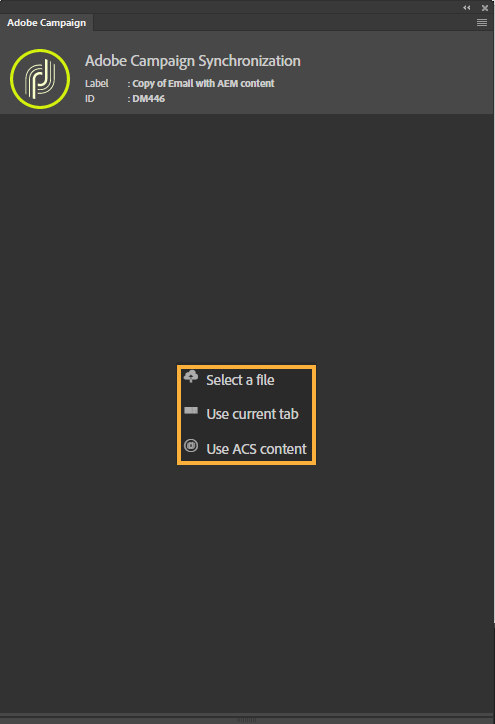

The Adobe Campaign panel contains the following options:
After you open a template in Dreamweaver, the Adobe Campaign panel is populated with the personalization fields and content blocks.
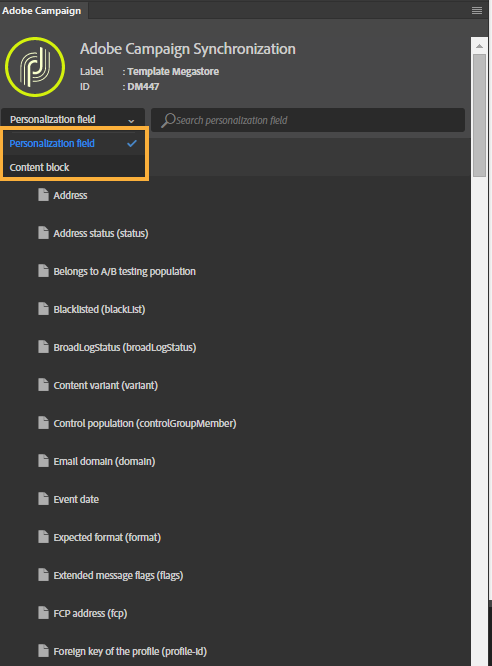

The Adobe Campaign panel consists of the following blocks:
The label and ID in the Adobe Campaign extension panel in Dreamweaver reflect the label and ID of the template in Adobe Campaign.
The blocks available in the Content block vary depending on the context (email or landing page).
There are multiple ways you can work with Dreamweaver and Adobe Campaign.
In Adobe Campaign, create a new email template, or select and open an existing template that you want to edit.
To open the template in Dreamweaver, click Dreamweaver, and confirm that you want to open Dreamweaver.
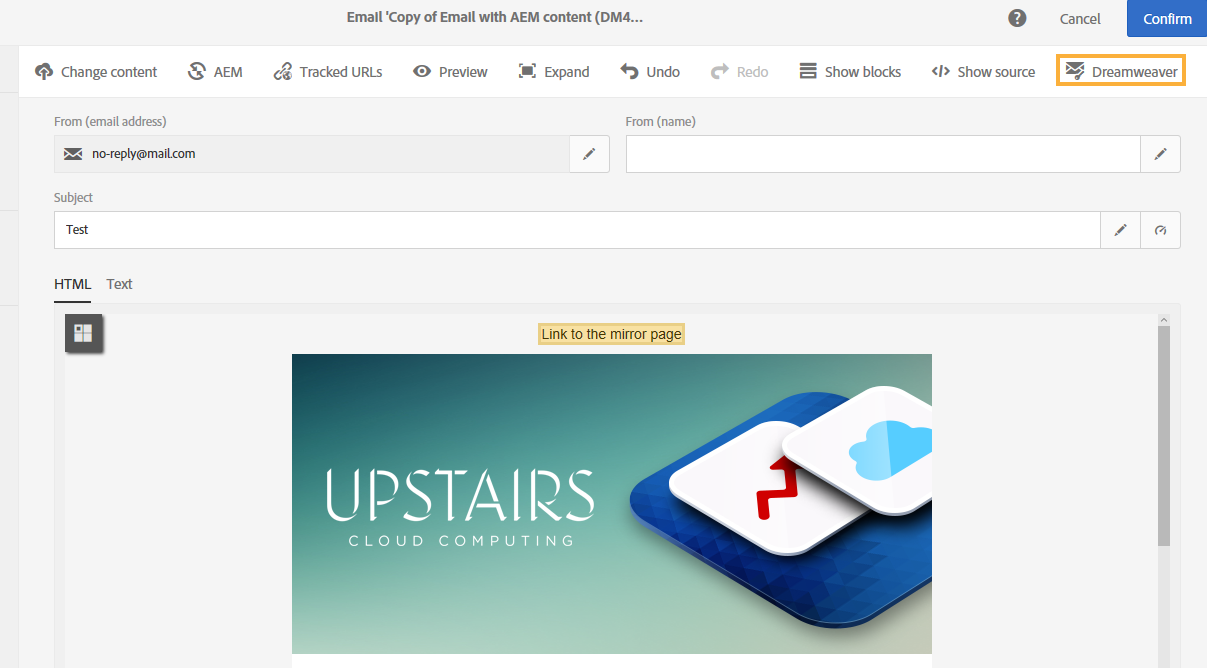

The template opens up in Dreamweaver.
In Dreamweaver, select Window > Campaign to open the Adobe Campaign extension panel.
Then click Use ACS content to open the Campaign template in Dreamweaver.
Add the personalization fields, and content blocks that you want to use.
When you add a personalization field or a content block, they appear as yellow boxes in Design or Live View.
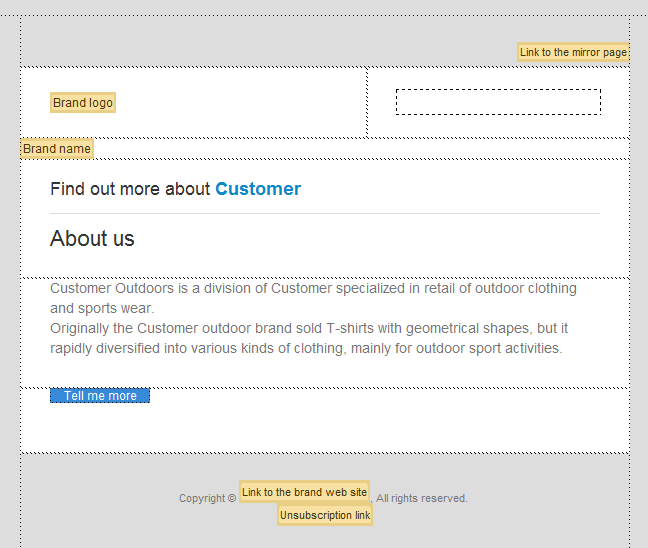

Add images and other media content like you would normally do in Dreamweaver.
After you are done with all your changes in Dreamweaver, go to Adobe Campaign, and you can see all the changes you made in Dreamweaver reflected in the campaign there.
In Adobe Campaign, you can continue to make further changes, and all these changes are synchronized with the campaign in Dreamweaver.
After you are done with your changes, click Confirm and then Save in Adobe Campaign. All your changes are saved, and the synchronization connection with Dreamweaver is broken.
You can then send the finished email campaign to your recipients from Adobe Campaign.
You can create email templates in Dreamweaver, use the Campaign extensions panel to add personalization, and content blocks, and then synchronize it with Adobe Campaign.
To start creating an email campaign in Dreamweaver, you can use one of the starter templates. Choose File > New > Starter Templates > Email Templates. Or you can create one from scratch.
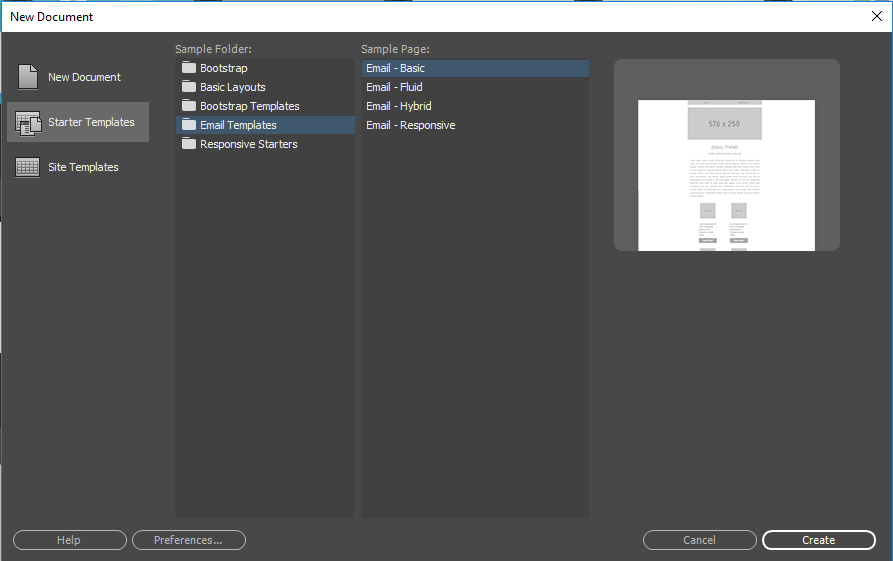

Edit the template to adapt it to your needs.
After you have made all your changes, close and exit Dreamweaver.
Open Adobe Campaign. Open any existing email template in Campaign and then click Dreamweaver.
In Dreamweaver, open the template you created. Select Window > Campaign to display the Adobe Campaign extension panel.
If you do not have a template open in Dreamweaver, click Select a File, and then browse to the saved template to open it.
In the Campaign panel, click Use Current tab.


The Adobe Campaign personalization fields and content blocks appear in the Adobe Campaign extension panel.


Add the personalization fields, and content blocks that you want to use.
When you add a personalization field or a content block, they appear as yellow boxes in Design or Live View.


After you are done with all your changes in Dreamweaver, go to Adobe Campaign, and you can see all the changes you made in Dreamweaver reflected in the campaign there.
In Adobe Campaign, you can continue to make further changes, and all these changes are synchronized with the campaign in Dreamweaver.
After you are done with your changes, click Confirm and then Save in Adobe Campaign. All your changes are saved, and the synchronization connection with Dreamweaver is broken.
You can then send the finished email campaign to your recipients from Adobe Campaign.
Build beautiful websites in Dreamweaver
Design, code, and manage dynamic websites in a powerful all-in-one tool.