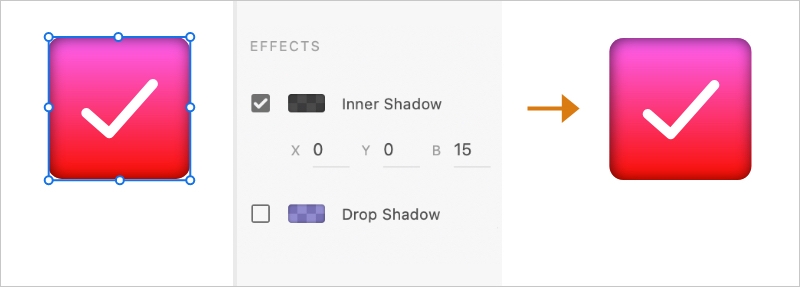
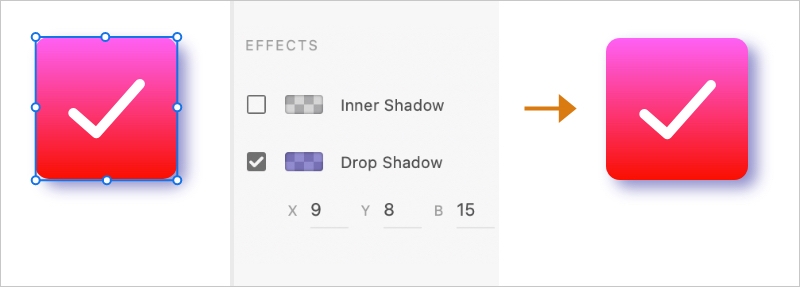
Select the object.
You can add drop shadows and inner shadows to objects like toggles, buttons, sliders, and illustrations.
- Adobe XD User Guide
- Introduction
- Design
- Artboards, guides, and layers
- Shapes, objects, and path
- Text and fonts
- Components and states
- Masking and effects
- Layout
- Videos and Lottie animations
- Prototype
- Create interactive prototypes
- Animate prototypes
- Object properties supported for auto-animate
- Create prototypes with keyboard and gamepad
- Create prototypes using voice commands and playback
- Create timed transitions
- Add overlays
- Design voice prototypes
- Create anchor links
- Create hyperlinks
- Preview designs and prototypes
- Share, export, and review
- Share selected artboards
- Share designs and prototypes
- Set access permissions for links
- Work with prototypes
- Review prototypes
- Work with design specs
- Share design specs
- Inspect design specs
- Navigate design specs
- Review and comment design specs
- Export design assets
- Export and download assets from design specs
- Group sharing for enterprise
- Back up or transfer XD assets
- Design systems
- Cloud documents
- Integrations and plugins
- Work with external assets
- Work with design assets from Photoshop
- Copy and paste assets from Photoshop
- Import or open Photoshop designs
- Work with Illustrator assets in Adobe XD
- Open or import Illustrator designs
- Copy vectors from Illustrator to XD
- Plugins for Adobe XD
- Create and manage plugins
- Jira integration for XD
- Slack plugin for XD
- Zoom plug-in for XD
- Publish design from XD to Behance
- XD for iOS and Android
- Troubleshooting
- Known and fixed issues
- Installation and updates
- Launch and crash
- Cloud documents and Creative Cloud Libraries
- Prototype, publish, and review
- Import, export, and working with other apps
Learn to set stroke, fill, drop shadow, and inner shadow, and create blend effects for objects in Adobe XD.
Apply a fill color to an object
-
-
Click the rectangle next to Fill. The Color Picker appears.
The color picker The color picker NoteYou can also use the Eyedropper tool to fill colors. The [i] key activates the Fill eyedropper.
- Clicking the key once would open the Fill eyedropper.
- Clicking the key again would close the Fill eyedropper.
-
You can choose to:
- Specify the HSBA, RGB, or hexadecimal values if you know the exact color values. You can also switch between the different color modes.
- Adjust the color using the color field and color slider. When you do so, the numeric HSBA, RGB, and hexadecimal values are adjusted accordingly.
- You can set the fill and the opacity of the fill by using the color slider or specifying a value in percentage.
- Use the Eyedropper tool to select a color from an artboard.
- You can also apply gradient fills to object. For more information on gradients, see Create and modify gradients.
As you modify the options in the color picker, you can preview the changes on the artboard.
NoteAdobe XD also supports shorthand for hexadecimal codes. For example, if you type 0 and press Return, XD automatically displays the color with code #000000.
-
You can save a color as a swatch for future use. To save a color as a swatch, click the + icon at the bottom of the Color Picker.
Add swatches Add swatches You can rearrange swatches in the color picker by dragging a swatch to the new location. To delete a swatch, drag it outside the color picker.
Apply image fill to objects
First, turn on the fill if it's not already on (as described in Apply a fill color to an object). Then, drag the image onto the object from the location where you have saved it (for example, Finder or Windows Explorer).
Crop and place image fills
You can now double-click images placed within containers (Object > mask with Shape) to crop and reposition the images (when dragged from the desktop) within the image fills. Use the Crop mode in an image fill to:
- Double click and enter a crop mode for an image fill
- Reposition the image within the crop mode, or
- Move the image anywhere in the crop mode
This enhancement is also applicable for files imported from Photoshop and Sketch. The imported files retain the image fills and the crop performed in the source application.
Image paste from clipboard
You can also copy an image outside of Adobe XD into your operating system clipboard, select a shape, and paste the image as an image fill from your operating system clipboard. Images will also fill a shape if a shape is selected and a user selects File > Import.
Create strokes and specify stroke color
-
Select the object.
-
The default stroke width is 1. To specify a different value, change the Border value.
-
Click the rectangular color chip next to Border. The Color picker appears.
The color picker The color picker -
You can choose to:
- Specify the HSBA, RGB, or hexadecimal values if you know the exact values.
- Adjust the color using the color field and color slider. When you do so, the numeric HSBA, RGB, and hexadecimal values are adjusted accordingly.
- Use the Eyedropper tool to select a color from an artboard.
- Set the opacity of the border using the color slider or typing in a value in percentage.
- Edit the border size and create dotted lines
- Specify end caps (Butt, Round, Projecting) and joins (Miter, Round, Bevel), and inner and outer strokes.
As you modify the options in the color picker, you can preview the stroke color on the object.
-
You can save a color as a swatch for future use. To save a color as a swatch, click the + icon at the bottom of the Color Picker.
Add swatches Add swatches You can rearrange swatches in the color picker by dragging a swatch to a new location. To delete a swatch, drag it off the color picker.
-
If the object is a closed path, you can specify the stroke width. To align the stroke along the path, choose one of the following options listed in the next illustration.
By default, XD aligns the inner stroke in a closed path.
Stroke styles A. Inner stroke B. Outer stroke C. Center stroke D. Butt cap E. Round cap F. Projecting cap G. Miter join H. Round join I. Bevel join
Stroke styles NoteChanging the stroke width or stroke alignment does not change the actual size of the object (in terms of the bounding box). However, when you export the object, chances are there for the dimensions of the object to change depending on the type of stroke used.
SVG only supports center strokes. If you export an object with inner or outer strokes as SVG, the size of the exported image appears as if it had a center stroke.
Create editable vector shapes from lines, paths, shapes, text, images, and boolean groups using Outline Strokes. After creating the shape, you can further modify it using controls, or by changing its properties in the Properties Panel.
Try these steps to create an icon as shown here with an Outline Stroke.
Add shadows
Inner Shadow


Drop Shadow


-
Click the object, and then click Drop Shadow or Inner Shadow in the Property Inspector.
-
In the Color Picker,
a. To add a color to the shadow, do one of the following:
- Specify the HSB, RGB, or hexadecimal value of the color. You can easily switch between these color modes.
- Adjust the color using the color field and color slider. When you do so, the HSB, RGB, or hexadecimal value is automatically adjusted.
- Use the Eyedropper tool to select a color from an artboard.
b. Set the opacity of the shadow using the opacity slider or type in the opacity value in percentage.
 To save a swatch, click the + icon at the bottom of the color picker. You can rearrange swatches in the color picker by dragging a swatch to a new location. To delete a swatch, drag it off the color picker.
Apply blend effects
Select an image or object (including shapes, text layers, groups, masks, or components) on the design canvas. From the Property Inspector, select and apply the blend mode of your choice. For more information, see Apply blend effects.
Remove a fill, shadow, or stroke from an object
Select the object. Then, click the check box next to Border, Fill, or Shadow in the Property Inspector. If you want the fill, stroke, or shadow back, click the check box again.


