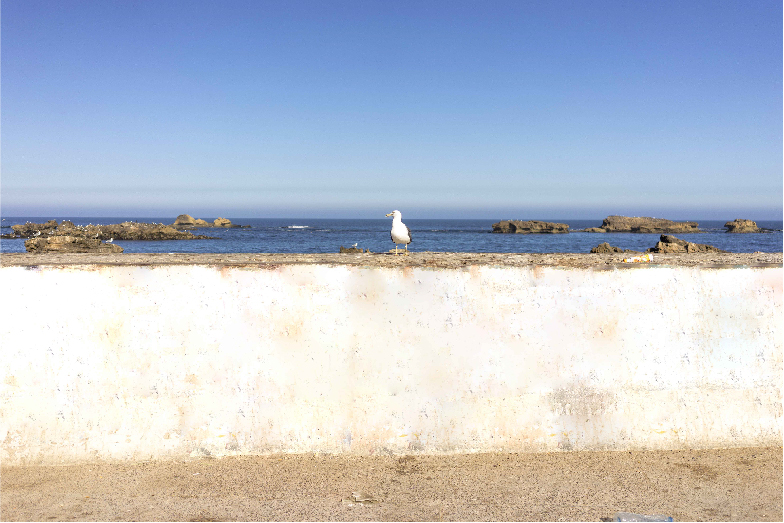
Use any available method to create transparent areas in your composition.
- After Effects User Guide
- Beta releases
- Getting started
- Workspaces
- Projects and compositions
- Importing footage
- Preparing and importing still images
- Importing from After Effects and Adobe Premiere Pro
- Importing and interpreting video and audio
- Preparing and importing 3D image files
- Importing and interpreting footage items
- Import SVG files
- Working with footage items
- Detect edit points using Scene Edit Detection
- XMP metadata
- Text and Graphics
- Text
- Motion Graphics
- Work with Motion Graphics templates in After Effects
- Use expressions to create drop-down lists in Motion Graphics templates
- Work with Essential Properties to create Motion Graphics templates
- Replace images and videos in Motion Graphics templates and Essential Properties
- Animate faster and easier using the Properties panel
- Variable Font Axes
- Drawing, Painting, and Paths
- Overview of shape layers, paths, and vector graphics
- Paint tools: Brush, Clone Stamp, and Eraser
- Taper shape strokes
- Shape attributes, paint operations, and path operations for shape layers
- Use Offset Paths shape effect to alter shapes
- Creating shapes
- Create masks
- Remove objects from your videos with the Content-Aware Fill panel
- Roto Brush and Refine Matte
- AI-powered Object Matte
- Create Nulls for Positional Properties and Paths
- Layers, Markers, and Camera
- Animation, Keyframes, Motion Tracking, and Keying
- Animation
- Keyframe
- Motion tracking
- Keying
- Transparency and Compositing
- Adjusting color
- Effects and Animation Presets
- Effects and animation presets overview
- Effect list
- Effect Manager
- Simulation effects
- Stylize effects
- Audio effects
- Distort effects
- Perspective effects
- Channel effects
- Generate effects
- Time effects
- Transition effects
- The Rolling Shutter Repair effect
- Blur and Sharpen effects
- 3D Channel effects
- Utility effects
- Matte effects
- Noise and Grain effects
- Detail-preserving Upscale effect
- Obsolete effects
- Cycore plugins
- Expressions and Automation
- Expressions
- Expression basics
- Understanding the expression language
- Using expression controls
- Syntax differences between the JavaScript and Legacy ExtendScript expression engines
- Editing expressions
- Expression errors
- Using the Expressions editor
- Use expressions to edit and access text properties
- Expression language reference
- Expression examples
- Automation
- Expressions
- Immersive video, VR, and 3D
- Construct VR environments in After Effects
- Apply immersive video effects
- Compositing tools for VR/360 videos
- Advanced 3D Renderer
- Import and add 3D models to your composition
- Import 3D models from Creative Cloud Libraries
- Create parametric meshes
- Image-Based Lighting
- Animated Environment Lights
- Enable lights to cast shadows
- Extract and animate lights and cameras from 3D models
- Tracking 3D camera movement
- Adjust Default Camera Settings for 3D compositions
- Cast and accept shadows
- Embedded 3D model animations
- Shadow Catcher
- 3D depth data extraction
- Enable in‑engine Depth of Field in Advanced 3D
- Modify materials properties of a 3D layer
- Apply Substance 3D materials
- Work in 3D Design Space
- 3D Transform Gizmos
- Single 3D Gizmo for multiple 3D layers
- Do more with 3D animation
- Preview changes to 3D designs real time with the Mercury 3D engine
- Stereoscopic 3D in After Effects
- Add responsive design to your graphics
- Views and Previews
- Rendering and Exporting
- Basics of rendering and exporting
- H.264 Encoding in After Effects
- Export an After Effects project as an Adobe Premiere Pro project
- Converting movies
- Multi-frame rendering
- Automated rendering and network rendering
- Rendering and exporting still images and still-image sequences
- Using the GoPro CineForm codec in After Effects
- Working with other applications
- Collaboration: Frame.io, and Team Projects
- Memory, storage, performance
- Knowledge Base
Use this article to learn how the Content-Aware Fill panel can be used to remove unwanted objects from your video.
Removing an unwanted object or area from a video can be a time-consuming and complex process. With the Content-Aware Fill feature, you can remove unwanted objects, such as mics, poles, and people, from your video with a few simple steps. Powered by Adobe Sensei, this feature is temporally aware, so it automatically removes a selected area and analyzes frames over time to synthesize new pixels from other frames. By drawing a mask around an area, After Effects can instantly replace it with new image details from other frames.
The tool gives you the option to help get the fill to blend seamlessly with the rest of the image. The Content-Aware Fill panel contains various options to help you remove unwanted objects and fill transparent areas.
The Content-Aware Fill panel
To open the content aware fill panel, select Windows > Content-Aware Fill.


- Fill Target: This is the preview of the area that Content-Aware Fill analyzes. The transparent area is outlined in pink.
- Alpha Expansion: Use this to increase the size of the area to fill. Content-Aware Fill does not require precise masking and may offer better results when the area includes pixels outside the object being removed.
- Fill Method: Choose the type of fill to render:
- Object: Removes an object from the footage. It fills the transparent area by taking pixels from the current and surrounding frames. It estimates the motion of the scene behind the object and uses this to find appropriate color values. For best results, use this to replace moving objects, like a car on a road.
- Surface: Replaces the surface of an object. It works similarly to Object, as it takes pixels from surrounding frames but uses the motion estimated in the comp under the transparent area. For best results, use this for static and flat surfaces, like a stain on a shirt or a sign on a building.
- Edge Blend: Blends surrounding edge pixels. It fills the transparent area by sampling pixels at the edges of the transparent area and blending them together and renders fast. For best results, use this to replace static objects on surfaces that lack texture, like text on paper.
- Lighting Correction: Enable this to handle dynamic lighting shifts in your footage. Incorporate lighting correction into fills to cleanly remove objects from footage where lighting changes from frame to frame. You can select from the three different correction strengths – Subtle, Moderate, and Strong. For best results, start with selecting Strong, in case it starts adding too much correction to the footage, go for Moderate or Subtle.
- Range: Choose whether to render the fill layer for only the work area or the entire duration of the composition. Setting it to the work area restricts Content-Aware Fill from pulling in content outside of the work area.
- Create Reference Frame: Creates a single-frame fill layer frame and opens it in Photoshop. Use reference frames to help Content-Aware Fill learn what the fill layer should look like. For example, if you have a video with a complex background and Content-Aware Fill is unable to give you the desired results, use the tools in Photoshop, such as clone and patch, to create a better result on the reference frame. Once done, generate a new fill layer. Content-Aware Fill transfers the pixels from the reference frame to new frames in the fill layer. For some shots, you can create multiple reference frames at frames where the lighting or camera angle changes. Note that you can also use any other process to create single-frame layers to guide content-aware fill. It also respects the content in those layers as a guide. This is a shortcut to do that.
- Generate Fill Layer: Creates a new fill layer. Analysis and rendering progress are displayed at the bottom of the panel. Content-Aware Fill prioritizes analyzing and rendering the frame under the Current-Time Indicator (CTI). While the fill is being rendered, you can move the CTI to a different frame to prioritize that frame, which can help you decide whether the results look correct before the entire fill layer is generated.
How to use Content-Aware Fill
The Content-Aware Fill panel includes multiple features to enable the precise removal of unwanted objects from your video. But all these features may not be useful in every situation.
-
For example, draw a mask around an object or area of your composition that you want to replace and set it to Subtract mode.
Use the Mask option under the Layers menu to create a mask around the object you want to remove. Use the Mask option under the Layers menu to create a mask around the object you want to remove. -
Open the Content-Aware Fill panel by selecting Windows > Content-Aware Fill.
-
In the Content-Aware Fill panel, select the Fill Method, and set the Range that you want After Effects to analyze. Then select Generate Fill Layer, which generates fill and adds a Fill layer on top of the selected layer in the Timeline panel. The layer contains sequences of images that After Effects analyzes while it generates a fill layer.
Lighting Correction in Content-Aware Fill


Handle lighting shifts in footage better with improved Content-Aware Fill. It helps you cleanly remove objects from footage where harsh lighting changes occur throughout your footage and get results that look more realistic without distracting artifacts. Without lighting correction enabled, Content-Aware Fill stays true to the reference frame and does not take into consideration any lighting changes.
Lighting Correction has three strengths:
- Subtle: Use when the lighting changes are not very dramatic.
- Moderate: Use when lighting changes are moderately dynamic.
- Strong: Use when the footage has heavy lighting changes.
The old Content-Aware Fill (when Lighting Correction is disabled) stays true to the reference frame and does not take into consideration lighting changes. It's more useful in footage with consistent lighting. Content-Aware Fill currently copies only local information from each image and then finds some global adjustments to fit this information into the target frame. When you use lighting correction on footage that contains lighting shifts such as shadows, highlights, lens flares, and auto exposure changes that are not correctly read, the color of the pixels copied into the hole are not the correct color, and the result do not look clean.
With this feature, you have the option to correct fill lighting inside of Content-Aware Fill like the actual fill layer that’s generated. This eliminates the need to generate several fill layers to correct it and is helpful for lighting and color changes. When Lighting Correction is enabled, Content-Aware Fill gives back a fill layer that is seamlessly integrated with the rest of the footage. This Fill layer is lighter, but with the same quality.
This does not impact the speed of the performance than without lighting correction. The overall workflow is faster when working with footage with variable lighting because you don't need to take additional steps to clean up the results.
Work with Lighting Correction
-
Start by analyzing the shot. See the lighting changes and movement, and then decide what needs to be masked out.
-
From all the Fill Methods, you don’t need to use Lighting correction for Edge Blend.
-
Select Strong first. In case it starts adding too much correction to the footage, go for Moderate or Subtle.
-
Once the settings are done, then select Generate Fill Layer.
Best practices to work with Lighting Correction
Situations where the Strong might not work well are footage with flickering lighting conditions, such as grass or sandy shots that reflect a lot of light. The Strong can also color correct too harshly, which can introduce more flickering. In those cases, try using Subtle or Moderate strength.
Examples
You can use the following examples to see how the different settings work in different situations:
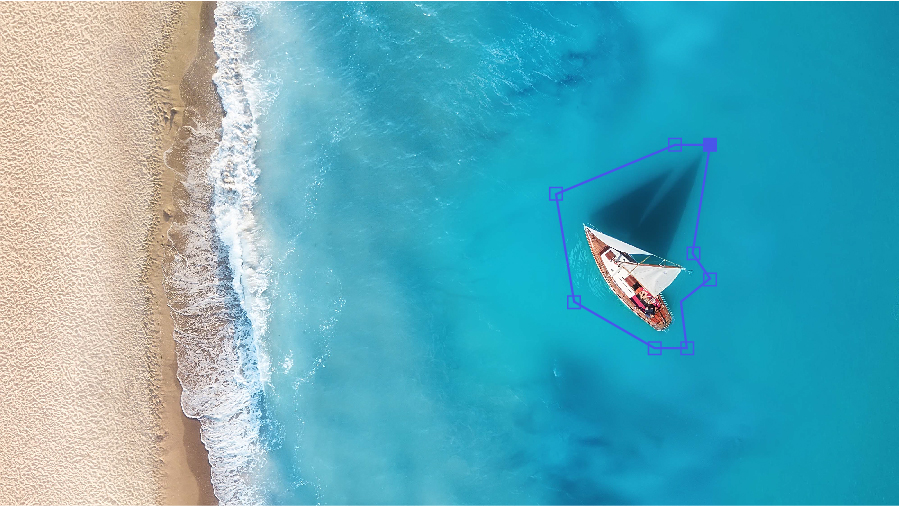
Example 1: Footage with moving camera
-
Use the Pen tool to draw a mask around the boat. For best results, draw the mask close to the object but leave some space around it for After Effects to analyze the frames better.
You can use the following steps to draw a simple mask:
- In the Timeline panel, select the layer and select the Pen tool.
- Select key points along the shape that you want to mask. To close the mask, select again on the start point.
- Adjust the mask point by using the Selection tool. Select and drag points to adjust them.
- If you want the mask to have refined curves, select around each mask point to adjust the curve.
- Once the masking is done, select Subtract.
- Since it's moving footage, track the mask so it moves with the boat. Right-click the mask layer and select Track Mask.
- In the Timeline panel, select the layer and select the Pen tool.
-
In the Timeline panel, right-click the layer and set the mask mode to Subtract. After Effects creates a transparent area in place of the boat.
-
Open the Content-Aware Fill panel by selecting Windows > Content-Aware Fill.
-
The panel displays multiple options. For a detailed list of the panel options, see the Content-Aware Fill panel. Use the following settings:
- Set the Fill Method to Object.
- Set the Range to Entire Duration.
-
Select Generate Fill Layer. After Effects analyzes each frame, fills the transparent area, and adds a Fill layer to the Timeline panel. The layer contains the resulting sequence of images that After Effects has analyzed. The name of the layer displays the number of images in that sequence.
This fill method is best used on footage with a moving camera as it replaces the object entirely with what is behind it. It fills the transparent area by taking pixels from the current and surrounding frames and outputs a seamless-looking frame.
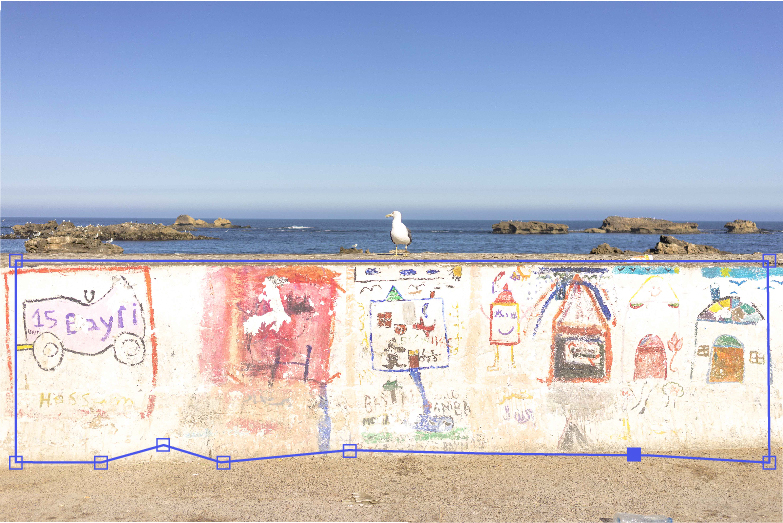
Example 2: Footage where the background is a flat surface without much detail
-
Use the first three steps in the Example 1 section to mask the areas to be replaced.
-
Select Window > Content-Aware Fill.
-
Set Fill Method to Surface and Range to Work Area.
-
Fill Target displays the transparent area to be filled. Select Generate Fill Layer and let After Effects render the frames.
Example 3: Work with your footage in Photoshop
There can be footage where Content-Aware Fill alone may not achieve the desired results. For example, footage with water or areas with varied light and texture. In such situations, you can take advantage of Adobe Photoshop tools such as Clone Stamp to fine-tune your footage.
Make sure you have Photoshop installed on your machine.
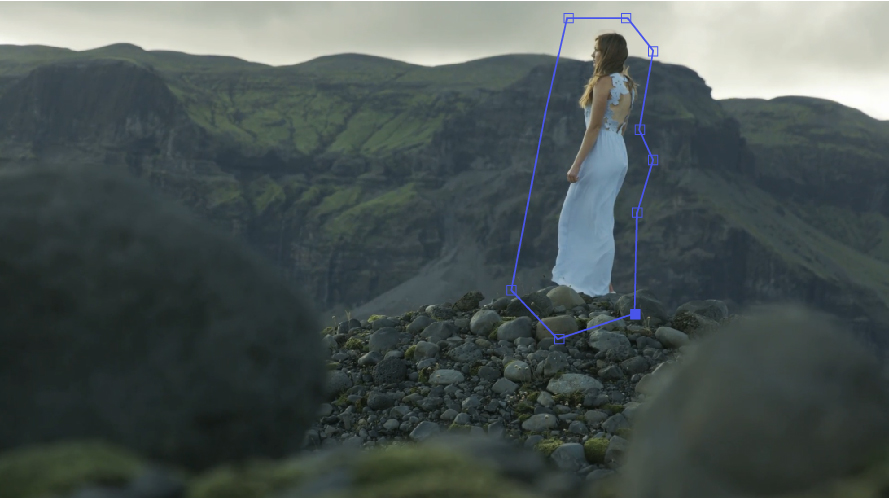
In the above example, we remove the girl from the footage where the background has varied light and texture.
-
Follow the steps in the above example to mask the girl in the footage. Set the Fill Method to Object.
Frame with the girl masked out. Frame with the girl masked out. -
After you mask, use the Create Reference Frame option in the Content-Aware Fill panel.
-
To make a Reference Frame, after you create a mask, select a frame where the object is the largest in your shot. In this example, use the first frame. Select the Create Reference Frame button to send that frame (with its mask) to Photoshop. A reference frame is a user-painted single-still clean plate to teach the Content-Aware Fill algorithm what pixels to fill in your masked area.
Open reference frame in Photoshop. Open reference frame in Photoshop. -
Paint in the fill in any way that works for you. For this example, use the Clone Stamp tool to get finer results. After you make the edits, save the footage. Avoid saving the footage using Save As but always Save the changes with the same name and location. Otherwise, Photoshop creates a new file that isn’t referenced directly by After Effects.
Reopen After Effects, and the Content-Aware Fill panel places your reference frame on a layer below your original shot. This layer updates with your saved paint job from Photoshop and fills the object mask for that frame only with your Photoshop Reference Frame.
Another tool you can use is the Photoshop Content Aware Fill. or Retouch and repair photos.
-
Click the Generate Fill Layer button to render Content-Aware Fill that references your fixed frame.
Content-Aware Fill settings
To open the Content-Aware Fill Settings dialog, select the menu icon (three bars) in the title bar of the Content-Aware Fill panel and select Content-Aware Fill Settings.
- Output Depth: The color depth, in bits per channel (8-, 16-, or 32-bpc), used to write the fill layer sequence files. By default, Output Depth inherits the project's color depth.
- Output Location: Choose where After Effects After Effects saves the fill layer sequence files. By default, the files are saved to a folder named Fills, which is in the same folder as the project file.
- Path Type: Project Relative saves the files to a location relative to the project file. Absolute specifies the full path to the folder.
- Path: The path to the folder. For Absolute, this is the full path to the folder. For Project Relative, this specifies the path relative to the project file. A single dot (.) in the path represents the folder where the project file is located. Use two dots (..) to go up or down one level.
- Create Photoshop Reference Frame: Save reference frames as a PSD file and open it in Photoshop. Enabled by default. If disabled, saves the reference frame as a PNG (8- or 16-bpc) or EXR (32-bpc) file and opens it in the system default application for those file types.
- Create Photoshop Sequence for Output: Saves fill layer sequences as PSD files. Disabled by default. If disabled, fill layer sequences are saved as PNG (8- or 16-bpc) or EXR (32-bpc) files.
- Auto-manage Unused Fill Footage: When a new fill layer is generated, you'll be asked if you want to delete fill layer footage that isn't being used in a composition. Disabled by default.
Delete Unused Fill Footage
To manually delete fill layer footage that isn't being used by a composition, select the menu icon in the title bar of the Content-Aware Fill panel and choose Delete Unused Fill Footage.
Important points and tips
- You can select an area in a footage using any method that creates transparency, including:
- Mask
- Roto Brush
- Eraser Tool
- Keying methods such as the Keylight method
- Keyframing
- If you have 4K footage in an HD comp, use footage that is already scaled down via transcoding for better performance.
- Remove more complicated items in sections. For example, you can remove a person and their shadow separately more effectively than removing both at once.
- Smaller masks take less time to process than larger ones.
- The feature might give different results for a complex moving texture like water or areas where there is varied light and texture.
- If the mask is feathered, Content-Aware Fill blends in the filled region with the original content based on this alpha value (semi-transparency). This is very useful when you use the panel, and it causes a noticeable boundary between the filled region and the original content.
- Generate Fill Layer renders sequences of images that are placed in the timeline. These files may take up considerable space on the hard drives, depending on the kind of footage and duration of your sequence.
- In certain cases, Content-Aware fill alone may be unable to remove objects with precision. To improve results, create a reference frame, take it into Photoshop, and use the tools there to fine-tune the results.
- When shooting footage, consider the background and foreground of your composition to reduce editing time during post-production.


