- Adobe Premiere Rush User Guide
- Introduction
- Import footage
- Edit video
- Edit your video in the timeline
- Add and refine audio
- Change video color, size, and position
- Create titles
- Add transitions, pan and zoom effects and automatically reframe your clips
- Transform clip properties
- Change aspect ratio of your video
- Create a picture-in-picture effect
- Speed up or slow down video
- Use fonts from Adobe Fonts
- Duplicating projects and sequences
- Export video
- Premiere Rush on iOS and Android
- Adobe Premiere Rush on mobile | Common questions
- Create and edit videos using Adobe Premiere Rush on iOS
- Export video to social media channels
- Create and edit videos using Adobe Premiere Rush on Android
- Manage Adobe Premiere Rush subscriptions on iOS
- Manage Adobe Premiere Rush subscriptions on Android
- Manage Adobe Premiere Rush subscriptions on Samsung Galaxy Store
Perform simple edits to your videos - adding, deleting, and trimming clips in the timeline.
As we introduce the next generation of Adobe Premiere mobile apps, we are discontinuing Adobe Premiere Rush. Effective September 30, 2025, Premiere Rush will no longer be available on Adobe.com. As an alternative, we recommend Premiere on iPhone; a version for Android is currently also in development. For more information, visit the Premiere Rush Discontinuation FAQ.
After you create a project in Premiere Rush, you can start editing your project in the timeline. Generally at this stage of editing, you trim clips, move them around, add more clips, or delete clips.
At this point in your editing workflow, the focus is not as much on enhancing your video (using techniques such as transition or color correction). The aim here is to make sure that your video follows a particular narrative in the order you want and that all extra footage is removed.
Here are some common tasks that you will perform while editing your video in the timeline:
Premiere Rush timeline
Before you start editing, take a minute to become familiar with the Premiere Rush timeline and its capabilities.
The Premiere Rush timeline is a Non-Linear Editor (NLE). The timeline allows you to add, trim, split, duplicate, and arrange clips. You can arrange the media in any order and use additional tracks to stack or layer clips; you don't have to put the media in the timeline in a sequential order.
Working with tracks in the timeline
In Premiere Rush, you can have a maximum of seven tracks in the timeline: four video tracks and three audio-only tracks. Video tracks support video (with or without audio), images, and graphics. Audio-only tracks support audio-only clips, such as music and voiceover recordings.
The main track is the video (V1) track. When you import video footage or still images, they are all by default arranged on this V1 track. If you import audio files or add titles, those clips are placed in separate tracks in the timeline.
The main V1 track is gapless. When you import footage, Premiere Rush automatically assembles all clips in this track next to one another with no gaps in between the clips. Similarly, when you remove a portion of the footage, the rest of the clips automatically align themselves leaving no gaps in the timeline. You don't have to manually align clips. The V1 track is lighter in color than the other tracks.
Clips placed on tracks V2-V4 and A1-A3 are associated with clips in the main V1 track, keeping your clips in sync.
How Premiere Rush associates clips in the timeline
When you select a clip in the V1 track, clips that are associated with it in tracks V2-V4 and A1-A3 display a yellow line along their bottom edge. In addition, a vertical yellow line shows the connection point to the clip in the V1 track.


Move or rearrange clips
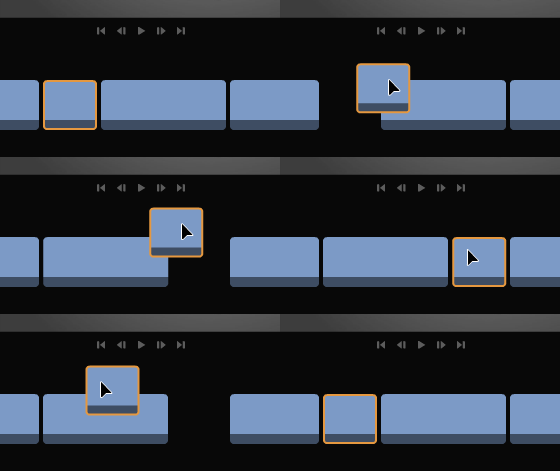

Click a clip that you want to move in the timeline; an orange border appears around the clip to indicate that it is selected.
To select multiple clips, place your cursor and hold down to lasso multiple clips. Press the Ctrl or Command key and click individual clips to select multiple non-adjacent clips.
For multiple, adjacent clips that are selected, you can drag the selected clips to a new location in the timeline to rearrange them. You can also move those clips to other tracks.
TIP: You can use this technique to create cutaway shots (for example, where you show two different perspectives of a single event).
Trim clips
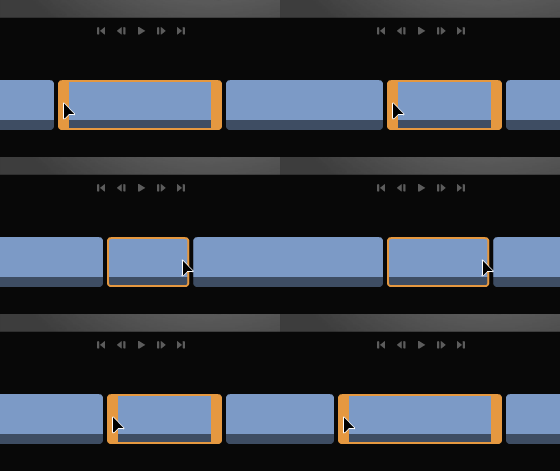

You can fine-tune the duration of a clip in your timeline by moving the clip’s start point or end point. This is called trimming.
Click on a clip to select it. Orange handles appear around the clip when it is selected. Click-hold and drag Go to the beginning or the end of the clip, hold the thick orange handle and drag it to the right to trim away a portion of the beginning of the clip.
Trimming clips does not trim the original video. You can drag the thick yellow line to the right to extend the trimmed clip at any time.
Split clips
Splitting is useful if you’ve added a clip to your timeline but don’t want to use the entire clip all at once.
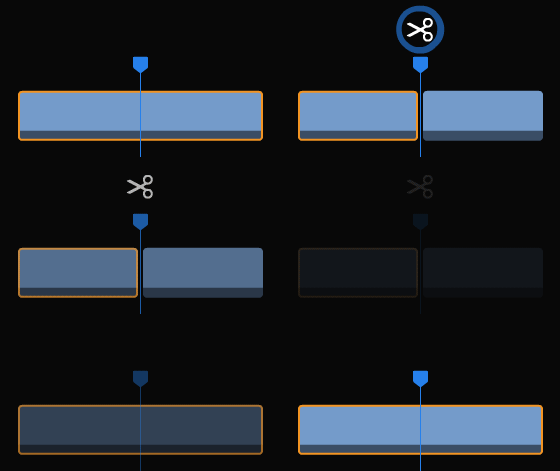
To split a clip into two, select the clip in the timeline and drag the playhead to the place you want the split to occur (you can also use the < and > keys or zoom into the timeline to get a precise cut) and then click Split (the Scissors icon in the left toolbar).
After you split a clip, you can rearrange the two clips and move them around separately within your timeline.

Duplicate clips


Duplicating a clip before editing is a great idea as you can retain the original clip and do before-and-after comparisons while editing.
Select a clip in the timeline, and click the Duplicate icon in the left toolbar.
If the selected clip is on the main V1 track, Premiere Rush duplicates the clip and adds the new clip after the original clip in the timeline.
If the selected clip is an audio clip or a title, Premiere Rush duplicates the clip and adds the new clip at the exact spot as the original but in a new track.
Speed up or slow down clips
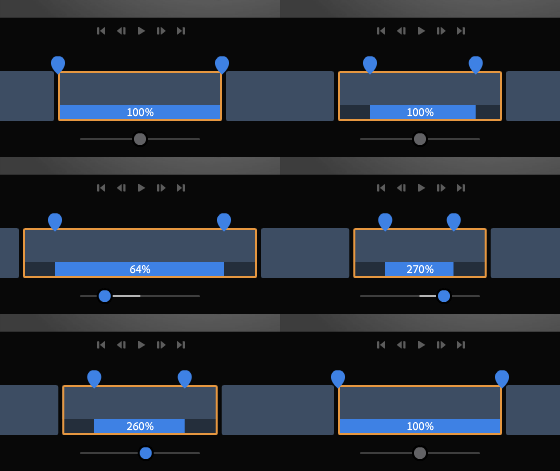

You can increase or decrease the duration of an entire clip or a selected portion of a clip. To select a portion of a clip, use the blue handles, then use the Range Speed slider to speed up or slow down the selected portion.
For more information, see Speed up or slow down video.
Manage tracks
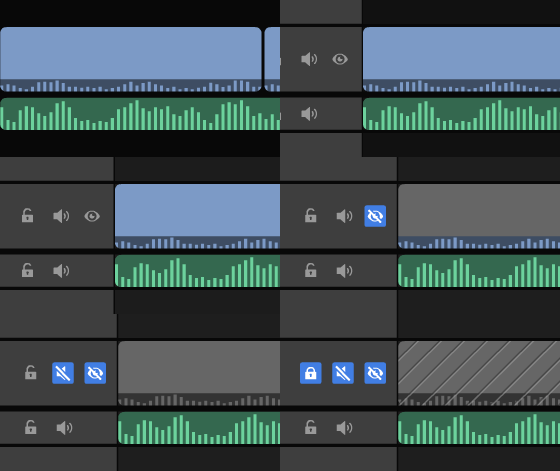
You can hide tracks on the timeline to make editing easier on other tracks. You can also lock tracks to prevent changes.
To show and hide tracks: Click the Eye icon.
To lock and unlock tracks: Click the Lock icon.
To mute and unmute audio: Click the Loudspeaker icon.

Add clips
To add media clips to your project while editing, place the playhead on the timeline where you want to add the clip. Then click the + icon in the left toolbar, and select Media. Media Browser opens on the left of the application. Use the navigation buttons at the top to view folders and select your media. After you have selected all of your media, click Add.
Media Browser only displays files that are supported for import into Premiere Rush. For more information on supported file formats, see Supported video and audio formats for import.
Delete clips
To delete a clip, click the clip on the timeline to select it and click the Delete icon to the left of the timeline or press Delete on the keyboard.