
Original clip
Last updated on
Oct 1, 2024
- Get to know Premiere Elements
- Adobe Premiere Elements User Guide
- Download and Install Premiere Elements
- Introduction to Adobe Premiere Elements
- Workspace and workflow
- Working with projects
- 360° and VR Video Editing
- Importing and adding media
- Arranging clips
- Editing clips
- Reduce noise
- Select object
- Candid Moments
- Color Match
- Color Fonts and Emojis
- Smart Trim
- Freehand Crop
- Delete All Gaps
- Change clip speed and duration
- Split clips
- Freeze and hold frames
- Adjusting Brightness, Contrast, and Color - Guided Edit
- Stabilize video footage with Shake Stabilizer
- Replace footage
- Working with source clips
- Trimming Unwanted Frames - Guided Edit
- Trim clips
- Editing frames with Auto Smart Tone
- Artistic effects
- Color Correction and Grading
- Applying transitions
- Special effects basics
- Effects reference
- Applying and removing effects
- Create a black and white video with a color pop - Guided Edit
- Time remapping - Guided edit
- Effects basics
- Working with effect presets
- Finding and organizing effects
- Editing frames with Auto Smart Tone
- Fill Frame - Guided edit
- Create a time-lapse - Guided edit
- Best practices to create a time-lapse video
- Applying special effects
- Use pan and zoom to create video-like effect
- Transparency and superimposing
- Reposition, scale, or rotate clips with the Motion effect
- Apply an Effects Mask to your video
- Adjust temperature and tint
- Create a Glass Pane effect - Guided Edit
- Create a picture-in-picture overlay
- Applying effects using Adjustment layers
- Adding Title to your movie
- Removing haze
- Creating a Picture in Picture - Guided Edit
- Create a Vignetting effect
- Add a Split Tone Effect
- Add FilmLooks effects
- Add an HSL Tuner effect
- Fill Frame - Guided edit
- Create a time-lapse - Guided edit
- Animated Sky - Guided edit
- Select object
- Animated Mattes - Guided Edit
- Double exposure- Guided Edit
- Special audio effects
- Movie titles
- Create Titles and MOGRTs
- Creating titles
- Adding shapes and images to titles
- Adding color and shadows to titles
- Apply Gradients
- Add responsive design
- Editing and formatting text
- Text Styles and Style Browser
- Align and transform objects
- Motion Titles
- Appearance of text and shapes
- Exporting and importing titles
- Arranging objects in titles
- Designing titles for TV
- Applying styles to text and graphics
- Adding a video in the title
- Disc menus
- Sharing and exporting your movies
You can correct, improve, and otherwise modify your clips with the effects provided in Adobe Premiere Elements. All effects are preset with default values for settings, so when you apply an effect, it alters your clip. You can adjust and animate values as desired.
This reference contains descriptions of all audio and video effects included as part of Adobe Premiere Elements. It defines only those effect properties and tools that may not be self-explanatory. It doesn’t include descriptions of effects installed with capture cards or third-party plug-ins.
Gallery of video effects
The samples below illustrate just some of the video effects included with Adobe Premiere Elements. To preview an effect not in this gallery, apply it and preview it in the Monitor panel. (See Apply and preview effects.)


Note
Below gallery of NewBlue Video Effects is applicable for 2022 and earlier versions.

Adjust
Channel Mixer
Every clip in Premiere Elements is composed from three color channels: red, green, and blue. Each channel contains the luminance values for its respective color. Using the Channel Mixer effect, you can add the values from any of these channels to any of the other channels, for example, adding the luminance values from the green channel into the red channel. Use this effect to make creative color adjustments not easily achieved with the other color adjustment tools. Create high‑quality grayscale clips by choosing the percentage of the grayscale contributed by each color channel, create high‑quality sepia‑tone or other tinted clips, and swap or duplicate channels. You could use this effect, for example, to entirely replace a noisy blue channel with values taken from, say, a clean green channel.
Each of the properties for the Channel Mixer is labeled with a pair of color names. The word to the left of each hyphen names the property’s output channel; the word to the right names its input channel. For example, the Red-Green property has the red channel as its output and the green channel as its input. You can use it to add the luminance values of the green channel to the red channel.


A. Output channel B. Input channel C. Value
The value to the right of each property name sets the percentage of the output channel contributed by the specified input channel. This number is a percentage ranging from -200% to 200%.
The Constant (Const) properties for each output channel allow you to specify a base value to add to that output. For example, a Red-Const value of 50 will add 50% of full luminance (50% of 255, or about 127) to every pixel in the red output channel.
The Monochrome option creates a grayscale clip from the output channel values. Monochrome is useful for clips that you plan to convert to grayscale. If you select this option, adjust the channel values, and then deselect this option, you can modify the blend of each channel separately, creating a hand‑tinted appearance.
Mix Channels in a clip
-
Apply the Channel Mixer effect, and then click the Applied Effects button. Expand the Channel Mixer effect and drag any channel’s value to the left to decrease the channel’s contribution to the output channel. Drag the value to the right to increase the channel’s contribution to the output channel. Alternatively, click an underlined value, type a value between ‑200 and +200 in the value box, and press Enter. Using a negative value inverts the source channel before adding it to the output channel.
-
(Optional) Drag or type a value for the channel’s constant value. This value adds a base amount of a channel to the output channel.
-
(Optional) Select Monochrome to apply the same settings to all the output channels, creating a clip that contains only gray values.
-
Click Done.
Extract
The Extract effect removes colors from a video clip or still image, creating a textured grayscale appearance. Control the clip’s appearance by specifying the range of gray levels to convert to white or black.
Specify Extract settings
-
Apply the effect.
-
Click the Applied Effects button, and then click the Setup button to the right of the effect name.
-
In the Extract Settings dialog box, drag the two triangles underneath the histogram (a diagram showing the number of pixels at each brightness level in the current keyframe) to specify the range of pixels converted to white or black. Pixels between the triangles are converted to white. All other pixels are converted to black.
-
Drag the softness slider to introduce levels of gray into the pixels that have been converted to white. Higher softness values produce more gray.
-
(Optional) Select Invert to reverse the range that is converted to white and black, and click OK.
-
Click Done.
Image Control
The Image Control effect emulates the controls of a video processing amplifier. This effect adjusts the brightness, contrast, hue, and saturation of a clip.
Lighting Effects
The Lighting Effects effect applies creative lighting effects on a clip with up to five lights. You can control lighting properties such as lighting type, direction, intensity, color, lighting center, and lighting spread. Use the Bump Layer control to use textures or patterns from other clips to produce special lighting effects, such as a 3D-like surface effect.
Posterize
The Posterize effect specifies the number of tonal levels (or brightness values) for each channel in a clip and maps pixels to the closest matching level. For example, if you choose two tonal levels in an RGB clip, you get two tones for red, two tones for green, and two tones for blue. Values range from 2 to 255. Although the results of this effect are most evident when you reduce the number of gray levels in a grayscale clip, Posterize also produces interesting effects in color clips.
Use Level to adjust the number of tonal levels for each channel to which Posterize will map existing colors.
Blur and sharpen
Antialias (Windows only)
The Antialias effect blends the edges between areas of highly contrasting colors. When blended, colors create intermediate shades that make transitions between dark and light areas appear more gradual.
note: You cannot apply keyframes to the Antialias effect.

A. Antialias off B. Antialias on
Fast Blur
Use the Fast Blur effect to specify how much to blur a clip. You can specify that the blur is horizontal, vertical, or both. Fast Blur blurs areas more quickly than Gaussian Blur.
Gaussian Blur
The Gaussian Blur effect blurs and softens the clip and eliminates noise. You can specify that the blur is horizontal, vertical, or both. (Gaussian refers to the bell‑shaped curve that is generated by mapping the color values of the affected pixels.)
Ghosting (Windows only)
The Ghosting effect overlays transparencies of the immediately preceding frames on the current frame. This effect can be useful, for example, when you want to show the motion path of a moving object, such as a bouncing ball. Keyframes cannot be applied to this effect.

Sharpen (Windows only)
The Sharpen effect increases the contrast where color changes occur.
Channel
Invert
The Invert (video) effect inverts the color information of a clip.
Channel
Specifies which channel or channels to invert. Each group of items operates in a particular color space, inverting either the entire clip in that color space or just a single channel. RGB consists of three additive color channels: red, green, and blue. HLS consists of three calculated color channels: hue, lightness, and saturation. YIQ is the NTSC luminance and chrominance color space, where Y is the luminance signal, and I and Q are the in‑phase and quadrature chrominance signals. Alpha, not a color space, provides a way to invert the alpha channel of the clip.
Blend with Original
Combines the inverted clip with the original. You can apply a fade to the inverted clip.
Color Correction
AutoTone and Vibrance
The AutoTone effect uses automatic Adobe Premiere Elements settings for exposure, brightness, contrast, blacks, and whites. You can choose to use the default settings or edit the parameters after applying the effect to a clip.
Note
While AutoTone parameters are applied automatically to each frame, set the Vibrance value manually.
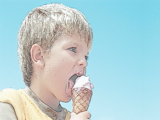
Vibrance prevents over saturation of colors as full saturation values are reached. For example, you can use vibrance to prevent over saturation of skin tones. The saturation levels of lower-saturated colors are affected more than the higher-saturated colors.
Note
Color Correction is applicable for Premiere Elements 2024 and previous Versions
HSL Tuner
You can adjust the hue, saturation, and luminance of specific colors in your image or video using the HSL tuner effect. Use the slider controls in the Applied Effects panel to adjust the hue, luminance, or saturation for the following colors in your image:
- Red
- Orange
- Yellow
- Green
- Aqua
- Blue
- Purple
- Magenta
The HSL tuner effects enables you to provide a movie-type look to your video.

Split Tone
Use the color balance adjustment to tone the shadows and highlights of your image in two different colors.
Use the Split toning effect to tint the highlights in your image with a particular color and the shadows with a different color. You can achieve best results, if the highlights and shadows in your image are of opposite colors.Use the Hue and Saturation control sliders to adjust the hue and saturation for both highlights and shadows

Distort
Note
All the Distort options are available only on Windows.
Bend (Windows only)
The Bend effect distorts a clip by producing the appearance of a wave traveling both vertically and horizontally through it. You can produce a number of different wave shapes at various sizes and rates. To change the following effect properties for the horizontal dimension, the vertical dimension, or both, select the clip with the effect in the Expert view timeline. Click the Applied Effects button, and then click the Setup button to the right of the effect name in the Applied Effects panel.
Direction
Specifies the direction of the wave. The In setting specifies that waves move toward the center of the clip. The Out setting specifies that waves start in the center and move to the edge of the clip.
Wave
Specifies the shape of the wave. Choose from a sine wave, circle, triangle, or square.
Intensity
Specifies the height of the wave.
Rate
Specifies the frequency of the wave. To produce a wave only vertically or horizontally, move the Rate slider all the way to the left for the direction you do not want.
Width
Specifies the wave width.
Corner Pin
Applicable for 2022 and earlier versions.
The Corner Pin effect distorts a clip by changing the position of any of its four corners. Use it to stretch, shrink, skew, or twist a clip, or to simulate perspective or movement that pivots from the edge of a layer, such as a door opening.

A. Original clip B. Corner moved C. Final clip
Lens Distortion
The Lens Distortion effect simulates a distorted lens through which the clip is viewed.
Curvature
Changes the curvature of the lens. Specify a negative value to make the clip concave, or a positive value to make the clip convex.
Vertical and Horizontal Decentering
Displaces the focal point of the lens, making the clip bend and smear. At extreme settings, the clip wraps in on itself.
Vertical and Horizontal Prism FX
Creates a result similar to vertical and horizontal decentering, except that, at extreme values, the clip doesn’t wrap in on itself.
Fill Color
Specifies the background color.
Fill Alpha Channel
When selected, makes the background transparent so that underlying tracks are visible. To access this option from the Applied Effects panel, click the Setup button to the right of the effect name.
Mirror
The Mirror effect creates a mirror image of the clip and places the center of its side at a pivot point you specify. You can make both the location of the pivot point and the reflection angle change over time.
Reflection Center
Setting the first value determines the horizontal location of the pivot point. Setting the second determines its vertical location.
Reflection Angle
Setting this value determines the angle at which the mirror image pivots at the pivot point.
Ripple (Windows only)
The Ripple effect produces an undulating pattern on a clip, like ripples on the surface of a pond. The shape, severity, and direction of the ripple pattern are adjustable, as well as the background color.
Spherize
Applicable for 2022 and earlier versions.
The Spherize effect wraps the clip around a sphere, giving objects and text a three-dimensional appearance. To set the size of the sphere, enter a Radius value from 0.1 to 2,500. To position the effect, enter horizontal or vertical values for Center Of Sphere.
Transform
The Transform effect applies two-dimensional geometric transformations to a clip. Use the Transform effect to skew a clip along any axis. Apply the Transform effect instead of using a clip’s fixed effects if you want to render anchor point, position, scale, or opacity settings before other Standard effects are rendered.
Anchor Point
Specifies the point, in an x,y coordinate, around which the clip will be scaled or skewed.
Position
Specifies the location, in an x,y coordinate, of the center (anchor point) of the clip.
Scale Height
Scales height up or down as a percentage of the source clip height.
Scale Width
Scales width up or down as a percentage of the source clip width.
Uniform Scale
Scales height and width proportionately.
Skew
Specifies skew amount.
Skew Axis
The axis on which the skew is based. Changing the axis has no effect if Skew is 0.
Rotation
Specifies the number of complete rotations and degree that the clip rotates.
Opacity
Specifies the degree of transparency of the clip, in percentages.
note: Transform is an Adobe After Effects effect that includes the Shutter Angle control and the Use Composition option; both of which apply only in Adobe After Effects.
Twirl
The Twirl effect rotates a clip around its center. The clip is rotated more sharply in its center than at the edges.
Wave Warp
The Wave Warp effect distorts a clip to make it wave-shaped.
Wave Type
Options from a pop-up menu specify the shape of the wave.
Wave Height
Specifies the height of the wave.
Wave Width
Specifies the distance from one wave crest to the next.
Direction
Specifies the direction of the wave, in degrees.
Wave Speed
Specifies the rate at which the wave pulses during playback.
Pinning
Options from a pop-up menu set the orientation of the wave.
Phase
Sets the starting point, in degrees, at which the wave cycle begins.
Antialiasing
Options from a pop-up menu control the amount of blurring used to smooth the edges of the waves.
Generate
Lens Flare
Use the Lens Flare effect to simulate the refraction caused by shining a bright light into the camera lens.
Flare Center
Specifies a location for the center of the flare.
Flare Brightness
Specifies the percentage of brightness. Values can range from 0% to 300%.
Lens Type
Selects the type of lens to simulate.
Blend With Original
Specifies the degree to which the effect will be blended with the source clip.
Write-on
Creates the effect of text being hand-written on the screen. The key to this effect is animating the position of the Write-on effect, by creating keyframes in the Effect Controls panel. It is recommended that you use this effect for videos only. You may experience severe performance degradation if this effect is used on still images or synthetic clips.
- Select the Write-on effect from the Effects panel and apply it to a video clip on the timeline.
- Select the clip on the timeline and expand the effect (Write-on) in the Applied Effects panel.
- Position the edit line at the beginning of the clip.
- Drag the small circle with an + in the center, on the Monitor window, to where you want to begin writing.
- To animated the Brush Position, open the keyframe control and toggle the key next to the Brush Position parameter.
- Increase the brush size from 2 to a higher value (say 10)
- Move the CTI a few frames on the timeline to move the Write-on point to a new location. Repeat this several times as required and preview the effect.
Note: You can also tweak and animate the other parameters such as Brush Hardness, Brush Opacity, etc.
Image control
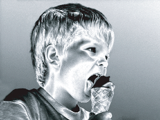
Black & White
The Black & White effect converts any color clip to grayscale. That is, colors appear as shades of gray. You cannot apply keyframes to this effect.
Color Balance (HLS)
The Color Balance (HLS) effect alters a clip’s levels of hue, lightness, and saturation.
Hue
Specifies the color scheme of the clip.
Lightness
Specifies the brightness of the clip.
Saturation
Specifies the intensity of the colors in the clip.
note: Setting the Saturation to ‑100 converts a movie to grayscale.
Note
Color Balance (HLS) is applicable for Premiere Elements 2024 and previous versions.
Color Balance (RGB)
The Color Balance effect changes colors in the clip by adjusting its RGB levels. Drag the Red, Green, and Blue sliders to adjust the level of each color.
Note
Color Balance (RGB) is applicable for Premiere Elements 2024 and previous versions.,
Color Pass (Windows only)
The Color Pass effect converts a clip to grayscale, with the exception of specified colors. Use the Color Pass effect to highlight a particular area of a clip. For example, in a clip of a basketball game, you could highlight the basketball by selecting and preserving its color, while keeping the rest of the clip displayed in grayscale. Note, however, that with the Color Pass effect, you can isolate only colors, not objects within the clip.
Specify Color Pass settings
-
Apply the effect.
-
In the Project Assets panel, select the clip with the effect and click the Applied Effects button. Then click the Setup button to the right of the effect name in the Applied Effects panel.
-
In the Color Pass Settings dialog box, select the color you want to preserve by clicking a color in the Clip Sample area on the left (the pointer becomes an eyedropper), or by clicking the Color swatch and selecting a color in the Color Picker dialog box.
-
Drag the Similarity slider to increase or decrease the range of the specified color.
-
To reverse the effect, so that all colors except the specified color are preserved, select Reverse and click OK.
-
Click Done.
Color Replace (Windows only)
The Color Replace effect replaces all occurrences of a selected color with a new color, preserving any gray levels. Using this effect, you could change the color of an object in a clip by selecting it, and then adjusting the controls to create a different color.
Replace a color
-
Apply the effect.
-
In the Project Assets panel, select the effect and click the Applied Effects button. Then click the Setup button to the right of the effect name Applied Effects panel.
-
In the Color Replace dialog box, select the color you want to replace by clicking a color in the Clip Sample area on the left (the pointer becomes an eyedropper), or by clicking the Target Color swatch and selecting a color in the Color Picker dialog box.
-
Choose the replacement color by clicking the Replace Color swatch.
-
Broaden or reduce the range of the color you’re replacing by dragging the Similarity slider.
-
Select the Solid Colors property to replace the specified color without preserving any gray levels, and click OK.
-
Click Done.
Gamma Correction
The Gamma Correction effect lightens or darkens a clip without substantially changing the shadows and highlights. It does this by changing the brightness levels of the midtones (the middle‑gray levels), while leaving the dark and light areas unaffected. The default gamma setting is 7. You can adjust the gamma from 1 to 28.
Note
Gamma Correction is applicable for Premiere Elements 2024 and previous Versions
Tint
The Tint effect alters a clip’s color information. For each pixel, the luminance value specifies a blend between two colors. Map Black To and Map White To specify to which colors dark and bright pixels are mapped. Intermediate pixels are assigned intermediate values. Amount To Tint specifies the intensity of the effect.
Keying
For information on using keying effects to create transparency, see Superimposing and transparency.
Alpha Adjust
Use the Alpha Adjust effect in place of the Opacity effect when you need to change the default render order of fixed effects. Change the opacity percentage to create levels of transparency. The following controls allow you to interpret the alpha channel in the clip.
Note
This effect ignores or inverts the alpha channel of only a single instance of a clip. To adjust the alpha channel of every instance of the clip, you need to use the Interpret Footage command.
Ignore Alpha
Ignores the alpha channel of the clip.
Invert Alpha
Reverses the transparency and opaque areas of the clip.
Mask Only
Displays only the alpha channel.

A. Clip with alpha channel B. Ignore Alpha C. Invert Alpha D. Mask Only
Blue Screen Key and Green Screen Key (Windows only)
The Blue Screen Key effect and the Green Screen Key effect create a keyhole of all clip pixels that are similar to a standard blue screen or green screen, so that they become transparent. This effect is typically used to replace a blue or green background with another clip, as in replacing a blue screen behind a TV weatherman with a weather map.
Effective use of the Blue Screen Key or the Green Screen Key requires footage where the background is a bright, evenly-lit standard blue or green screen. Make sure that persons or objects you place in front of the backdrop don’t match the color of the backdrop (unless they have areas that you also want to make transparent). For footage with a single-color background that doesn’t match these requirements, try Chroma Key or the Videomerge effect.
You can adjust the following settings in the Applied Effects panel:
Threshold
Sets the level of blue or green that determines transparent areas in the clip. Dragging the Threshold slider to the left increases the amount of transparency. Use the Mask Only option to view the black (transparent) areas as you move the Threshold slider.
Cutoff
Sets the opacity of the nontransparent areas that the Threshold setting specifies. Dragging the Cutoff value to the right increases the opacity. Select the Mask Only option to view the white (opaque) areas as you drag the Cutoff value.
Smoothing
Specifies the amount of anti-aliasing (softening) applied to the boundary between transparent and opaque regions. Choose None to produce sharp edges, with no anti-aliasing. This option is useful when you want to preserve sharp lines, such as those in titles. Choose Low or High to produce different amounts of smoothing.
Mask Only
Displays only the clip’s alpha channel. Black represents transparent areas, white represents opaque areas, and gray represents partially transparent areas.
Chroma Key (Windows only)
The Chroma Key effect creates transparency from a color or range of colors. You can use this key for a scene shot against a screen that contains a range of one color, such as a shadowy blue screen. Select a key color by clicking the Color swatch or by clicking the Eyedropper tool and selecting a color in the Monitor panel. Control the range of transparent colors by adjusting the tolerance level. You can also feather the edges of the transparent area to create a smooth transition between the transparent and opaque areas.

A. Original clip B. Blue color keyed out C. Clip on second track D. Final composite clip
Note
Apply the Chroma Key effect to a clip multiple times to key out multiple colors.
Adjust the following Chroma key settings as needed:
Similarity
Broadens or reduces the range of color that will be made transparent. Higher values increase the range.
Blend
Blends the clip you are keying out with the underlying clip. Higher values blend more of the clip.
Threshold
Controls the amount of shadows in the range of color you keyed out. Higher values retain more shadows.
Cutoff
Darkens or lightens shadows. Drag to the right to darken shadows, but do not drag beyond the Threshold slider; doing so inverts gray and transparent pixels.
Smoothing
Specifies the amount of anti‑aliasing applied to the boundary between transparent and opaque regions. Anti‑aliasing blends pixels to produce softer, smoother edges. Choose None to produce sharp edges with no anti‑aliasing. This option is useful when you want to preserve sharp lines, such as those in titles. Choose Low or High to produce different amounts of smoothing.
Mask Only
Displays only the clip’s alpha channel, as modified by the key settings. If Mask Only is selected, opaque areas of a clip appear white, transparent areas appear black, and partially transparent areas appear gray. Remove all the gray areas to produce a clean, hard‑edged key.
Difference Matte effect
The Difference Matte effect creates transparency by comparing a source clip with a difference clip, and then keying out pixels in the source image that match both the position and color in the difference image. Typically, it’s used to key out a static background behind a moving object, which is then placed on a different background. Often the difference clip is simply a frame of background footage (before the moving object has entered the scene). For this reason, the Difference Matte effect is best used for scenes that have been shot with a stationary camera and an unmoving background.

A. Original image B. Background image C. Image on second track D. Final composite image
Garbage Matte (Four‑Point, Eight‑Point, and Sixteen‑Point)
Use these effects to apply a garbage matte with either four, eight, or 16 adjustment points for more detailed keying. After you apply the effect, click the Applied Effects button, and then click the effect name in the Applied Effects panel to display the garbage matte handles in the Monitor panel. To adjust the matte, drag the handles in the Monitor panel.
Image Matte Key effect
The Image Matte Key determines transparent areas based on a matte image’s alpha channel or brightness values. To get the most predictable results, choose a grayscale image for your image matte, unless you want to alter colors in the clip. Any color in the image matte removes the same level of color from the clip you are keying. For example, white areas in the clip that correspond to red areas in the image matte appear blue‑green (since white in an RGB image is composed of 100% red, 100% blue, and 100% green); because red also becomes transparent in the clip, only blue and green colors remain at their original values. Select your matte by clicking the Setup button in Applied Effects panel.

Matte Alpha
Composites the clips using the alpha channel values of the image matte.
Matte Luma
Composites the clips using the luminance values of the image matte.
Luma Key effect
Applicable for 2022 and earlier versions.
The Luma Key effect keys out all the regions of a layer with a specified luminance or brightness. Use this effect if the object from which you want to create a matte has a greatly different luminance value than its background. For example, if you want to create a matte for musical notes on a white background, you can key out the brighter values. The dark musical notes become the only opaque areas.

Threshold
Specifies the range of darker values that are transparent. Higher values increase the range of transparency.
Cutoff
Sets the opacity of nontransparent areas specified by the Threshold slider. Higher values increase transparency.
Tip: You can also use the Luma Key effect to key out light areas by setting Threshold to a low value and Cutoff to a high value.
Non Red Key
Applicable for 2022 and earlier versions.
The Non Red Key creates transparency from green or blue backgrounds. This key is similar to the Blue Screen and Green Screen Keys, but it also lets you blend two clips. In addition, the Non Red Key helps reduce fringing around the edges of nontransparent objects. Use the Non Red Key to key out green screens when you need to control blending, or when the Blue Screen or Green Screen Keys don’t produce satisfactory results.
The following Non Red Key settings are adjusted in the Applied Effects panel:
Threshold
Sets the levels of blue or green that determine transparent areas in the clip. Dragging the Threshold slider to the left increases the amount of transparency. Use the Mask Only option to view the black (transparent) areas as you move the Threshold slider.
Cutoff
Sets the opacity of nontransparent areas that the Threshold value specifies. Higher values increase transparency. Drag to the right until the opaque area reaches a satisfactory level.
Defringing
Removes residual green or blue screen color from the edges of the opaque areas of a clip. Choose None to disable defringing. Choose Green or Blue to remove a residual edge from green-screen or blue-screen footage, respectively.
Smoothing
Specifies the amount of anti-aliasing (softening) that is applied to the boundary between transparent and opaque regions. Choose None to produce sharp edges, with no anti-aliasing. This option is useful when you want to preserve sharp lines, such as those in titles. Choose Low or High to produce different amounts of smoothing.
Mask Only
Displays only the clip’s alpha channel. Black represents transparent areas, white represents opaque areas, and gray represents partially transparent areas.
Note
Combine the Non Red Key with the Blue Screen Key, the Green Screen Key, or the Videomerge effect to smooth out hard to key areas.
Remove Matte effect
Applicable for 2022 and earlier versions.
The Remove Matte effect removes color fringes from clips that are premultiplied with a color. It is useful when combining alpha channels with fill textures from separate files. If you import footage with a premultiplied alpha channel, you may need to remove halos from an image. Halos are caused by a large contrast between the image's color and the background, or matte, color. Removing or changing the color of the matte can remove the halos.
Choose the color of the matte from the Matte Type menu.
RGB Difference Key effect (Windows only)
Applicable for 2022 and earlier versions.
The RGB Difference Key effect is a simpler version of the Chroma Key effect. It lets you select a range for the target color, but you cannot blend the image or adjust transparency in grays. Use the RGB Difference Key effect for a scene that is brightly lit and contains no shadows, or for rough cuts that don’t require fine adjustments.
Color
Specifies the color in the video that will be made transparent by the mask.
Similarity
Broadens or reduces the range of the target color that will be made transparent. Higher values increase the range.
Smoothing
Specifies the amount of anti-aliasing (softening) applied to the boundary between transparent and opaque regions. Choose None to produce sharp edges, with no anti-aliasing. This option is useful when you want to preserve sharp lines, such as those in titles. Choose Low or High to produce different amounts of smoothing.
Mask Only
Displays only the clip’s alpha channel. Black represents transparent areas, white represents opaque areas, and gray represents partially transparent areas.
Drop Shadow
Adds a 50% gray, 50% opaque shadow offset 4 pixels down and to the right from the opaque areas of the original clip image. This option works best with simple graphics such as titles.
Track Matte Key
The Track Matte Key reveals one clip (background clip) through another (superimposed clip), using a third file as a matte that creates transparent areas in the superimposed clip. This effect requires two clips and a matte, each placed on its own track. White areas in the matte are opaque in the superimposed clip, preventing underlying clips from showing through. Black areas in the matte are transparent, and gray areas are partially transparent.
You can create mattes in various ways:
Use the Titles view to create text or shapes (use only grayscale images if you plan to key using luma information), save the title, and then import the file as your matte.
Create a matte from any clip by using the Videomerge effect, Chroma Key, Blue Screen Key, Green Screen Key, or Non Red Key keying effect; then choose the effect’s Mask Only option.
Use Adobe Photoshop Elements, Adobe Illustrator, or Adobe Photoshop to create a grayscale image and import it into Premiere Elements.
The Track Matte Key has the following controls:
Matte
Lists the video tracks that contain clips that could be used as mattes. Choose one from the list.
Composite Using
Selecting Matte Alpha from this pop-up menu sets the matte’s transparency based on its alpha channel. Matte Luma sets transparency based on the matte’s luminance or brightness.
Reverse
Reverses the order of the background and foreground clips.
NewBlue Art Effects Elements
Airbrush
Applicable for 2022 and earlier versions.
The Airbrush effect creates an airbrushed effect by smoothing colors while maintaining sharp edges.
Spray
Lets you set the width of the airbrush nozzle. Increase the spray value to make the colors blend together over larger areas. Decrease the spray value to make individual color details become more evident.
NewBlue, Inc., www.newbluefx.com.
Colorize
Applicable for 2022 and earlier versions.
The Colorize effect turns the image black-and-white, and then enhances specific areas using one or two colors that you specify. The areas that are enhanced are those that contain one of the two colors you specify. You can specify the two paint colors that dominate the image, and adjust how much color is applied.
To use only one color, drag the strength value of one color to 0.
Color A and Color B
Specify the paint colors that stand out in the image. Use the eyedropper to select point colors directly from the image, or click the color swatch to choose a color from the Color Picker. Brightness or dullness does not affect the results; however, the hue is important. For example, you can select a dark green or a light green and the result will be the same. You can refine the color by clicking the color swatch and adjusting the color in the Color Picker.
Strength A and Strength B
Control the influence of the associated paint color. The stronger the paint, the more it is used to color neighboring hues.
NewBlue, Inc., www.newbluefx.com.
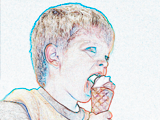
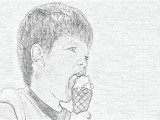
Line Drawing
Applicable for 2022 and earlier versions.
The Line Drawing effect converts an image into a series of dots and lines drawn against a plain-colored background.
Paper
Sets the background color. Use the eyedropper to select a color directly from the image, or click the color swatch to choose a color from the Color Picker.
Ink
Sets the pen color used for drawing the lines. Use the eyedropper or color swatch to choose a color.
Density
Sets the sensitivity for creating lines. Slide to the far left for little to no lines. Slide to the right and the picture becomes increasingly busy with lines filling in the textures.
NewBlue, Inc., www.newbluefx.com.
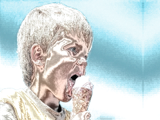
Metallic
Applicable for 2022 and earlier versions.
The Metallic effect paints an image to look like it’s hammered out of metal. You can control the metal’s color, its behavior, and the amount it mixes with the original image.
Color
Specifies the color of the metal. Use the eyedropper to select a color directly from the image, or click the color swatch to choose a color from the Color Picker.
Metal
Specifies how much metal is mixed into the picture. Use this in conjunction with the Picture control to create a nice blend between metal and original picture.
Picture
Specifies how much of the original picture to blend in with the metal. Mixing metal with the original colors creates a much more appealing result. Turn up both Metal and Picture to increase brightness.
NewBlue, Inc., www.newbluefx.com.
Pastel Sketch
Applicable for 2022 and earlier versions.
The Pastel Sketch effect softens colors and draws sharp lines around the edges, creating the effect of a painting in pastel colors.
Density
Controls the sensitivity for creating lines. Drag to the left to decrease the number of lines; drag right to increase the number of lines.
Blend
Specifies how to mix the original image with the sketched image. Drag to the right if you want more of the original image to show through. Drag to the left to achieve a more sketched look.
NewBlue, Inc., www.newbluefx.com.
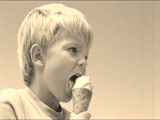
NewBlue Film Look
Old Film
Applicable for 2022 and earlier versions.
The Old Film effect makes your video look like an aged movie, complete with scratches, jitters, and graininess, all of which you can adjust for maximum impact.
Damage
Sets the amount of film damage, including wear and scratches.
Color-Sepia-B&W
Shifts the color of the film from full color to sepia to black and white.
Jitter
Controls the amount of camera jitter in the scene.
Wear Pattern
Sets the style of film wear. Use this in conjunction with Damage.
NewBlue, Inc., www.newbluefx.com.
NewBlue Motion Effects Elements
Active Camera
Applicable for 2022 and earlier versions.
The Active Camera effect simulates every variety of camera movement, from agitated hand-held, to jackhammer, to a gentle train ride.
Horizontal
Sets the range of motion along the horizontal (side to side) axis.
Vertical
Sets the range of motion along the vertical (up and down) axis.
Crop
Enlarges the picture so it doesn’t chop off at the edges from the camera movements. Depending on the Horizontal and Vertical settings, drag this control just enough to hide all exposed picture edges.
Rate
Sets the speed at which the camera moves from one position to another.
Jitter
Sets the rate and intensity of random jitter as the camera moves from one position to another.
NewBlue, Inc., www.newbluefx.com.
Earthquake
Applicable for 2022 and earlier versions.
The Earthquake effect recreates the chaos of an earthquake by moving, rotating, and blurring the image to simulate the effect of a shaking camera.
Magnitude
Specifies the range of motion. Drag to the left for subtle movement. Slide all the way to the right for the greatest range of movement.
NewBlue, Inc., www.newbluefx.com.
Shear Energy
Applicable for 2022 and earlier versions.
The Shear Energy effect twists the images with a shearing blur on two axes. For example, consider a row of books on a shelf, leaning to the right. If you push them to the left, they will lean to the left. Shear lets you increase or decrease the shear (angle) of the first image, then it blurs the image in the direction of the shear.
H Shear
Sets the horizontal shearing. When the image is sheared horizontally, it progressively blurs more to the sides as it moves up from the center point of the shear operation.
V Shear
Sets the vertical shearing. When the image is sheared vertically, it progressively blurs more to the top and bottom as it moves outward from the center point of the shear operation.
Angle
Rotates the shear blur in degrees.
Center
Specifies the center point of the shear blur.
Blend
Sets the amount of blur to mix in with the picture. Drag all the way to the left to make the blur disappear. Drag to the right to increase the percentage of blur until the original picture is completely replaced by the blurred image.
NewBlue, Inc., www.newbluefx.com.
Zoom Blur
Applicable for 2022 and earlier versions.
The Zoom Blur effect simulates a camera zoom within a shot, adding motion blur that you can adjust up or down for dramatic effect.
Zoom
Sets the strength of the zoom. Drag to the right to increase image magnification. As you increase, you create a blur that starts with the original image and expands it to the magnified version of the image.
Blend
Sets the amount of blur to mix with the nonblurred image. With Blend set all the way to the left, the blur disappears. Drag to the right to increase the percentage of blur until the original picture is completely replaced by the blurred image.
Center
Sets the origin of the zoom.
NewBlue, Inc., www.newbluefx.com.
NewBlue Cartoonr effect
Applicable for 2022 and earlier versions.
The NewBlue Cartoonr Plus effect is the latest addition to the list of effects that can be applied to movie clips in Adobe Premiere Elements Editor. The cartoon effect provides a cartoon-like feel to movie clips on which it is applied. Using this effect, you can create a cartoon-like movie out of a live-motion movie clip.
The effect can be customized using its various parameters.
Density
Controls how many lines to draw. At the lowest value, only the simplest, most obvious, lines show.
Clean Up
Removes dirt and noise between the lines.
Width
Sets the width of the lines. Increasing the value increases the overall width of the lines.
Mix
Determines the intensity of the black lines mixed into the image. Increase the value for solid, black lines.
Layers
Determines the number of layers of paint for coloring the picture. Set a low value to have broad, distinct layers. Increase the value to blend the paints into a continuously changing palette.
Smooth
Controls the smoothness of the layer edges. Low values set harsh, high-resolution layer edges. High values set the layers to wander in and out of the picture lines.
Sharpen
Increases the sharpness of the layer edges. At high values, a strong, almost brittle, effect is achieved.
Shading
Adds a bold shading around the edges of objects in the picture, making it more dramatic
ColorShift
When you change the value, the colors change to other colors that fall within the spectrum of the primary color.
Color
Sets the color saturation. Decreasing the value results in a monochrome image. Increase the value for vivid colors.
Brightness
Sets the overall brightness of the picture.
Contrast
Increases the contrast between the dark and light areas in the picture.
Blend
Mixes the original picture with the cartooned image. Decrease the value to get an image close to the original image. Increase the value for a more cartoonish effect.
Perspective
Basic 3D
The Basic 3D effect manipulates a clip in an imaginary three‑dimensional space. You can rotate your clip around horizontal and vertical axes and move it toward or away from you. You can also create a specular highlight to give the appearance of light reflecting off a rotated surface. The light source for the specular highlight is always above, behind, and to the left of the viewer. Because the light comes from above, the clip must be tilted backward to see this reflection. Specular highlights enhance the realism of the three‑dimensional appearance.

A. Swivel B. Swivel and Tilt C. Swivel, Tilt, and Distance
Swivel
Controls horizontal rotation (rotation around a vertical axis). You can rotate past 90° to see the back side of the clip, which is the mirror clip of the front.
Tilt
Controls vertical rotation (rotation around a horizontal axis).
Distance To Image
Specifies the clip’s distance from the viewer. As the distance gets larger, the clip recedes.
Specular Highlight
Adds a glint of light that reflects off the surface of the rotated layer, as though an overhead light were shining on the surface. When Draw Preview Wireframe is enabled, the specular highlight is indicated by a red plus sign (+) if it is not visible on the layer (the center of the highlight does not intersect the clip) and a green plus sign (+) if the highlight is visible. You must render a preview before the Specular Highlight effect becomes visible in the Monitor panel.
Preview
Draws a wireframe outline of the three‑dimensional clip. Because manipulating a clip in three‑dimensional space can be time consuming, the wireframe renders quickly so you can manipulate the controls to get the rotation you want. Deselect the Preview control when you finish manipulating the wireframe clip to see your final results.
Bevel Alpha
Applicable for 2022 and earlier versions.
The Bevel Alpha effect adds a beveled edge and lights to the alpha boundaries of a clip, often giving two‑dimensional elements a three‑dimensional appearance. (If the clip has no alpha channel or its alpha channel is completely opaque, the effect is applied to the edges of the clip.) The edge created in this effect is somewhat softer than that of the Bevel Edges effect. This effect works well with text containing an alpha channel.
Bevel Edges
The Bevel Edges effect gives a chiseled and lighted three‑dimensional appearance to the edges of a clip. Edge locations are determined by the alpha channel of the source clip. Unlike Bevel Alpha, the edges created in this effect are always rectangular, so clips with nonrectangular alpha channels do not produce the proper appearance. All edges have the same thickness.
Drop Shadow
The Drop Shadow effect adds a shadow that appears behind the clip. The shape of the Drop Shadow is determined by the clip’s alpha channel. Unlike most other effects, Drop Shadow can create a shadow outside the bounds of the clip (the dimensions of the clip’s source).
Since Drop Shadow uses the alpha channel, it works well with 32‑bit footage files from drawing programs and three‑dimensional rendering programs that support the alpha channel.
Note
Because Drop Shadow works best when it is the last effect rendered, apply this effect after applying all other effects. You can create a realistic‑looking shadow on animated clips by applying and animating the Motion or Basic 3D effect prior to applying Drop Shadow.
Pixelate
Facet (Windows only)
The Facet effect clumps pixels of similar color values in cells for a painterly effect. Keyframes cannot be applied to this effect.
Render
Lightning
The Lightning effect creates lightning bolts and other electrical effects, including a Jacob’s Ladder effect (an effect that depicts a small lightning bolt bridging two metal spikes, often seen in Frankenstein movies) between two specified points in a clip. The Lightning effect is automatically animated without keyframes across the clip’s time range.
Start Point, End Point
Specify where the lightning begins and ends.
Segments
Specifies the number of segments that form the main lightning bolt. Higher values produce more detail but reduce the smoothness of motion.
Amplitude
Specifies the size of undulations in the lightning bolt as a percentage of the layer width.
Detail Level, Detail Amplitude
Specify how much detail is added to the lightning bolt and any branches. For Detail Level, typical values are between 2 and 3. For Detail Amplitude, a typical value is 0.3. Higher values for either control are best for still images but tend to obscure animation.
Branching
Specifies the amount of forking that appears at the ends of bolt segments. A value of 0 produces no branching; a value of 1.0 produces branching at every segment.
Rebranching
Specifies the amount of branching from branches. Higher values produce tree‑like lightning bolts.
Branch Angle
Specifies the size of the angle between a branch and the main lightning bolt.
Branch Seg. Length
Specifies the length of each branch segment as a fraction of the average length of the segments in the lightning bolt.
Branch Segments
Specifies the maximum number of segments for each branch. To produce long branches, specify higher values for both the branch segment length and the branch segments.
Branch Width
Specifies the average width of each branch as a fraction of the width of the lightning bolt.
Adjust the following controls for the Lightning effect:
Speed
Specifies how fast the lightning bolt undulates.
Stability
Determines how closely the lightning undulates along the line defined by the start and end points. Lower values keep the lightning bolt close to the line; higher values create significant bouncing. Use Stability with Pull Force to simulate a Jacob’s Ladder effect and cause the lightning bolt to snap back to a position along the start line after it has been pulled in the Pull Force direction. A Stability value that is too low does not let the lightning stretch into an arc before it snaps back; a value that is too high lets the lightning bolt bounce around.
Fixed Endpoint
Determines whether the end point of the lightning bolt remains fixed in place. If this control is not selected, the end of the bolt undulates around the end point.
Width, Width Variation
Specify the width of the main lightning bolt and how much the width of different segments can vary. Width changes are randomized. A value of 0 produces no width changes; a value of 1 produces the maximum width changes.
Core Width
Specifies the width of the inner glow, as specified by the Inside Color value. The Core Width is relative to the total width of the lightning bolt.
Outside Color, Inside Color
Specify the colors used for the lightning bolt’s outer and inner glows. Because the Lightning effect adds these colors on top of existing colors in the composition, primary colors often produce the best results. Bright colors often become much lighter, sometimes becoming white, depending on the brightness of colors beneath.
Pull Force, Pull Direction
Specify the strength and direction of a force that pulls the lightning bolt. Use the Pull Force control with the Stability control to create a Jacob’s Ladder appearance.
Random Seed
Specifies a starting point for randomizing the lightning effects you have specified. Because random movement of the lightning may interfere with another clip or layer, typing another value for the Random Seed starts the randomizing at a different point, changing the movement of the lightning bolt.
Blending Mode
Specifies how the lightning is added to the layer. Adobe Premiere Elements support layer blend modes that change the way layers react with each other. You often use some of the common modes in every day work. For example, if your image is too dark, you can quickly make it brighter by duplicating the photo layer in the layers palette. Later, you change the duplicate layer mode to Screen. Use the Opacity filter to select blending modes for various layers of your video. Premiere Elements supports 27 blending modes. Select a blending mode from the list and apply it to your image. Use the sliders to increase or decrease its effect.
Simulation
Controls the frame‑by‑frame generation of the lightning. Selecting the Rerun At Each Frame option regenerates the lightning at each frame. To make the lightning behave the same way at the same frame every time you run it, do not select this control. Selecting this control may increase rendering time.
Ramp
The Ramp effect creates a color gradient, blending it with the original clip contents. Create linear or radial ramps and vary the position and colors of the ramp over time. Use the Start and End Of Ramp properties to specify the start and end positions. Use the Ramp Scatter control to disperse the ramp colors and eliminate banding.
Note
Traditionally, ramps do not broadcast well. Serious banding occurs because the broadcast chrominance signal does not contain sufficient resolution to reproduce the ramp smoothly. The Ramp Scatter control disperses the ramp colors, eliminating the banding apparent to the human eye.
Video Stabilizer
Stabilizer
The Stabilizer effect removes unwanted camera shaking by analyzing the video image and tracking objects in the picture. If the entire picture moves suddenly, the effect compensates for the move by shifting the image in the opposite direction, thus smoothing out the camera jitter. You can specify the amount of smoothing. When the effect moves the image, it leaves empty video on one side. Use Background-Use Original, Zoom, or both to specify how the space is filled.
Smoothing
Specifies the degree of stabilization. When turned all the way down, the effect removes only the smallest jitter and vibration. When turned all the way up, it keeps the camera movement stable over a long period of time. If there is intention camera movement (for example, panning across a scene), setting a high value for smoothing can cause the effect to remove that movement. Consequently, it is important to set Smoothing appropriately for each scene.
Background-Use Original
Fills in the blank edges with the original video image. This option works well for small movements.
Zoom
Enlarges the picture to fill in the blank edges. The more stabilization that is required (the more shaky the original image is), the more you will want to zoom in to compensate.
Correction-Limit To Zoom
Forces the stabilization to stray no further than the edges of the enlarged (zoomed) image. This option disables the stabilization when it hits the edge because it doesn’t allow for the full motion compensation. Use this option if you want to ensure that the edges never appear.
Note
Video Stabilizer is applicable for Premiere Elements 2024 and previous versions.
To know how to smoothen your videos by removing shakes and jitters, please see Shake Reduction.
Stylize
Alpha Glow
The Alpha Glow effect adds color around the edges of a masked alpha channel. You can specify that a single color either fades out or changes to a second color as it moves away from the edge.
Glow
Controls how far the color extends from the alpha channel edge. Higher settings produce larger glows (and can cause very slow processing before playback or export).
Brightness
Controls the initial opacity of the glow.
Start Color
Shows the current glow color. Click the swatch to choose another color.
End Color
Lets you add an optional color at the outer edge of the glow.
Fade Out
Specifies whether the colors fade out or stay solid.
Color Emboss
Applicable for 2022 and earlier versions.
The Color Emboss effect sharpens the edges of objects in the clip but doesn’t suppress any of the clip’s original colors.
Direction
Specifies the apparent direction in which the highlight source is shining, in degrees. A setting of 45° causes the shadow to be cast in the northeast direction.
Relief
Specifies the apparent height of the embossing, in pixels. The Relief setting actually controls the maximum width of highlighted edges.
Contrast
Specifies the sharpness of the clip content’s edges. At lower settings, only distinct edges show the effect. As you increase the setting, the highlight becomes more extreme.
Blend With Original
Adds a percentage of the original source clip to the final result.
Emboss
Applicable for 2022 and earlier versions.
The Emboss effect sharpens the edges of objects in the clip and suppresses colors. The effect also highlights the edges from a specified angle.
Direction
Specifies the apparent direction in which the highlight source is shining, in degrees. A setting of 45° causes the shadow to be cast in the northeast direction.
Relief
Specifies the apparent height of the embossing, in pixels. The Relief setting actually controls the maximum width of highlighted edges.
Contrast
Specifies the sharpness of the clip content’s edges. At lower settings, only distinct edges show the effect. As you increase the setting, the highlight becomes more extreme.
Blend with Original
Adds a percentage of the original source clip to the final result.
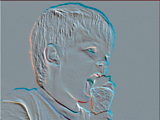
Find Edges
The Find Edges effect identifies the areas of the clip that have significant transitions and emphasizes the edges. Edges can appear as dark lines against a white background or colored lines against a black background. When the Find Edges effect is applied, clips often look like sketches or photographic negatives of the original.
Invert
Inverts the clip after the edges are found. When Invert is not selected, edges appear as dark lines on a white background. When Invert is selected, edges appear as bright lines on a black background.
Blend With Original
Adds a percentage of the original source clip to the final result.
Mosaic
The Mosaic effect fills a layer with solid color rectangles. It is useful for creating a highly pixelated clip.
Horizontal/Vertical Blocks
Specifies the number of mosaic divisions in each direction.
Sharp Colors
Gives each tile the color of the pixel in its center in the unaffected clip. Otherwise, the tiles are given the average color of the corresponding region in the unaffected clip.
Noise
The Noise effect randomly changes pixel values throughout the clip.
Amount Of Noise
Specifies the amount of noise, and therefore the amount of distortion, through random displacement of the pixels. The range is 0% (no effect) to 100% (the clip may not be recognizable).
Noise Type
Randomly changes the red, green, and blue values of the clip’s pixels individually when Use Color Noise is selected. Otherwise, the same value is added to all channels.
Clipping
Determines whether the noise causes pixel colors to wrap around. When the color value of a pixel gets as large as it can be, clipping makes it stay at that value. With unclipped noise, the color value wraps around or starts again at low values. When Clipping is selected, even 100% noise leaves a recognizable clip. If you want a completely randomized clip, turn off Clipping and turn on Color Noise.
Replicate
The Replicate effect divides the screen into tiles and displays the whole clip in each tile. Set the number of tiles per column and row by dragging the slider.
Solarize
The Solarize effect creates a blend between a negative and positive clip, causing the clip to appear to have a halo. This effect is analogous to briefly exposing a print to light during developing.
Strobe Light
The Strobe Light effect performs an arithmetic operation on a clip at periodic or random intervals. For example, every five seconds a clip could appear completely white for one‑tenth of a second, or a clip’s colors could invert at random intervals.
Strobe Color
Specifies the color of the strobe light. Click the white box to choose a color from the Color Picker, or use the eyedropper to select a color from the clip.
Blend With Original
Specifies the intensity, or brightness, of the effect. A value of 0 causes the effect to appear at full intensity; higher values diminish the intensity of the effect.
Strobe Duration
Specifies in seconds how long a strobe effect lasts.
Strobe Period
Specifies in seconds the duration between the start of subsequent strobes. For example, if the Strobe Duration is set to 0.1 second and the Strobe Period is set to 1.0 second, the clip has the effect for 0.1 second and then is without the effect for 0.9 second. If this value is set lower than the Strobe Duration, the strobe effect is constant.
Random Strobe Probability
Specifies the probability that any given frame of the clip will have the strobe effect, giving the appearance of a random effect.
Strobe
Specifies how the effect is applied. Operates On Color Only performs the strobe operation on all color channels. Make Layer Transparent makes the clip transparent when a strobe effect occurs.
Strobe Operator
Specifies the arithmetic operator to use when Operates On Color Only is selected from the Strobe menu. The default setting is Copy.
Random Seed
Randomizes the way lightning effect works.
Texturize
Applicable for 2022 and earlier versions.
The Texturize effect gives a clip the appearance of having the texture of another clip. For example, you could make the clip of a tree appear as if it had the texture of bricks, and control the depth of the texture and the apparent light source.
Texture Layer
Select the source of the texture to be used from the list of video tracks in the pop-up menu. To see the texture without seeing the actual clip used for the texture, set the opacity for the texture clip to zero. To disable texture, select None.
Light Direction
Changes the direction of the light source, thus changing where shadows lie and how deep they appear.
Texture Contrast
Specifies the intensity of the texture’s appearance. Lower settings decrease the amount of visible texture.
Texture Placement
Specifies how the effect is applied. Tile Texture applies the texture repeatedly over the clip. Center Texture positions the texture in the middle of the clip. Stretch Texture To Fit stretches the texture to the dimensions of the selected clip.
Time
Echo
The Echo effect combines a frame with previous frames from the same clip. It has a variety of uses, from a simple visual echo to streaking and smearing effects. This effect is visible only when there is motion in the clip. By default, any previously applied effects are ignored when you apply the Echo effect.

A. Original clip B. Clip with low echo values C. Clip with increased number of echoes
Echo Time
Specifies the time, in seconds, between echoes. Negative values create echoes from previous frames; positive values create echoes from upcoming frames.
Number Of Echoes
Specifies the number of frames to combine for the Echo effect. For example, if two echoes are specified, Echo will make a new clip out of [current time], [current time + Echo Time], and [current time + 2 x Echo Time].
Starting Intensity
Specifies the intensity, or brightness, of the starting frame in the echo sequence. For example, if this is set to 1, the first frame is combined at its full intensity. If this is set to 0.5, the first frame is combined at half intensity.
Decay
Specifies the ratio of intensities of subsequent echoes. For example, if the decay is set to 0.5, the first echo will be half as bright as the Starting Intensity. The second echo will then be half that, or 0.25 times the Starting Intensity.
Echo Operator
Specifies the operations to be performed between echoes. Add combines the echoes by adding their pixel values. If the starting intensity is too high, this mode can quickly overload and produce streaks of white. Set Starting Intensity to 1.0 per number of echoes and Decay to 1.0 to blend the echoes equally. Maximum combines the echoes by taking the maximum pixel value from all the echoes. Minimum combines the echoes by taking the minimum pixel value from all the echoes. Screen emulates combining the echoes by sandwiching them optically. This is similar to Add, but it will not overload as quickly. Composite In Back uses the echoes’ alpha channels to composite them back to front. Composite In Front uses the echoes’ alpha channels to composite them front to back. Blend combines the echo values by averaging their values.
Posterize Time
The Posterize Time effect changes the frame rate of a clip to one you choose. You can use it to slow a 30-fps clip to 24 fps, for example, to give it the look of film, slow it to 18 fps to simulate the jerkiness of old home movies, or slow it even further to give it a strobe effect.
Transform
Camera View (Windows only)
The Camera View effect distorts a clip by simulating a camera viewing the subject from different angles. By controlling the location of the camera, you distort the shape of the image.
Latitude
Moves the camera vertically. The effect makes the clip appear to be flipping vertically.
Longitude
Moves the camera horizontally. The effect makes the clip appear to be flipping horizontally.
Roll
Rolls the camera, thus appearing to rotate the clip.
Focal Length
Changes the focal length of the camera lens. Shorter lengths provide wider views, whereas longer focal lengths provide narrower but closer views.
Distance
Sets the distance between the camera and the center of the clip.
Zoom
Enlarges or reduces the view of the clip.
Fill Color
Specifies the background color.
Fill Alpha Channel
When checked, makes the background transparent (useful if the clip with the effect is superimposed). To access this option from the Applied Effects panel, click the Setup button to the right of the effect name.
Clip (Windows only)
The Clip effect trims rows of pixels off the edges of a clip and replaces the trimmed areas with a specified background color. If you want Adobe Premiere Elements to automatically resize the trimmed clip to its original dimensions, use the Crop effect instead of the Clip effect
Left, Top, Right, Bottom
Crops each edge of the clip separately.
Fill Color
Specifies the color that replaces the trimmed areas. The default color is black.
Units
Sets the units specified by the sliders, either in pixels or the percentage of the frames. Click the Setup button at the right of the effect name to set units.
Crop
The Crop effect trims rows of pixels from the edges of a clip and, if you select the Zoom option, automatically resizes the trimmed clip to its original dimensions. Use the slider controls to crop each edge of the clip separately. You can crop by pixels or clip percentage.
Edge Feather
The Edge Feather effect adds a darkened, soft‑focused bevel to the edges of a clip. To adjust the width of the feather, drag the Amount slider left or right.
Horizontal Flip
The Horizontal Flip effect reverses each frame in a clip from left to right; however, the clip still plays in a forward direction.
Horizontal Hold (Windows only)
The Horizontal Hold effect skews the frames to the left or to the right; the effect is similar to the horizontal hold setting on a TV. Drag the slider to control the clip’s slant.
Roll
The Roll effect rolls a clip to the left or to the right, or up or down, as if the clip were on a cylinder.
Vertical Flip
The Vertical Flip effect flips a clip upside down. You cannot apply keyframes to this effect.
Vertical Hold (Windows only)
The Vertical Hold effect scrolls the clip upward; the effect is similar to adjusting the vertical hold on a TV. You cannot apply keyframes to this effect.
Videomerge

The Videomerge effect automatically determines the background of the selected clip and makes it transparent. Video or image clips on the tracks below it become visible through the transparent areas. If you want a different color to be transparent, select the Select Color option, and choose a different color in the clip.
For best results, when shooting video that will use transparency, do the following:
Create a strong (preferably dark or saturated) solid, uniform color background to shoot against.
Make sure that the background is brightly and uniformly lit to avoid shadows.
Avoid skintones and colors that are similar to the subject’s clothing or hair color. (Otherwise, the skin, clothes, or hair will become transparent too.)
Videomerge
Premiere Elements 2025 allows the automatic application of Videomerge, which is ideal for some situations.
When you place a video with a solid background on top of another video on the timeline, Premiere Elements might pop up a dialog called "Video Merge." This dialog gives you options for how the two clips will be combined.

Videomerge options
Select Color
Click if you want to specify a different color as transparent.
Color
Click the color box to choose a new color from the Color Picker, or click the eyedropper, and then click a color in the clip. To use this option, first select Select Color.
Presets
Choose from Soft, Normal, or Detailed to specify the softness of the edges created by the transparency.
Tolerance
Specifies the color range that determines transparent areas in the clip. Dragging the slider to the right increases the color range so that more similar colors become transparent.
Audio effects
Balance
The Balance effect lets you control the relative volumes of the left and right channels. Positive values increase the proportion of the right channel. Negative values increase the proportion of the left channel. You can use this to compensate, for example, when the sounds coming from one channel overpower those from the other.
Bass
The Bass effect lets you increase or decrease lower frequencies (200 Hz and below). Boost specifies the number of decibels by which to increase the lower frequencies.
AudioGain
Audio gain helps in normalizing audio, by either raising or lowering it to match other audio sources.
Channel Volume
The Channel Volume effect lets you independently control the volume of each channel in a stereo clip or track. Unlike the Balance effect, Channel volume doesn’t automatically reduce the volume of one channel when you raise that of the other. You might use this, for example, to raise the volume of a voice in the left channel without diminishing the volume of a voice in the right. Each channel’s level is measured in decibels.
Delay
The Delay effect adds an echo of the audio clip’s sound that plays after a specified amount of time.
Delay
Specifies the amount of time before the echo plays. The maximum is 2 seconds.
Feedback
Specifies a percentage of the delayed signal to be added back into the delay to create multiple decaying echoes.
Mix
Controls the amount of echo.
Fill Left, Fill Right
The Fill Left effect duplicates the left channel information of the audio clip and places it in the right channel, discarding the original clip’s right channel information. The Fill Right effect duplicates the right channel information and places it in the left channel, discarding the existing left channel information. For example, you might use this effect on footage shot with a monaural microphone plugged into only one channel of a camcorder, extending the voice of a speaker from one channel to both.
Highpass, Lowpass
The Highpass effect removes frequencies below the specified Cutoff frequency. Use it to reduce low-pitched noises and rumbles.
The Lowpass effect eliminates frequencies above the specified Cutoff frequency. Use it to eliminate high-pitched noises, squeals, and whistles.
Invert
The Invert effect inverts the phase of all channels. Use it, for example, to bring the sound of one shot of an event into phase with another shot of the same event taken from another camcorder.
NewBlue Audio Polish
Applicable for 2022 and earlier versions.
Audio Polish that cleans and enhances audio. It includes features for noise reduction, compression, brightening the high end and even adding reverberation.
Noise Reduction
Sets the amount of noise reduction to apply to the audio. Rotate the knob to the right to decrease background noise.
Compression
Boosts lower-level signals, flattening the sound to be more consistent. Compression is especially useful for dialog because it brings voices up to a constant level. Rotate the knob to the right to increase compression.
Brightness
Adds a little high end to the signal. Rotate the knob to the right to “brighten” the sound. Brightening help polish muddy recordings.
Ambience
Adds a little reverberation to the mix. Rotate the knob to the right to increase the amount of reverberation.
NewBlue Auto Mute
Applicable for 2022 and earlier versions.
Auto Mute reduces background noise by turning off all sound when the signal goes below a specified threshold.
Minimum Level
Sets the minimum acceptable signal level. Auto Mute only allows sounds above the minimum level to play. Auto Mute erases the sound whenever it dips below the minimum level. Turn the knob to the far left and almost every sound level makes it through. Turn it to the right and sensitivity increases to the point that only the loudest sounds make it through.
Decay
Controls the speed at which a sound is removed after its level drops below the minimum threshold. Most sounds have a natural decay to them. A quick cut immediately after the decay drops below the minimum Level sounds unnatural. On the other hand, the longer the decay, the more background noise can be heard. Turn the Decay knob to the left for a quick fadeout. Turn the knob to the right for a longer decay.
NewBlue Cleaner
Applicable for 2022 and earlier versions.
Removes many undesirable sounds from the mix. The effect includes noise-reduction circuitry and tone elimination, useful for removing isolated tones such as hum.
Noise Reduction
Sets the amount of noise reduction to apply to the audio. Turn the knob to the right to decrease background noise.
Hum Frequency
Sets the cut frequency for the tone eliminator. If you know the frequency (such as 60-Hz electric hum), select it. If you don't know the frequency, perform the following steps:
Turn the Hum Cut slider to the far left so that it magnifies the tone.
Turn Hum Frequency control to find the spot where the tone that you want to remove is at its loudest.
After you have isolated the frequency, turn the Hum Cut control to the right to set the depth of the tone elimination.
Most tones are not pure; they have overtones, or harmonics. Turn the Hum Harmonics slider to the right to add tone removal of higher harmonics. Don't overdo it because the increased filtering can also cut desired sounds.
NewBlue Hum Remover
Applicable for 2022 and earlier versions.
Hum Remover scrubs hum from your soundtrack. Electric power is usually the most common reason for hum. Reasons range from a microphone cable that runs too close to a power cord to the humming sound of an electronically dimmed light. Power hum is easy to isolate because it is always the same frequency: In North America, the power frequency is 60-Hz. In other countries, power hum is 50-Hz.Hum Remover applies a notch filter specifically to the frequency of the hum. Sometimes, that's not enough. The hum signal often distorts, which adds additional tones. Hum Remover calculates the frequencies of these additional tones and removes them as well.
Pitch
Sets the frequency that must be removed. Typically, the frequency is 60-Hz or 50-Hz. However, you can turn the knob to select any frequency within the range of 40-Hz to 75-Hz. The two most useful frequencies, 50-Hz and 60-Hz, are provided as presets.
Strength
Determines the strength of the hum filter. Start with the knob at the left and turn to the right until the hum goes away. Ensure that you have set the Pitch and Hum Distortion sliders correctly. If the Pitch and Hum Distortion sliders have not been set appropriately, Hum Remover removes the wrong part of the signal.
Hum Distortion
Provides information to the Hum Remover about the level of distortion of the hum tone. A distorted hum has higher frequency overtones that must also be eliminated. Turn the knob to the right to remove more of these overtones (also known as "harmonics"). The number of overtones removed depends on the level of distortion.
NewBlue Noise Fader
Applicable for 2022 and earlier versions.
Reduces background noise by progressively reducing the volume of quieter sounds.
Threshold
Sets the signal level for attenuation. Noise Fader leaves any sound louder than the threshold unchanged, while fading down sounds below the threshold. Turn the knob to the left to set the threshold low. Turn the knob to the far right to fade all but the loudest sounds.
Fade
Determines how to fade out sounds below the threshold level. Turn the knob to the left for minimum fading. Turn the knob all the way to the right to completely mute all sounds below the threshold. The correct level is somewhere in the middle.
NewBlue Noise Reducer
Applicable for 2022 and earlier versions.
Removes background noise. Use the effect to clean videos shot under less-than-ideal audio conditions.
Strength
Sets the intensity of the noise reduction. Turn all the way to the left for no reduction at all. Turn to the middle to significantly drop background noise while keeping the louder sounds prominently in the foreground. Turn further to the right and more of the signal fades out.
Notch
The Notch effect removes frequencies that are near the specified center. The Center control specifies the frequency to be removed. If you are removing power‑line hum, type a value that matches the power‑line frequency used by the electrical system where the clip was recorded. For example, in North America and Japan, type 60 Hz, and in most other countries, type 50 Hz.
Swap Channels
The Swap Channels effect switches the placement of the left and right channel information.
Treble
The Treble effects lets you increase or decrease higher frequencies (4000 Hz and above). The Boost control specifies the amount, measured in decibels, to increase or decrease. Use this to compensate, for example, when low instruments overpower high instruments in a soundtrack.
Volume
Use the Volume effect in place of the Fixed Volume effect if you want to render Volume before other Standard effects. The Volume effect creates an envelope for a clip so that you can increase the audio level without clipping. Clipping occurs when the signal exceeds the dynamic range that’s acceptable for your hardware, often resulting in distorted audio. Positive values indicate an increase in volume; negative values indicate a decrease in volume. The Volume effect is available for clips only.
Note
You can make most volume changes by using the fixed Volume effect. You can apply this additional Volume effect if other effects (such as Reverb or Bass) overly increase or decrease clip volume. You can also fade the volume of one clip out while fading the volume of the next up by dragging one of the Crossfade audio transitions from the Effects view of the Task panel to the cut point between the clips.
More like this
- Invert or hide alpha channels
- Superimposing and transparency
- Superimposing and transparency
- Hide unwanted objects with a garbage matte
- Superimposing and transparency
- Superimposing and transparency
- Create transparency with the Track Matte Key effect
- Create transparency with Videomerge
- Superimposing and transparency