Paragraph
- Captivate User Guide
- Get to know Captivate
- Adobe Captivate releases
- Adobe Captivate 13
- Adobe Captivate 12
- Project setup
- Import from PowerPoint
- Generative AI in Adobe Captivate
- Generative AI overview
- Generative AI FAQs
- Generative credits
- Generate text
- Generate images
- Generate avatar
- Generate transcripts
- Add and edit text
- Add and edit images
- Add and edit media
- Interactive components
- Create quizzes
- Add widgets
- Interactions and animations
- Enhance your e-learning project
- Simulation projects
- Timeline and TOC
- Review and collaborate
- Preview and publish
- Accessibility
- Design options in Adobe Captivate
- Additional resources
Learn how to add text to your Adobe Captivate project.
Adobe Captivate introduces content blocks, such as text or an image block, which contain components like text, image, or button. Play this video to learn more about content blocks and components.
The all-new Adobe Captivate makes inserting a text content block and formatting text simple. You can edit text, format text using the pre-defined styles, or create font style as required to enrich your eLearning project design.
Text content blocks
Once you add a text content block, you can customize the properties at two levels – at the content block level and the text level. In the following sections, let’s understand the various properties available at these levels.
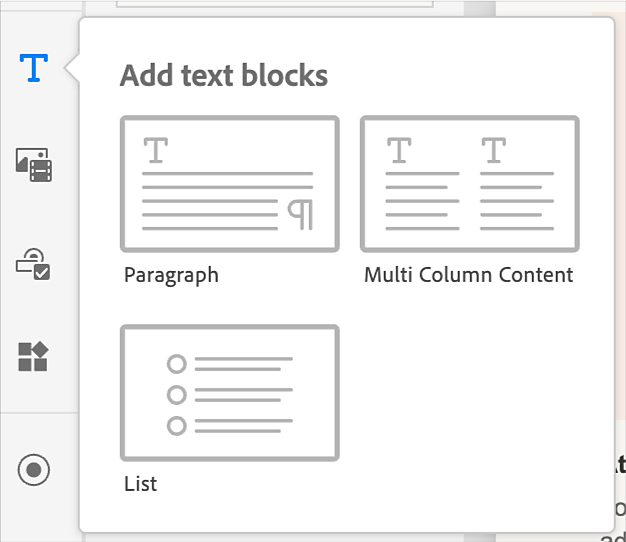
There are three types of text content blocks available in Captivate:
- Paragraph
- Multi Column Content
- List
Add text content block
In the left toolbar, select Add text blocks > Paragraph, Multi Column Content, or List.


Based on the type of text block you've selected, Adobe Captivate creates the following placeholder text blocks:
|
|
A paragraph content block contains text as a paragraph. |


|
|
Multi-column content |
A multi-column content block contains text in two columns. |


|
|
List content |
A list content block contains text as list. |


|
Change the properties of the text content block
Adobe Captivate allows you to change the properties at the block and text levels. At the block level, you can change the overall design of the component, add or remove elements from the component like title, subtitle, and more, and change the overall appearance of the content block by adding color, border, and shadow effects on the content block.
-
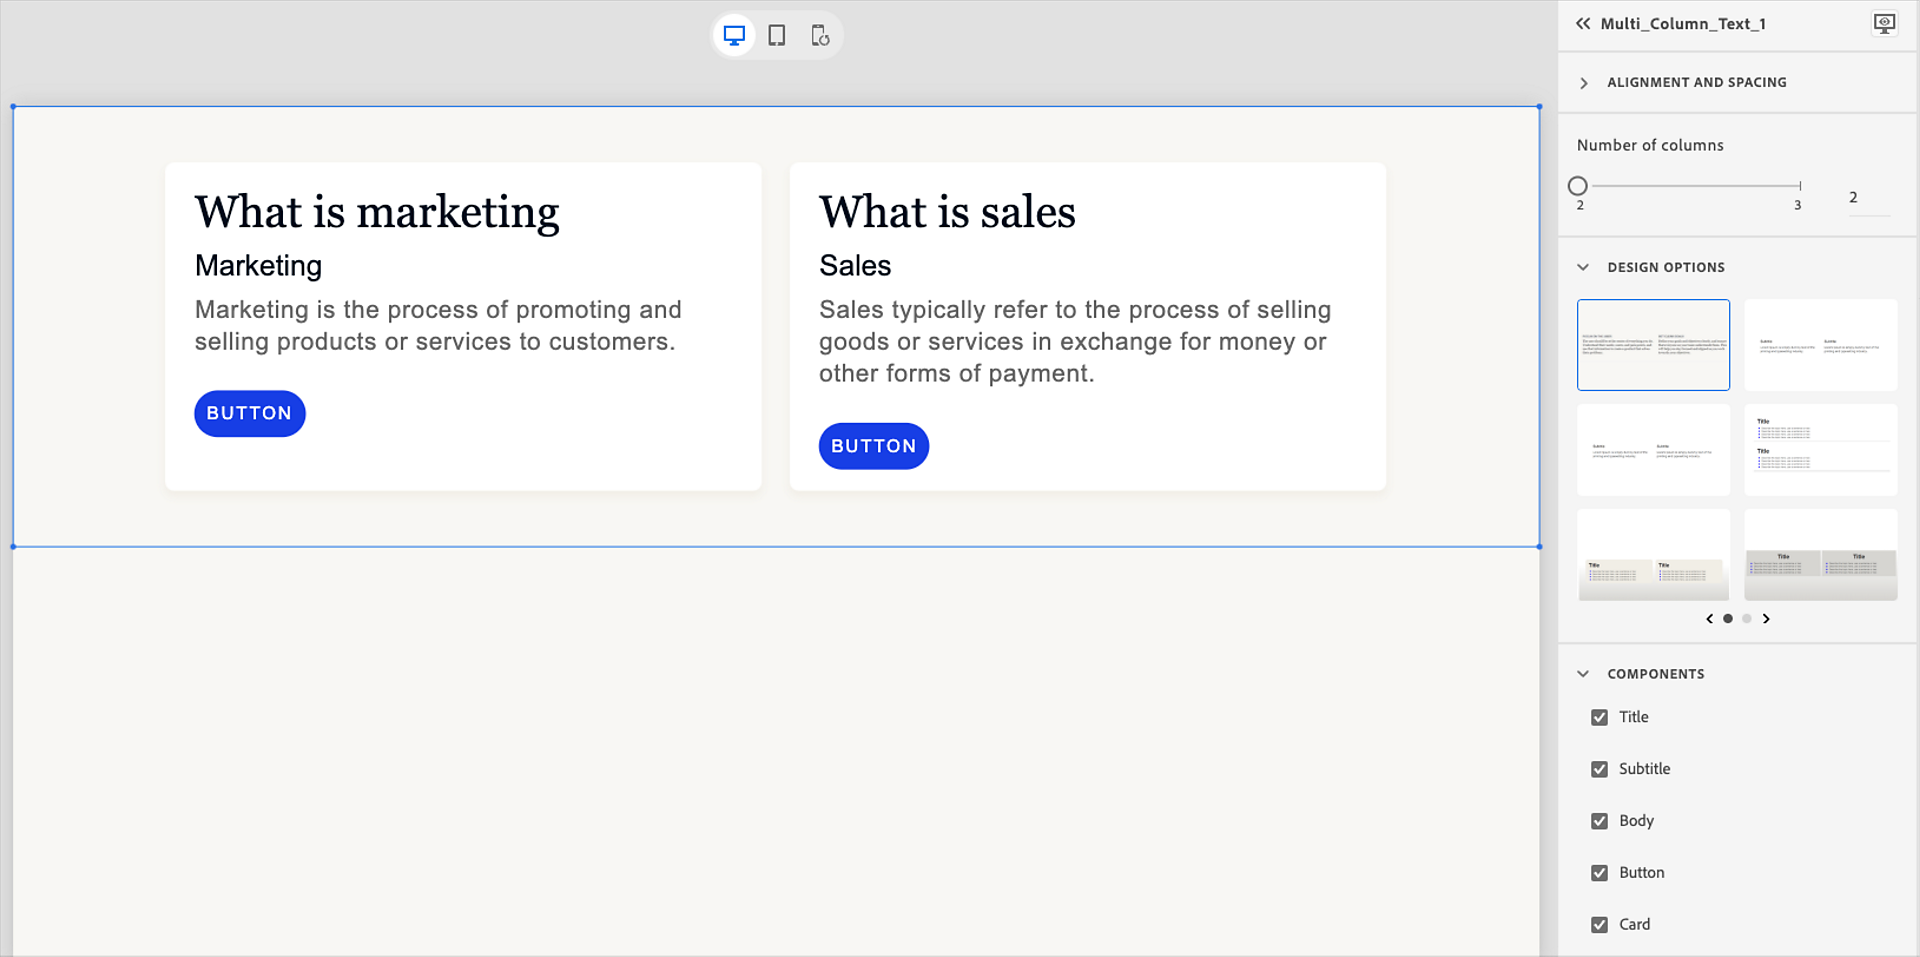
Select the content block (for example, multi-column) on the slide.
Select the multi column content block Select the multi column content block -
In a multi-column layout, you can have a minimum of two and a maximum of three columns. To change the number of columns, use the Number of Columns slider in the Visual Properties panel.
-
Select any design option. A design option presents pre-configured layouts with cleaner design elements to apply to the text content block.
For more information, view Design options in Adobe Captivate.
-
In the Components section, you can change the following:
- Title: Add or remove the title text.
- Subtitle: Add or remove the subtitle.
- Body: Add or remove the body of the text.
- Button: Add or remove the buttons.
- Card: Add or remove a card around the text.
Conponents of a text block Conponents of a text block -
Change the alignment of the title, subtitle, body, or button. To change the alignment (left, center, or right), hover on top of the title, and select the required alignment.
-
In the Appearance section, you can add a background color, linear gradient, radial gradient, or image to the text content block. Also, you can add a border or a shadow.
-
If you've enabled Card, you can change the card's properties of the content block, such as padding, border radius, background color, border, or shadow.
Format text in the content block
Adobe Captivate allows you to change the properties at the text level. At the text level, you can apply a preset, change the font, change the text color, apply bullets and numbering, and many more.
-
Select any text object inside the text content block. The Visual Properties panel displays all the properties you can apply to the text.
Text formatting options Text formatting options -
In the Visual Properties panel, move the opacity slider to increase or decrease the opacity of the selected text.
-
In the Appearance section, apply a preset. A preset is a preconfigured setting or template that allows you to apply a predefined set of styles to the selected text.
Override a preset
If you change the preset, for example, change the font, size, make the font bold or italic, or others, you can then update the preset. Select the Update Preset icon on the preset, and the preset inherits the new properties.
See the section Create a text preset for information on creating a preset.
-
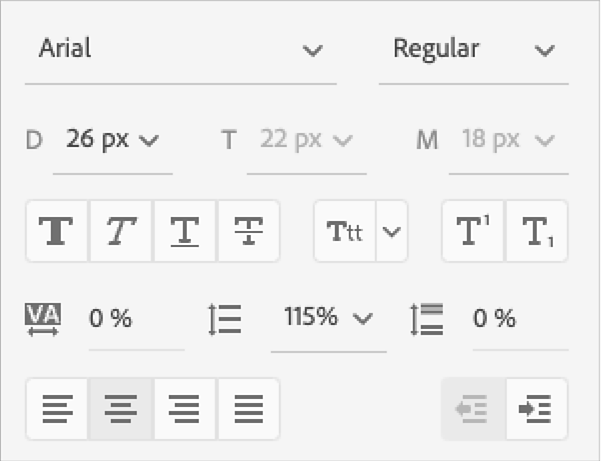
Change the font family, size, and style. Adjust the spacing in the text, paragraph, or line. You can also align the text and increase or decrease the indentation.
If you want the text to appear differently on devices, you can also change the font sizes for desktop, mobile, and tablet.
Edit fonts and adjust spacing Edit fonts and adjust spacing NoteIf you open any project on another machine that doesn't contain the font you've used, the font falls back to Arial (regular).
-
Change the casing of the text. Select Sentence, Title, Upper, or Lower cases from the dropdown.
-
Add color to the text. From the color picker, select any color. You can also add an outline to the text, apply highlights, or add shadow.
-
Select Bullets and numbering to convert the selected text into a bulleted format. There are several bullets and numbered list designs that you can choose from.
-
If you want to insert a link to the text, select the text to which you want to add a link, then expand the Link section, and then add a link to a web page, email address, or add hyperlinks to open or download files. Select Open in new window to open the link in a new browser window.
Add links to texts Add links to texts
-
Select any text object inside the text content block. The Visual Properties panel displays all the properties that you can apply to the text.
-
In the Presets panel, select a text preset, for example, Body 2.
-
Change the properties of the selected text, such as font family, size, color, or spacing.
-
Click the + icon in the Presets panel to create the preset.
A new preset is created with the properties you've applied to the text block.


Rename text presets
Rename text presets to align with organizational branding, typography standards, and compliance requirements. This allows users to replace generic names, such as "Heading 1," with custom labels like "Course Title", ensuring clarity and consistency. Renamed presets are grouped for easy access and can be exported with themes, enabling seamless application across projects. By adopting unique naming conventions, users can streamline workflows, reduce guesswork, and ensure adherence to branding guidelines.
Rename a preset
-
Select Project properties from the right toolbar.
-
Select Edit Theme.
-
Select Font Palette and rename a text preset by double-clicking on it
After you rename a preset or multiple presets in the theme editor, the renamed preset or presets appear at the top of the list alphabetically, separated by a divider. This ensures all renamed presets are grouped together, making it easier for you to locate a renamed preset.
-
Select Apply to save the renamed preset. It will appear at the top of the Presets panel. To use it, select any text and then choose the renamed preset from the panel.
Export a theme with renamed presets
Text presets are stored within the project theme. To share these customized presets with peers or collaborators, you need to save and export the entire theme. Learn more about themes in Adobe Captivate.
-
Make sure your current theme is saved and includes the renamed text presets.
-
Select Project properties from the right menu and then select Edit Theme.
-
Select Export.
-
Add a name and save the theme (.cpth) file
Import a theme with renamed presets
Import a theme that includes renamed, customized presets. Once the theme is imported and applied, the renamed presets are added to your existing presets. These renamed presets will then appear in the Presets panel.
-
Open a project and select Edit Theme from Project properties.
-
In the theme editor and select Import and select the .cpth file that contains custom text presets.
-
Select Apply. Confirm that the preset panel correctly displays the renamed preset names first.


